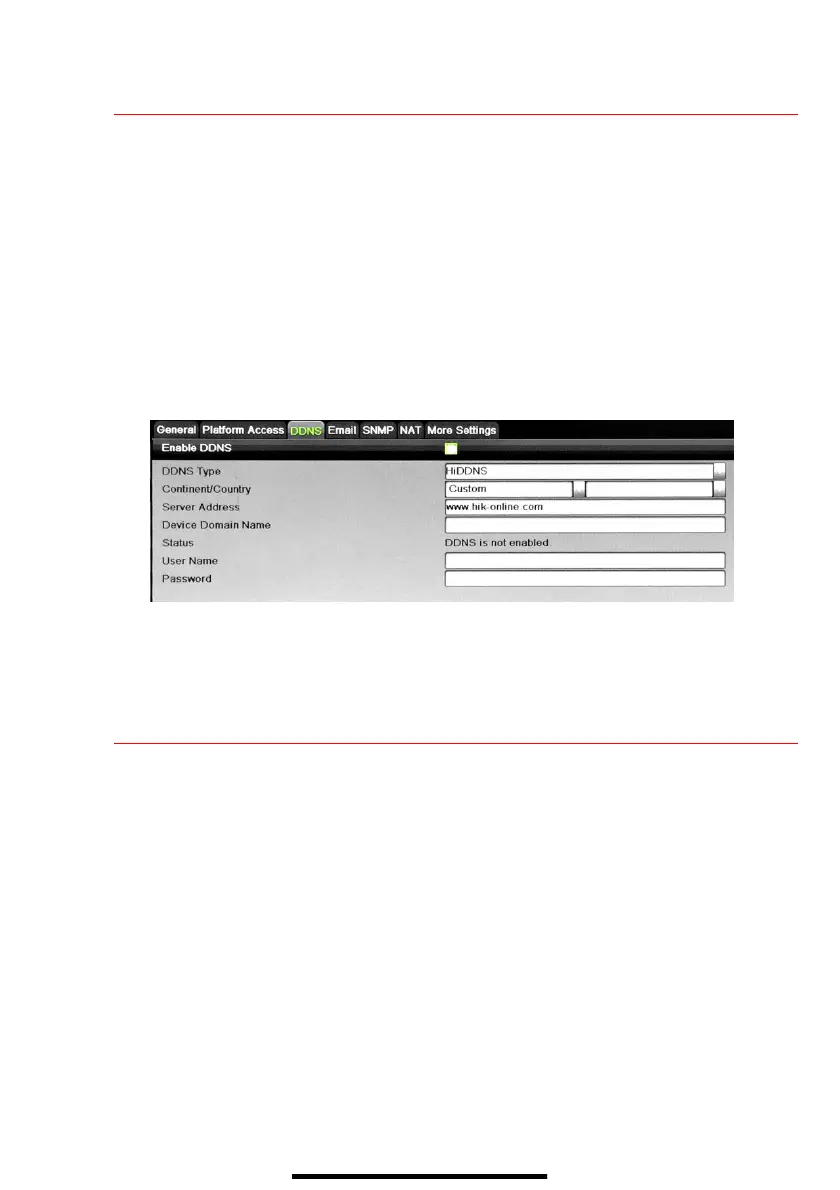
9 S E T U P D D N S ( D y n a m i c D o m a i n N a m e S y s t e m )
DDNS allows users with dynamic (changing) IP address to remotely access their unit.
1. Click on the DDNS tab.
2. Check the DDNS checkbox.
3. DDNS Type: HiDDNS (default)
4. Continent/Country: Auto Detection (default)
5. Server Address: www.hik-online.com (U.S. default)
6. Create a Device Domain Name (cannot begin with a number, contain spaces, special characters, or
upper case letters).
7. Create a User Name.
8. Password: System uses device serial number; cannot be changed.
9. After the changes have been made, press Apply to display the Succeeded message. (If the Domain
Name does not meet acceptable criteria, or is already registered, an error message will appear.)
10 A D D I P C A M E R A S
1. Right click a window in Live View mode to display the menu.
2. Click Menu to display Menu choices.
3. Click Cameras Setup to display the Add Cameras window.
4. Add camera(s) as follows:
• Hikvision Camera Connected to Unit’s PoE Port — Will automatically be added to an NVR
camera channel (D
x
) and will be visible on the camera list in white within two minutes.
• Hikvision Camera Connected to the Network but Not Unit’s PoE Ports — Will automatically be
detected and displayed at bottom of the camera list in yellow. Must be added to an NVR camera
channel manually:
1) Click an unused camera channel’s D
x
checkbox.
2) Click the EDIT (Pencil) button to display the Edit IP Camera window.
3) Use pull-down menu to change Adding Method from “Plug and Play” to “Manual.”
4) Enter the camera’s IP address and other information as required.
5) Press the OK button to add the camera.

 Loading...