EasyManua.ls Logo

HIKVISION HiLook IPC-T250H - User Manual

HIKVISION HiLook IPC-T250H
28 pages
Print Icon
To Next Page IconTo Next Page
Loading...
0
Quick Start Guide
Network Turret Camera
Question and Answer IconNeed help?

Do you have a question about the HIKVISION HiLook IPC-T250H and is the answer not in the manual?

Summary

Regulatory Information

FCC Information

Details FCC compliance, limits, and conditions for radio frequency emissions.

EU Conformity Statement

Covers CE marking and European directives regarding EMC and RoHS compliance.

Industry Canada ICES-003 Compliance

States compliance with Canadian standards for digital devices.

Safety Instruction

Warnings

Highlights potential for serious injury or death if warnings are neglected.

Cautions

Highlights potential for injury or equipment damage if cautions are neglected.

Appearance Description

Type I Overview

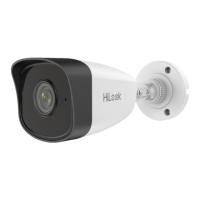
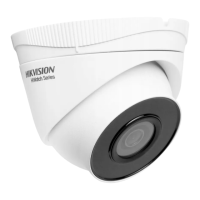
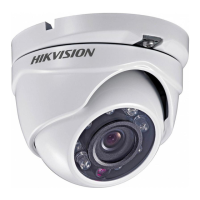
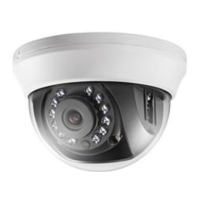
Details the components of the Type I turret camera.

Type II Overview

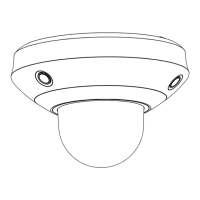
Details the components of the Type II turret camera.

Type III Overview

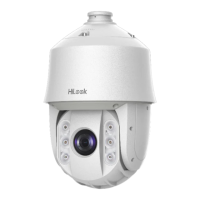
Details the components of the Type III turret camera.

Type IV Overview

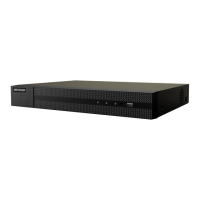
Details the components of the Type IV turret camera.

Installation

Memory Card Installation

Steps for installing and removing a memory card in compatible cameras.

Ceiling Mounting

Detailed steps for mounting the camera to a ceiling.

Mounting with Junction Box

Instructions for mounting the camera using a junction box.

Mounting with Inclined Base

Steps for mounting the camera using an inclined base.

Wall Mounting

Instructions for mounting the camera directly to a wall.

Install Network Cable Waterproof Jacket

Guide to installing a waterproof jacket for outdoor network cable connections.

Activate and Access Network Camera

Overview

This document is a Quick Start Guide for a Network Turret Camera, providing essential information for its installation, activation, and access. The guide outlines various aspects of the camera, from its physical appearance and components to safety instructions, regulatory compliance, and different mounting options.

The primary function of this device is to provide network-based surveillance, capturing images and transmitting them over an Ethernet connection. It is designed for both indoor and outdoor use, with specific instructions for waterproofing the network cable when installed outdoors. The camera supports Power over Ethernet (PoE), which simplifies installation by allowing both power and data to be transmitted over a single Ethernet cable, provided a PoE-enabled switch is used.

Usage features of the Network Turret Camera are detailed through its installation and adjustment processes. The camera comes in different types (Type I, Type II, Type III, Type IV), each with a slightly varied appearance but sharing core functionalities. Key components include an enclosure, camera body, lens (for Type II, III, and IV), mounting base, power cord, and network cable. Some models (Type III and IV) also feature a memory card slot cover, indicating support for local storage.

Installation is a significant aspect of the camera's usage. The guide covers multiple mounting scenarios:

  • Ceiling Mounting: This is presented as a primary example, with steps for using a drill template to mark screw and cable holes, disassembling the camera to access the mounting base, fixing the base to the ceiling, routing cables, and reassembling the camera body.
  • Mounting with Junction Box: This option requires a separately purchased junction box. The process involves fixing the camera's mounting base to the junction box cover, securing the junction box body to the wall, and then combining the cover with the body. This method is suitable for both wall and ceiling installations.
  • Mounting with Inclined Base: Similar to the junction box, an inclined base needs to be purchased separately. The steps involve using a drill template, disassembling the inclined base, installing the camera's mounting base on the inclined base cover, and then securing the inclined base body to the ceiling or wall.
  • Wall Mounting: This requires a separately purchased wall mounting bracket. The process involves drilling screw holes, installing the bracket on the wall using expansion screws, and then attaching the camera's mounting base to the bracket.

After physical installation, the guide emphasizes adjusting the viewing angle to ensure optimal image capture. The camera allows for adjustments in pan (0° to 360°), tilt (0° to 75°), and rotation (0° to 360°), providing flexibility in surveillance coverage.

Maintenance features are primarily focused on ensuring the longevity and proper functioning of the device, as well as safety. The guide provides a comprehensive list of safety instructions and cautions:

  • General Safety: Users are warned against neglecting warnings, as serious injury or death could occur, and cautions, which prevent injury or equipment damage. Proper configuration of passwords and security settings is highlighted as the installer's/end-user's responsibility. Compliance with electrical safety regulations is mandatory.
  • Power Supply: Input voltage must conform to IEC60950-1 standards (SELV and Limited Power Source). Users are advised not to connect multiple devices to a single power adapter to avoid overheating or fire hazards. The power plug must be firmly connected, and the device securely fixed when mounted. In case of smoke, odor, or noise, the device should be immediately powered off and unplugged, and the service center contacted.
  • Environmental Considerations: The camera should not be dropped or subjected to physical shock. Sensor modules should not be touched with fingers; if cleaning is necessary, a clean cloth with a bit of ethanol should be used gently. The lens cap should be replaced for extended periods of non-use to protect the sensor from dirt.
  • Light Exposure: The camera should not be aimed at the sun or other extremely bright places, as this can cause blooming or smearing and affect sensor endurance. Laser beams can burn out the sensor, so care must be taken to prevent exposure.
  • Temperature and Ventilation: The camera should not be placed in extremely hot or cold environments (operating temperature range is -30°C to 60°C), dusty, or damp locations, and should not be exposed to high electromagnetic radiation. Good ventilation is required to avoid heat accumulation.
  • Liquid and Packaging: The camera must be kept away from liquids during use. For delivery, it should be packed in its original packaging or similar protective material.
  • Part Replacement: Regular replacement of certain parts, such as electrolytic capacitors, is recommended based on their average enduring time, which varies with operating environment and usage history. Users are advised to contact their dealer for details.
  • Battery Safety (if applicable): The guide includes specific warnings regarding battery replacement, emphasizing the risk of explosion if an incorrect type is used. Used batteries must be disposed of according to instructions. Improper battery replacement, disposal into fire or hot ovens, mechanical crushing or cutting, or exposure to extremely high temperatures or low air pressure can lead to explosions or leakage of flammable substances.
  • Troubleshooting: If the product malfunctions, users are instructed to contact their dealer or service center and never attempt to disassemble the camera themselves, as unauthorized repairs void responsibility.

The guide also covers regulatory information, including FCC compliance for Class B digital devices and EU conformity statements (CE mark, WEEE directive, battery directive), indicating the product's adherence to relevant standards and guidelines for electronic waste and battery disposal. Industry Canada ICES-003 Compliance is also mentioned.

Finally, the guide provides a QR code for activating and accessing the network camera, noting that mobile data charges may apply if Wi-Fi is unavailable. This suggests a mobile application or web-based interface for initial setup and ongoing management of the camera.

HIKVISION HiLook IPC-T250H Specifications

General IconGeneral
Image Sensor1/2.7" Progressive Scan CMOS
ApertureF2.0
IR RangeUp to 30 m
Video CompressionH.265+/H.265/H.264+/H.264
Ingress ProtectionIP67
Lens2.8 mm, 4 mm
Focal Length2.8mm
Day & NightIR cut filter with auto switch
Bit Rate32 Kbps to 8 Mbps
Network InterfaceRJ45 10M/100M Ethernet
Power SupplyPoE (802.3af)
Power ConsumptionDC12V: 5W max; PoE: 6.5W max
Operating Conditions-30 °C to 60 °C (-22 °F to 140 °F), humidity: 95% or less (non-condensing)
Minimum Illumination0 Lux with IR

Related product manuals