Do you have a question about the HIKVISION HiWatch HWI-B140H-M and is the answer not in the manual?
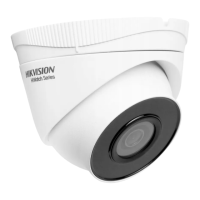
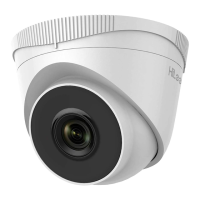
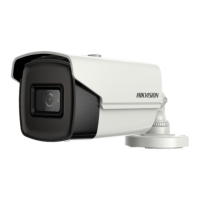
| Camera Type | Bullet |
|---|---|
| Image Sensor | 1/3" Progressive Scan CMOS |
| Min. Illumination | 0.01 Lux @(F1.2, AGC ON), 0 Lux with IR |
| Shutter Speed | 1/3 s to 1/100, 000 s |
| Lens Mount | M12 |
| Day & Night | IR cut filter with auto switch |
| Wide Dynamic Range | Digital WDR |
| Digital Noise Reduction | 3D DNR |
| Video Compression | H.265+/H.265/H.264+/H.264 |
| Video Bit Rate | 32 Kbps to 8 Mbps |
| IR Range | Up to 30 m |
| Protection Level | IP67 |
| Material | Metal |
| Lens | 2.8 mm, 4 mm |
| Sub-Stream | 640 × 480 @20fps |
| Image Settings | Brightness, contrast, saturation, sharpness |
| Day/Night Switch | Auto |
| Protocols | TCP/IP, HTTP, HTTPS, FTP, DHCP, DNS, DDNS, RTP, RTSP, RTCP, NTP, UPnP, SMTP, IGMP, IPv6 |
| General Function | Mirror, password protection, watermark, IP address filtering |
| Communication Interface | RJ45 10M/100M Ethernet |
| Operating Conditions | -30 °C to 60 °C (-22 °F to 140 °F), Humidity 95% or less (non-condensing) |
| Power Supply | DC 12V ± 25%, PoE (802.3af) |
| Power Consumption | Max. 5 W |
| Dimensions | 70 mm |
| Field of View | 78° (horizontal) |
| Main Stream | 4 MP (2560 × 1440) @20fps |
Acknowledgment of trademarks and logos belonging to Hikvision and other owners.
Legal limitations and representations regarding the product and manual.
Safeguards to prevent serious injury or death if neglected.
Precautions to prevent potential injury or material damage if neglected.
Steps for connecting and configuring the camera on a local area network.
Steps to activate the camera by setting a strong password via different methods.
Guide on how to access and log in to the network camera using a web browser.
Instructions for using the iVMS-4200 client software for live view and camera management.
Steps for connecting to wireless networks using Manage and Ad-hoc modes.
Guide to setting up Wi-Fi connection easily using the WPS function.
How to configure IP settings for the wireless network interface controller.
Overview of the live view interface elements and their functions.
Instructions on how to initiate the live view of the camera feed.
Steps to manually record video and capture still images from the live view.
How to control the camera's pan, tilt, and zoom functions.
Procedures for saving and recalling specific camera positions.
How to configure and activate camera patrol sequences using presets.
Settings for live view, recording, and captured pictures.
Configuration of device name, time, serial ports, and DST.
Procedures for device upgrade, restoration, and log management.
Configuration of user authentication, IP filters, and security services.
Managing user accounts, permissions, and security questions.
Configuration of core network parameters like TCP/IP, DDNS, PPPoE, and NAT.
Detailed steps for setting up IPv4 and IPv6 network addresses and DNS.
Setting up Dynamic DNS for network access when using PPPoE.
Advanced network configurations including SNMP, FTP, Email, HTTPS, and QoS.
Setting up FTP for uploading captured pictures and event snapshots.
Configuring email notifications for alarm events like motion detection or video loss.
Enabling and configuring HTTPS for secure web access and certificate management.
Setting up video stream parameters like resolution, bitrate, encoding, and frame rate.
Configuring up to five additional custom video streams for specific needs.
Adjusting audio settings including encoding, input, volume, and noise filter.
Optimizing video quality by allocating encoding resources to specific regions.
Specifying a target area for detailed display via a third stream.
Adjusting image parameters like brightness, contrast, exposure, and day/night modes.
Automatic switching between day and night modes based on illumination.
Scheduling specific times for the camera to switch between day and night modes.
Customizing on-screen display elements like camera name, date, and time format.
Masking specific areas of the live video to prevent viewing or recording.
Overlaying a custom image, such as a logo, onto the camera feed.
Configuring basic event triggers like motion detection, video tampering, and alarm inputs.
Setting up motion detection areas, sensitivity, and arming schedules.
Enabling and configuring alarms for when the camera lens is covered or obstructed.
Setting up advanced event detection like audio exception, defocus, and scene change.
Detecting and analyzing faces within the camera's field of view.
Detecting unauthorized entry or loitering within defined virtual regions.
Configuring Video Content Analysis features and parameters.
Setting up schedules for continuous or event-triggered video recording.
Configuring schedules for taking snapshots, both continuous and event-triggered.
Setting up and initializing network hard drives for storing data.
Monitoring the status and health of the installed memory card.
Optimizing storage usage by reducing frame rate and bitrate when no motion is detected.
Introduction to the playback interface for viewing recorded video files.
Using the toolbar and progress bar to play, pause, zoom, and navigate video files.
Searching, viewing, and downloading pictures stored locally or on network storage.
Viewing and downloading captured face data and analyzing it in charts.
Analyzing people counting data, including entered and exited counts, in various reports.
Analyzing visit and dwell times using heat map visualizations.
Reviewing and downloading counting data for analysis in different chart formats.
Introduction to SADP tool for searching and managing network devices.
How to automatically and manually search for active devices on the network.
Steps to edit network parameters like IP address and port number for a selected device.
Guide to configuring port mapping settings for TP-LINK routers.