This document is a user manual for the HIKVISION TURBO HD H8T Series Bullet & Turret Camera. It provides detailed information on the camera's features, installation, and menu operations.
Function Description
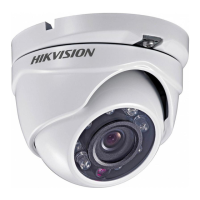
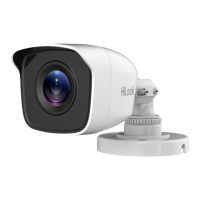
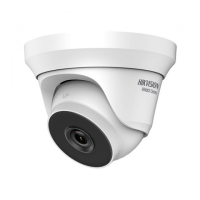
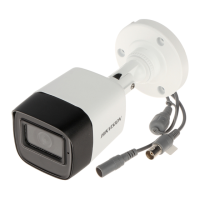
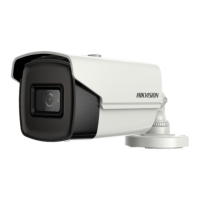
The HIKVISION TURBO HD H8T Series cameras are designed for surveillance applications, offering high-performance video capture. These cameras support multiple video output formats, including TVI, AHD, CVI, and CVBS, making them versatile for integration into various existing surveillance systems. The manual specifies two main types of cameras: Type I Camera (Bullet) and Type II Camera (Turret), each with distinct physical designs but sharing core functionalities.
Key features include:
- High performance CMOS sensor: Ensures high-quality image capture.
- IR cut filter with auto switch: Provides clear images in varying light conditions, automatically switching between day and night modes.
- OSD menu with configurable parameters: Allows users to adjust various camera settings directly through an On-Screen Display.
- Auto white balance: Automatically adjusts color balance for accurate color reproduction.
- Internal synchronization: Ensures stable video output.
- SMART IR mode: Optimizes infrared illumination to prevent overexposure in night vision.
- 4 in 1 video output (switchable TVI/AHD/CVI/CVBS): Offers flexibility in connecting to different DVRs.
- 3-axis adjustment: Allows for flexible positioning and aiming of the camera.
The camera's OSD menu provides extensive control over image parameters, including:
- VIDEO FORMAT: Supports various resolutions and frame rates (e.g., 5MP@20fps, 4MP@25fps/30fps, 2MP@25fps/30fps).
- EXPOSURE: Adjusts global exposure, BLC (Backlight Compensation), and WDR (Wide Dynamic Range) to handle challenging lighting.
- DAY/NIGHT: Configures IR Light, SMART IR, and AUTO settings for day and night operation.
- VIDEO SETTINGS: Controls image mode, white balance, brightness, contrast, sharpness, saturation, 3DNR (Digital Noise Reduction), and mirror effects.
- FUNCTIONS: Includes motion detection and privacy mask settings.
Important Technical Specifications
The manual lists specific models for each camera type:
- Type I Camera: DS-2CE19H8T-AIT3ZF
- Type II Camera: DS-2CE79H8T-AIT3ZF
While detailed electrical specifications are not fully enumerated in the provided excerpts, the safety instructions mention:
- Input voltage: Should meet both the SELV (Safety Extra Low Voltage) and the Limited Power Source with 12 VDC according to the IEC60950-1 standard.
- Power supply: The camera is powered by the external DC power supply (12 VDC, 1 A), which is compliant with the LPS, and the output current of this external DC power supply must be no more than 6 A.
- Power Cord: 24 VAC (indicated in the Type I Camera overview diagram, though the safety instructions specify 12 VDC, suggesting potential model variations or alternative power options).
Usage Features
The cameras are designed for ease of use and flexibility in deployment:
- Installation: The manual provides detailed steps for both ceiling mounting without a junction box and ceiling mounting with a junction box for both Type I (Bullet) and Type II (Turret) cameras. This includes drilling templates, cable routing, and securing the camera.
- 3-axis adjustment: Both camera types feature 3-axis adjustment, allowing users to precisely set the pan, tilt, and rotation angles to achieve the optimal surveillance view. For Type I cameras, pan is 0° to 360°, tilt is 0° to 90°, and rotation is 0° to 360°. For Type II cameras, pan is 0° to 360°, tilt is 0° to 75°, and rotation is 0° to 360°.
- Video Output Switching: A physical switch button on the camera allows users to easily switch between the four video output types (TVI, AHD, CVI, CVBS) to match the connected DVR.
- OSD Menu Operation: The camera's menu can be accessed and navigated using PTZ control from the DVR. Users can adjust various parameters like video format, exposure, day/night settings, and image enhancements.
- Exposure Mode: GLOBAL, BLC, and WDR settings are available to optimize image clarity in different lighting conditions.
- Day/Night Settings: Users can configure IR light, SMART IR, and set D-N Thresholds for automatic switching between day and night modes.
- Video Settings: Comprehensive controls for image mode (STD/HIGH-SAT), white balance (AUTO/MANUAL), brightness, contrast, sharpness, saturation, 3DNR, and mirror effects (OFF, H, V, HV) are provided.
- Motion Detection: Users can define up to 4 motion detection areas and adjust sensitivity.
- Privacy Mask: Up to 4 privacy areas can be configured to block out sensitive regions from being viewed or recorded.
Maintenance Features
The manual emphasizes safety and proper handling for maintenance:
- Cleaning: If cleaning is necessary, use a clean cloth with a bit of ethanol and wipe it gently.
- Environmental Protection: The product is marked with the WEEE directive symbol, indicating that it should not be disposed of as unsorted municipal waste. It should be returned to the local supplier or designated collection point for recycling.
- Product Care:
- Do not drop the camera or subject it to physical shock.
- Do not touch sensor modules with fingers.
- Do not place the camera in extremely hot, cold, dusty, or damp locations, and do not expose it to high electromagnetic radiation.
- Do not aim the camera at the sun or extra bright places.
- Ensure the sensor surface is not exposed to laser beam.
- Do not connect multiple devices to one power adapter to avoid over-heating or a fire hazard.
- Make sure that the plug is firmly connected to the power socket.
- Make sure that the device is firmly fixed if wall mounting or ceiling mounting is adopted.
- If smoke, odor, or noise rise from the device, turn off the power at once and unplug the power cord, and then contact the service center.
- Never attempt to disassemble the camera by unprofessional personal.
- Storage: While in delivery, the camera shall be packed in its original packing, or packing of the same texture.
- Water-proof device: Keep the camera away from liquid while in use for non-water-proof devices.
- Heat accumulation: To avoid heat accumulation, good ventilation is required for the operating environment.
The manual also includes regulatory information for FCC, CE, and ICES-003 compliance, ensuring the device meets international standards for electronic equipment.