Do you have a question about the HIKVISION HWT-T120-P and is the answer not in the manual?
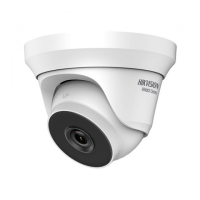
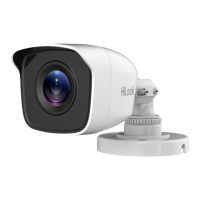
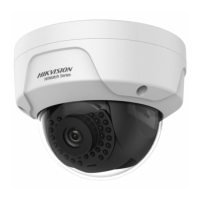
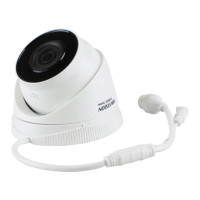
This document serves as a comprehensive user manual for HD Turret and Bullet Cameras, part of the HiWatch Series by Hikvision. It outlines the installation, operation, and maintenance procedures for six distinct camera types, ensuring users can effectively deploy and manage their surveillance systems.
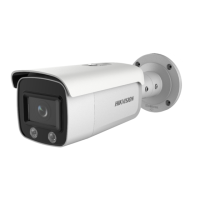
The primary function of these devices is to provide high-definition video surveillance. They are designed to capture clear images in various environments, offering robust security monitoring capabilities. The cameras are equipped with advanced features to enhance image quality and adaptability to different lighting conditions.
The cameras incorporate a high-performance CMOS sensor, which is crucial for capturing detailed images. To manage light effectively, an IR cut filter with auto switch is integrated, allowing the camera to adapt between day and night vision modes seamlessly. This ensures optimal image capture regardless of ambient light.
Users can access an On-Screen Display (OSD) menu, which provides configurable parameters for fine-tuning camera settings. This menu is a central hub for adjusting various aspects of the camera's performance.
Automatic white balance is a key feature, ensuring that colors in the captured video are rendered accurately, preventing color shifts that can occur under different lighting. Internal synchronization helps maintain consistent video output.
The cameras also feature a SMART IR mode, which intelligently adjusts the intensity of the infrared illumination to prevent overexposure of objects close to the camera, ensuring clear night vision without washout.
For installation flexibility, the cameras offer 3-axis adjustment, allowing for precise positioning and aiming to cover the desired surveillance area.
A notable feature across all six camera types is the ability to switch video output formats. By pressing and holding the switch button for 5 seconds, users can cycle through four different video outputs: TVI, AHD, CVI, and CVBS. This versatility makes the cameras compatible with a wide range of digital video recorders (DVRs) and monitoring systems.
The OSD menu, accessible via the PTZ Control interface or by clicking "Iris+", provides a structured way to manage camera settings. The main menu includes options for Video Format, Exposure Mode, Day/Night settings, Video Settings, Factory Default, Exit, and Save & Exit.
Under "Video Format," users can select resolutions and frame rates such as 4MP@30fps, 4MP@25fps, 2MP@30fps, or 2MP@25fps, catering to different recording and storage requirements.
"Exposure Mode" offers three options: GLOBAL, BLC (Backlight Compensation), and DWDR (Digital Wide Dynamic Range). GLOBAL is the standard mode, adjusting exposure based on overall image brightness. BLC compensates for bright backgrounds to clarify foreground objects, while DWDR balances brightness levels in scenes with both very bright and very dark areas, ensuring details are visible across the entire image.
The "Day/Night" settings allow users to choose between COLOR, B&W (Black and White), or AUTO modes. In COLOR mode, the image remains colored. In B&W mode, the image is monochrome, and the IR LIGHT automatically activates in low-light conditions. AUTO mode intelligently switches between color and B&W based on ambient brightness. Within B&W and AUTO modes, users can control the IR LIGHT (on/off) and adjust the SMART IR value from 0 to 3, with higher values providing more pronounced effects. Additionally, "Day to Night Threshold" and "Night to Day Threshold" settings, adjustable from 1 to 9, control the sensitivity of the camera's mode switching, allowing for customization based on environmental light changes.
"Video Settings" provides granular control over image quality. Parameters include BRIGHTNESS, CONTRAST, SHARPNESS, SATURATION, DNR (Digital Noise Reduction), AGC (Automatic Gain Control), and MIRROR. BRIGHTNESS and CONTRAST can be adjusted from 1 to 9 to darken/brighten the image and enhance color/light differences. SHARPNESS, also adjustable from 1 to 9, determines image detail. SATURATION, from 1 to 9, changes color intensity. DNR reduces noise, especially in low-light moving images, with settings for HIGH, MEDIUM, or LOW. AGC optimizes clarity in poor light, also with HIGH, MEDIUM, or LOW settings, or can be turned OFF (note: noise may be amplified when AGC is on). The MIRROR function offers OFF, H (horizontal flip), V (vertical flip), and HV (both horizontal and vertical flip) options for image orientation.
Finally, the "Factory Default" option allows users to reset all settings to their original state, while "Exit" and "Save & Exit" provide options to leave the menu without saving or to save changes and exit, respectively.
The manual emphasizes several key aspects for maintaining the device's longevity and performance. Users are advised to ensure strict compliance with electrical safety regulations during operation. The input voltage must meet SELV (Safety Extra Low Voltage) and Limited Power Source standards (12 VDC according to IEC60950-1), with the power adapter's output current not exceeding 6A. Connecting multiple devices to a single power adapter is discouraged to prevent overheating or fire hazards.
Proper installation is crucial for maintenance. The camera must be firmly fixed, whether wall-mounted or ceiling-mounted. If any smoke, odor, or unusual noise emanates from the device, users are instructed to immediately power off, unplug the power cord, and contact the service center. Importantly, users are warned against attempting to disassemble the camera themselves, as this should only be done by professional personnel.
For physical care, the camera should not be dropped or subjected to physical shock. It should be kept away from extreme temperatures (-40°C to 60°C), dusty or damp locations, and high electromagnetic radiation. Sensor modules should not be touched with fingers. If cleaning is necessary, a clean cloth with a small amount of ethanol should be used to gently wipe the surface.
To prevent damage, the camera should not be aimed directly at the sun or other extremely bright light sources. When using laser equipment, care must be taken to ensure the laser beam does not expose the sensor surface, as this can cause permanent damage.
Good ventilation is required for the operating environment to prevent heat accumulation. Non-waterproof devices should be kept away from liquids. For delivery, the camera should always be packed in its original packaging or similar protective material to prevent damage.
Before installation, users should verify that all assembly parts are included and that the device is in good condition. All related equipment should be powered off during installation. The installation environment should meet product specifications, and the power supply should match the camera's requirements. The mounting surface (wall or ceiling) must be strong enough to support three times the camera's weight and its mount. For cement surfaces, expansion bolts are required, while self-tapping screws are used for wooden surfaces. If the product malfunctions, users should contact their dealer or service center rather than attempting self-repair.
These guidelines ensure that the cameras remain in optimal working condition, providing reliable surveillance over time.
| Model | HWT-T120-P |
|---|---|
| Category | Security Camera |
| Signal System | PAL/NTSC |
| Resolution | 1920 x 1080 |
| Lens Mount | M12 |
| Day & Night | ICR |
| Angle Adjustment | Pan: 0° to 360°, Tilt: 0° to 75°, Rotation: 0° to 360° |
| Power Consumption | Max. 4 W |
| Communication | HIKVISION-C |
| IR Range | Up to 20 m |
| Material | Plastic |
| Minimum Illumination | 0.01 Lux @ (F1.2, AGC ON), 0 Lux with IR |
| Protection Level | IP67 |
| Image Sensor | 2MP CMOS |
| Lens | 2.8mm |
| Power Supply | 12 VDC ± 15% |
| Operating Conditions | -40°C to 60°C (-40 °F to 140 °F), Humidity 90% or less (non-condensing) |