1839010 and 1839011 Electronic Gauge
Along the Way:
• To change the batteries, remove the back door with a screwdriver and insert 4 AA
batteries. hilmor recommends brand name high-performance alkaline batteries.
• The temperature probes are factory calibrated and ready for immediate use
with the hilmor Electronic Gauge. If recalibration is needed, place probes in
an ice water bath. Press and hold the “+” and “-” buttons simultaneously for
three seconds to enter calibration mode. Once in calibration mode, push the
corresponding “+” or ”-” button to adjust to 32° Fahrenheit (0° Celsius). To exit
calibration mode, hit the power button.
• Although the hilmor Electronic Gauge is manufactured to be used with the hilmor
Thermocouple Clamps, dierent thermocouples may be paired with the hilmor
tool after proper field calibration (see item 2 above for instructions).
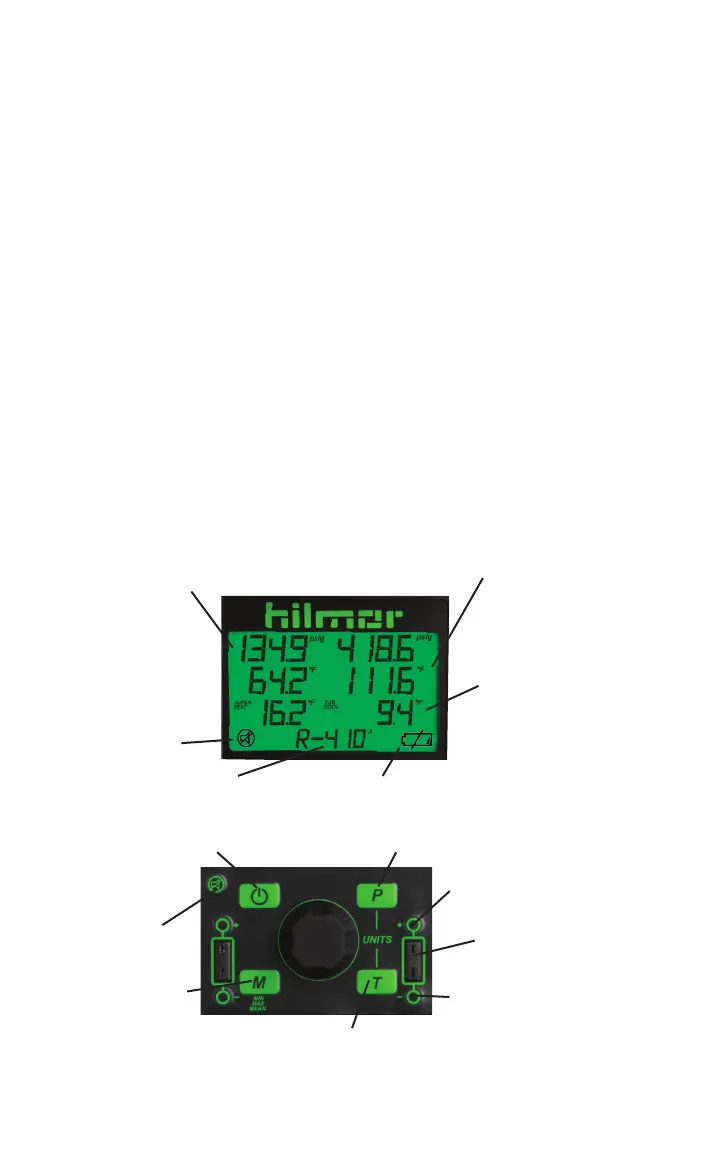
Controls and Displays:
Power Button
Pressure selection (psig, barg)
Refrigerant selected
Mute Indicator
Low Battery Indicator
Calibration adjustment (+)
Calibration adjustment (-)
Plug for K-style
thermocouples
TEMPERATURE
T1 and T2 measured in:
°F - Fahrenheit
°C - Celsius
K - Kelvin
PRESSURE
Low (left) and High (right) side.
Measured in:
psig - pounds per square inch gauge
barg - bar gauge
Superheat: Low (left) side
Subcool: High (right) side
°F - Fahrenheit
°C - Celsius
K - Kelvin
Sound on/o
Minimum
Maximum
Mean
Temperature selection (°F, °C, K)