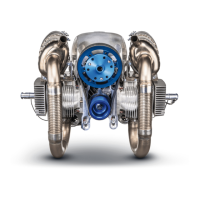
22:
lightly
screw
in by hand the 8 hex. nuts
with
washers
for
fasten1ng the cylinder. Put on
intake
gaskets
and intake mamfold. First set
up
and
tighten
the
two
hex. nuts and
spring
washers lying on the In-
side
and
thor
the two nuts on the
outside
uniformly
tighten
both
cylinders cross wise on the
cylinder
base
(nng
wrench S W
13
).
Cylinder
head
10
. Put on
cylinder
head
gaskets
and
cylinder
heads.
The
poured-in
bosses
of
cylinder
I must
point
towards
the
ignition
s1de,
of
cylinder
II towards
the
drive
side.
171:
lightly
screw on
cylinder
heads with 4 special
washers and hex
nuts
each.
Put
on
intake gaskets and intake manifold. Pay
atten-
tion
that
the surface on
the
flange is
pointing
up-
wards. First
put
on the 2 hex nuts with
spring
washers
on the inside and then the two nuts on the outside.
Tighten
the
4 hex nuts each on the
cy
linder head,
cross
wise
with2.7+0.3kgm
= 19.St.2.2
ftlbs.
th4!n
put
on 4
ellern
screws
with
special washers each and
tighten
also
crosswise
with
0.9
,.o.J
mkg
=
6.5
.2.2
ftlbs.
22:
Tighten
cylinder
heads with 8 ellern screws ond
special washers
with
0.9t0.3
kgm
=
6.5t
2.2
ftlbs.
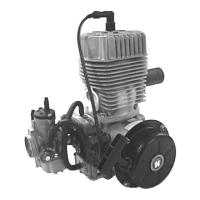
Ventilation
11 171:
l ightly
par
t t
wo
exhaust gaskets
to
the inside
of
the fan base on the exhaust side. Place fanbase
with
profile
rubber
on the
cylinder
and insert 4 studs.
Put on two more exhaust gaskets from the outside.
22:
Put on two exhaust
gaskets
put
on the exhaust
s1de
fanbase and again
put
on 2 exhaust gaskets
from the outside.
Screw
on using socket wrench S W 13 exhaust mani-
fold
with
washers and
copperplated
nuts
in
such a
way
that
the exhaust is
pointing
downward.
Place
gasket
on exhaust manifold and firmly screw
on
airguido
plate
with insulating flange and
carburc~
tor.
Put on
fancover
and
insert
tapping
screws with
washers and
sp
r
ing
washers on the
cylinder
heads.
Then
set
on the hex screws
with
washers and
spring
washers on the exhaust si
de
.
Push insulating hoses with clamps
over
the two
i
gnition
cables.
Screw
the
marked
ignition
cable for
cylinder
I with
clamp on the
thread
in the air
guide
plate
on the
i
gnition
side
(ignition
cable
for
cylinder
II with
171
place the
third
screw
in the
center
).
Now
tighten
the
upper
set
screws and finally the
screws on the side.
Sett
ing
of
the
interr
upted
distanc
e
12.
Push the fan wheel
over
the crankshaft
so
that
tho
slot
of
crankshaft and
of
fan wheel coincide. Place
fitting
key into the
slot.
Turn fan wheel in such a way,
that
the
slot
points
upward. In this
position
the
right
9
22
:
Serrer
les 8 ecrous de f1xation des cyhndres
legerement a
Ia
main.
Mettre
les
jomts
d'admission
en place, monter
le
collecteur
d'adl1)ission en
premier
lieu visser les 2 ecrous du centre
puis
les ecrous
exterieurs ne pas
oublier
les rondelles
grower
Serrer
les ecrous.
Serrer
les ecrous
des
deux
cylindres en
procedant
par
serrage
progressif
et
en
croix
(cle 13).
Culasse
10.
Poser
les
JOmts
de
culasse, monter les culasses, en
veillant
a
ce
que les 2
trous
venus de
fondelie
soient
orientes cOte allumage
pour
le
cylindre
I
et
cO
te
prise
de
force
pour
le
cylindre
II.
171
:
Serrer
legerement les cui asses au moyen des
4 ecrous munis
de
ronde
ll
es speciales.
Monter
les
joints
d'admiss
ion
et
le co
llecteur
d'admission, en
veil
l
ant
a ce que Ia
partie
plate du
collecteur
soit
orientee vers le haut. Commencer le serrage
par
los
ecrous du centre,
terminer
par
les ecrous du centre,
terminer
par les ecrous exterieurs.
Serrer
les 4 ecrous de culasse en
procedant
par
serroge en croix serrer b
2.7t0.3
kgm
ou 19.5 +
2.2
ftlbs.
ensuite
visser
et
serrer
les4
vis
~6
pons creux,
mime
procede de serroge
en
croix,
serrer a 0.9+0.3 mkg ou
6.5t2.2
ftlbs.
22: Serrer les 8
vis
a 6 pons creux ll 0.9+0.3 mkg au
6.5t
2.2
ftlbs.
Conduite
d
'a
ir
11
.
171
:
Coller
legerement deux
JO•nts
d'echappement
sur
Ia
face
interne
de
Ia
tole, gu1de d air. Poser
Ia
tole
guide
d'air avec son caoutchoux
profile
contra
les cylindres,
ViSSer
les 4
gOUJOnS
a
l'exterieur
monter
encore
2
joints
d'echappement.
22:
Monter
2
joints
d'echappement,
monter
Ia tOle
guide
d'air, monter encore 2
joints
d'echappemeo1t
a ''
exteneur
,
monter
le
collecteur
d'echa
ppement
,
l'echappement
onente
vers le bas.
Serrer
au moyen
des
ecrous cuivres
et
rondelles
plates
(cle No. 13).
Mettre
le
JOint
au
collecteur
d'admission, mont
er
Ia
tOle
guide d'air,
Ia
piece isolante le carburateur
serrer
les
ecrous.
Monter
lo
capot
de
refroid1ssement, visser les vis
taraud avec
rondelles
plates
et
rondelles
grower
dans les culasses,
puis
visser les
VIS
a 6 pans avec
rondelles
plates
et
rondelles
grower
cOte echappe-
ment.
Passer les gaines isolantes
et
les brides
de
fixation
sur
les 2 fils
de
bougie.
le
fil
de
boug1e
avec
repero
pour
le
cylindre
I se
fixe
en vissant
Ia
bride
au
trou
taraude dans
Ia
t61e
guide
d'air
c6te
allumage.
le
fil
de
bougie
du cylindre II se
f1xe
cote
pnse
de
force
(171: La
3e
vis se visse au
centre).
Maintenant
serrer
les vis en
commen~ant
par
colles
du
haul
et
en finissant
par
les vis laterales
Reglage
de
l
'e
cartement
des
vis
platinees
12.
Monter
le
venhlateur
sur
le
vilebrequin de
manu~re
a
ce
que
Ia
rainure de
clavette
sur
l'axe
comcide
avec
celle
du ventilateur, monter
Ia
clavette
Wood-
ruff.
Tourner
le
ventilateur
de
fa~on
a
ce
que
Ia
 Loading...