Anti-tip device installation
Tip Over Hazard
WARNING!
• Child or adult can tip the range and be killed.
• Install the anti-tip bracket to the wall or floor.
• Engage the range to the anti-tip bracket by sliding the range back such that the foot
is engaged.
• Re-engage the anti-tip device if the range is moved.
• See installation instructions for details.
• Failure to do so can result in death or serious burns to children or adults.
• Check to make sure that the rear leveling leg is fully inserted into the Anti-Tip bracket.
Anti-Tip Bracket
Install Anti-Tip Bracket (Anti-Tip Bracket Kit Included)
• Determine which mounting method to use: floor or wall. If you have a stone or masonry floor, you
can use the wall mounting method. If you are installing the range in a mobile home, you must
secure the range to the floor.
• This anti-tip bracket and screws can be used with wood or metal studs.
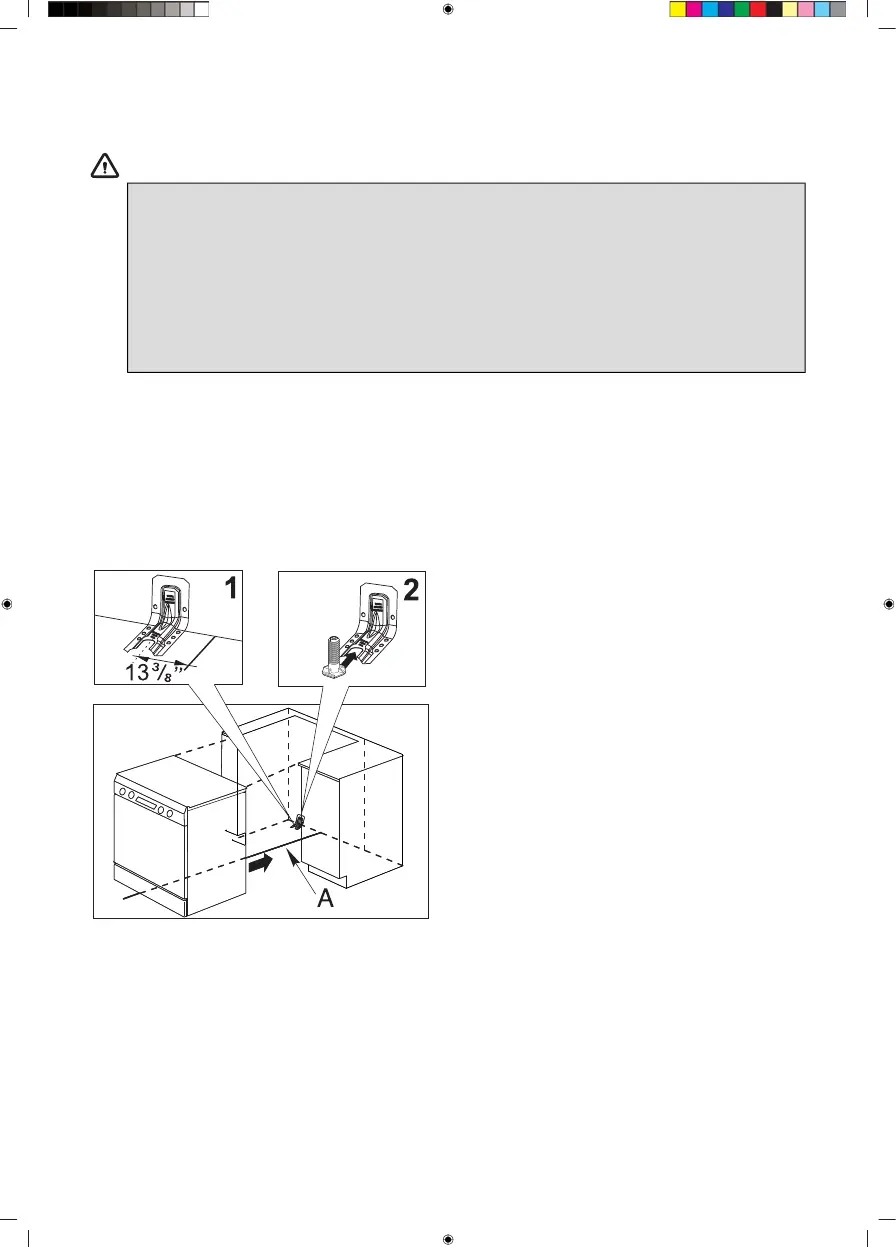
• Determine and mark the centerline of the
cutout space (1). The mounting bracket can
be installed on either the left-hand or
right-hand side of the cutout. Position the
mounting bracket against the wall in the
cutout so that the center of the cutout of
the bracket is 13 3/8" (34 cm) from the
centerline (A).
• Drill two 5/32" (4 mm) holes that
correspond to the bracket holes of the
determined mounting method.
• Using the two 3/16 x 2" (4,8 x 50 mm)
Phillips-head screws provided, mount the
anti-tip bracket to the wall or floor.
• Move range close enough to opening to allow for final electrical connections.
• Remove shipping base, cardboard or hardboard from under range.
• Move range into its final location, making sure the rear leveling leg slides into the anti-tip bracket
(2).
EN 11