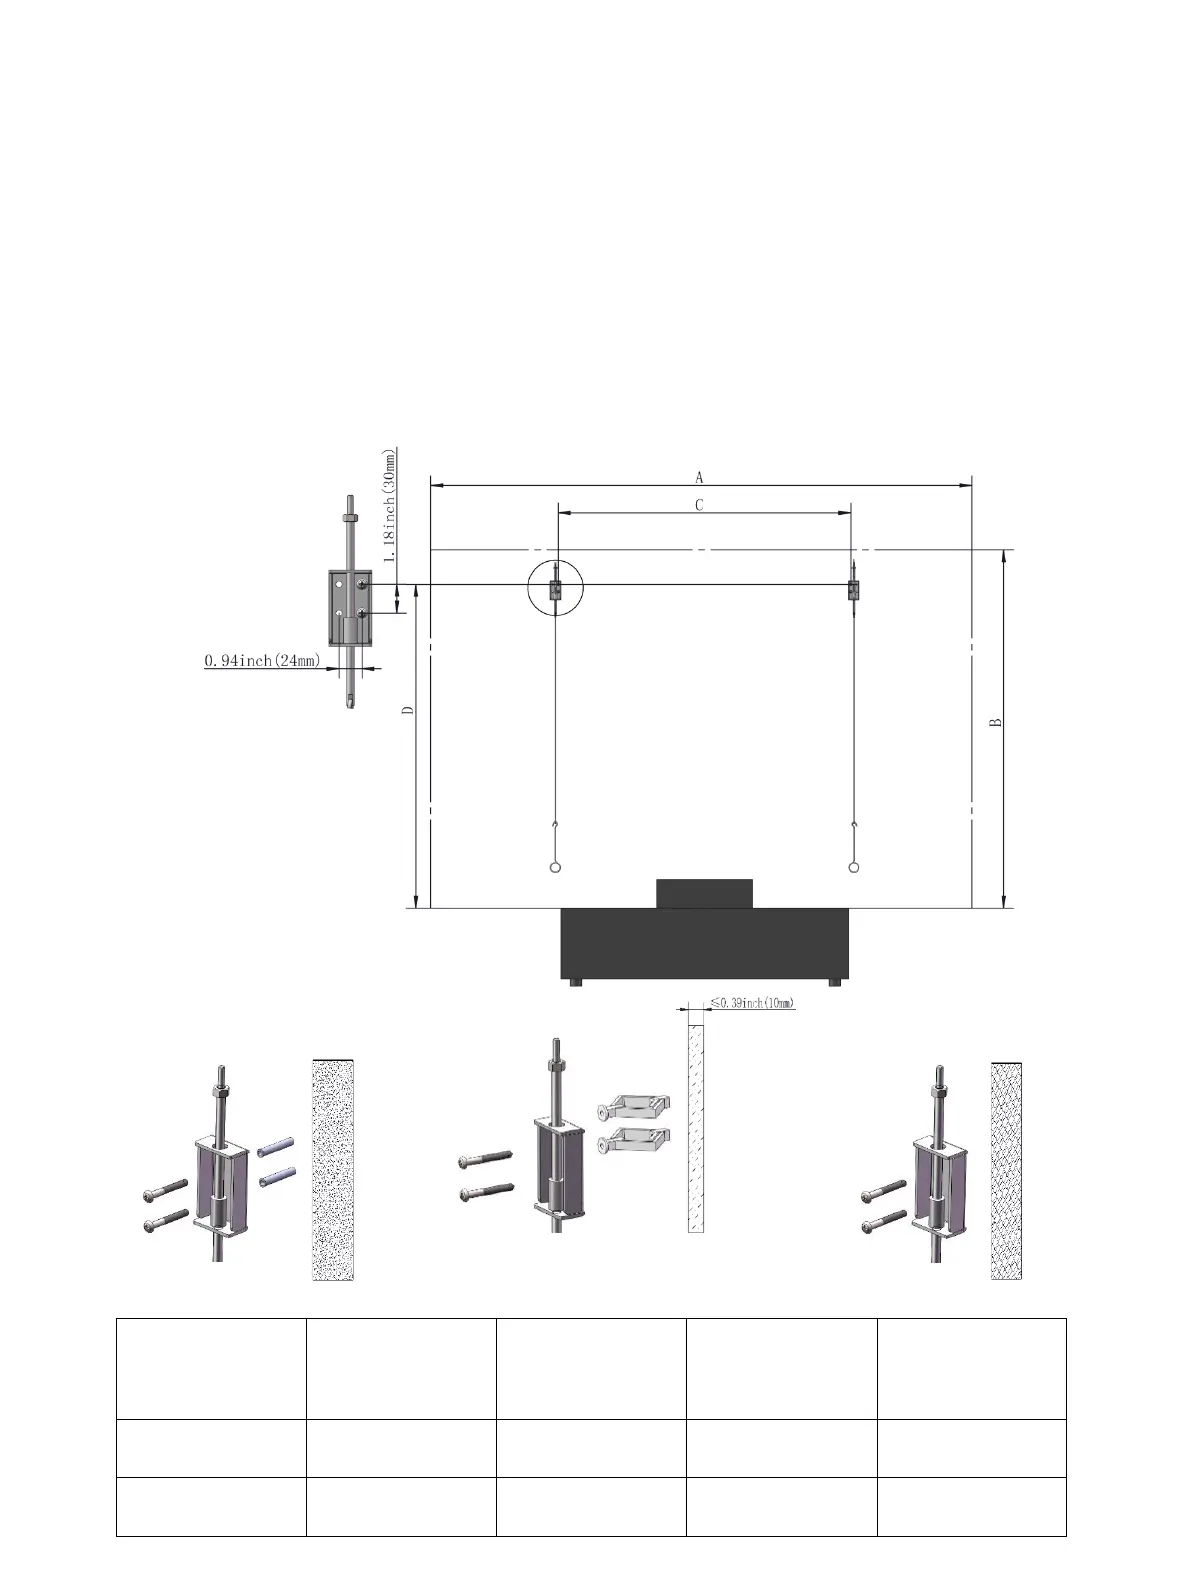
IV. Assembling Mounting Bracket
1. Pinpoint the positions according to the distance measurements in the illustration below.
2. There are three methods for installation, the first method (1) is used for solid wall, the second method
(2) is used for drywalls or hollow walls (Thickness>0.39inch(10mm)), and the third method (3) is used
for solid wood wall, only screws used.
3. Drill holes on the wall with drill, insert the anchor (Z1 or Z2), and then attach the mounting brackets
to the wall.
4. Hang the connecting rods (X) on the mounting brackets, and then connect the adjusting rods (W) to
the connecting rods.
5. Only two holes should be used for each wall mount (V).
A
(space for
installation)
B
(space for
installation)
W>90.6in.
H>66.9in.
43.3±11.8in.
58.9in.
W>90.6in.
H>66.9in.
43.3±11.8in.
59.8in.





 To Next Page