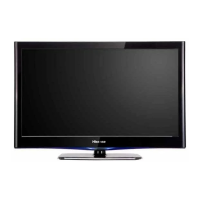
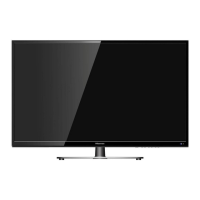
This document is a Service Manual for Hisense LCD Televisions, specifically covering models LTDN40D50TAM and LHD32D50TAM, with a chassis designation of 9206B. The manual, version 1.0, was released in May 2015 by Hisense Electric Co., Ltd.
The primary function of the device is to serve as an LCD Television, offering various input options and display capabilities.
Important Technical Specifications:
- Chassis: 9206B
- Product Models: LTDN40D50TAM, LHD32D50TAM
- Main & Power Board (one board): TP.S512.PB751\40D50TAM\ROH (part number 1149238)
- Digital System: DVB-T2
- Panel: JHD396DF-E01
- LVDS Cable: HX2-2X20KLB500P-S-1\500\ROH
- Dimensions (LTDN40D50TAM):
- Without stand: 902 x 86 x 523 mm
- With stand: 902 x 204 x 563 mm
- Weight (LTDN40D50TAM):
- Without stand: 8.2 kg
- With stand: 8.0 kg
- Minimum LCD Panel Size (diagonal): 40 inches (101.6 cm)
- Display Resolution: 1920 x 1080 (Full HD)
- Audio Power: 7W + 7W
- Power Consumption: 70W
- Power Supply: 100-240V ~ 50/60Hz
- Reception System: TV (PAL-M/N, NTSC, DVB-T2), AV (PAL, NTSC)
- Environmental Conditions:
- Temperature: 5°C ~ 45°C
- Humidity: 20%-80% RH
- Atmospheric Pressure: 86kPa - 106kPa
- Input Specifications:
- Component Input: 480i, 480p, 576i, 576p, 720p, 1080i, 1080p /60 Hz
- VGA Input: 640 x 480, 800 x 600, 1024 x 768, 1280 x 1024 /60Hz
- HDMI Input: 480i, 480p, 576i, 576p, 720p, 1080i, 1080p
Usage Features:
The television offers a range of user-friendly features accessible via a remote control:
- Power On/Off: Standard power button.
- Source Selection: Allows switching between various input sources (e.g., DTV, Analog TV, USB, HDMI, AV, Component, VGA).
- Menu Navigation: Dedicated buttons for displaying the main menu, navigating options (Up/Down/Left/Right), and confirming selections (OK).
- Volume Control: Volume Up/Down buttons.
- Channel Control: Channel Up/Down buttons.
- Picture and Sound Modes: Options to select different picture and sound modes.
- Sleep Timer: Set a timer for automatic power off.
- Audio Language & Subtitles: Select audio language and display subtitle content.
- Favorite Programs: Fast access to saved favorite programs.
- Media Playback: Red, Green, Yellow, and Blue buttons are used in media mode for various functions.
- Video Recorder Functions: Pvr list, Size, Reveal, Hold, Index, Subpage (teletext functions), Play/Pause, Stop, etc., are used in media mode.
- Freeze Picture: "Still" button to freeze the current image.
- Time Shift: Time shift functionality in DTV mode.
- Direct Channel Access: Numeric keypad (0-9) for direct channel input.
- Remote Sensor: Receives signals from the remote control. Users are advised not to obstruct the sensor.
- Remote Indicator: Red light in standby mode, blue light when powered on.
- Front Panel Controls: A STANDBY/SOURCE button on the TV allows turning on/off the TV or selecting signal sources by touch.
- Connectivity: Includes PC IN (VGA, Audio), Component IN (Y, Pb, Pr, Audio), Cable, Antenna, HDMI (multiple ports), Headphone, USB, AV&COMP/AUDIO.
Maintenance Features:
The service manual provides comprehensive guidance for servicing and troubleshooting the LCD TV, emphasizing safety precautions.
-
Safety Precautions:
- Always read safety precautions before servicing.
- Use manufacturer-specified replacement parts.
- Exercise caution to prevent personal injury and equipment damage.
- Be aware of CAUTIONS and NOTICES, which are not exhaustive.
- Critical components with special safety characteristics are marked with a triangle symbol (▲) in the parts list.
- Avoid using substitute parts that lack specified safety characteristics to prevent shock, fire, or other hazards.
- Do not modify the original design without written permission from Hisense.
- ESD Precautions: All ICs and many semiconductors are susceptible to electrostatic discharges. Use a wristband connected to the set's mass during repair.
- Never replace components while the unit is switched on.
- Use plastic tools for settings to prevent short circuits.
- Ensure proper AC plug insertion to prevent blade exposure.
- Route wire trees correctly and fix them with clamps.
- Check mains lead insulation for damage.
- Avoid touching signal/power connectors, EMI ground parts, and heat sinks while the product operates.
- Do not supply higher than specified voltage.
- Avoid using the product in high humidity, near water, or flammable materials.
- Immediately turn off power if foreign substances enter the panel module.
- Turn off power if the product emits smoke, abnormal smell, or sound.
- Confirm voltage has dropped to a safe level before disconnecting/connecting connectors after power off.
- Avoid pulling/inserting power cable with wet hands.
- Do not damage or modify the power cable.
- Clean dirty power connectors with a dry cloth.
- Use specified carts/stands to prevent tip-over injuries.
- Secure sufficient working space.
- Turn off power and disconnect the power cable during servicing, except for adjustments/checks.
- Wait at least 30 seconds after power off before servicing to prevent electric shock and PC board breakage.
- When installing/removing the LCD module, use at least two persons.
- Ensure no foreign matter is on cushioning materials when the panel surface contacts them.
- Remove static electricity from your body before handling circuit boards.
- Handle circuit boards by holding large parts like heat sinks or transformers.
- Do not stack circuit boards.
- Perform a safety check after servicing to ensure all parts are returned to original locations and no deterioration has occurred.
-
Factory/Service OSD Menu and Adjustment:
- Accessing Factory OSD Menu:
- Power on the TV.
- Press "Menu" on the remote to open the User OSD Menu.
- Select "Sound" and press "OK".
- Move the cursor to "Balance".
- While "Balance" is focused, press number keys 1->9->6->9 in sequence.
- The Factory OSD Menu will appear.
- DC power off exits the factory menu.
- Factory Menu Items: White Balance, Input Source, Function, Channel Lint, Test Pattern, Protected Clear, Unprotected Clear, Design Menu.
- Function Sub-Menu: TO Fac (M/U), Power mode last memory, Software update (start), Uart debug (on/off).
- MODE "M" vs "U": "M" allows entry with factory or user RC (for factory production only); "U" allows entry only with user RC.
- Design Menu Items: White balance, Picture Curve, Volume Curve, Sound Mode.
-
Software Updating:
- USB Directly Upgrade:
- Rename the upgrading file (e.g., SIS506_52.bin for LHD32D50EU, SIS506_67.bin for LTDN40D50EU).
- Copy the renamed *.bin file to the root directory of a USB disk (ensure no other *.bin files are present).
- AC power off the TV, insert the USB disk into the Main board USB port, then AC power on. The TV will update automatically.
- Indicator light changes indicate upgrade status:
-
During upgrade: Red and green indicators alternate slowly (once/second).
-
Successful upgrade: Red and green indicators alternate fast (four times/second).
-
Failed upgrade: Red indicator flickers for 1.75 seconds/once, green for 250ms/once.
5. Important Note: Do NOT power off the TV or perform other operations during upgrading, as this can destroy the bootloader, making USB upgrading impossible.
* USB Menu Upgrade:
- Insert a USB disk with only one SIS506_XX.bin file in the root.
- Enter the Factory OSD Menu (see 3.1).
- Navigate to Factory menu -> Function -> software update -> start.
- When prompted "upgrade program detects whether an upgrade", select "YES".
- The TV will display "Erasing of software, Please wait..." with a progress percentage.
- Upon completion, "Programming of software, Please wait..." will show.
- Finally, "Update OK, Please remove the USB !!!" will appear.
- Remove the USB disk; the TV will automatically restart.
*   **SIS Tool Upgrade:**
    1.  **Install Uart driver software:** Install CP210x\_VCP\_Windows by running CP210xVCPInstaller.exe.
    2.  **Hardware Connecting:** Connect the SIS debug board to the TV's VGA port and the other USB port to the PC.
    3.  **SIS Tool Usage:**
-
AC power off the TV.
-
Unlock compress.
-
Run U2S_1.18.exe.
-
Choose "Comport setting" and select the corresponding COM port (found in Device Manager under "Ports (COM & LPT)").
-
Click "Connect".
-
AC power on the TV.
-
Click "Restore", load the *.bin file, then click "restore" button.
-
The process will show "Updating..." and progress.
-
After "Restore successful" appears, AC power off and power on the TV.
-
Troubleshooting Flowcharts:
- Remote Control: Checks batteries, replaces RC, checks IR receiver, replaces Led & IR board, replaces Led & IR cable, replaces main board.
- Function Key: Checks switches, solder connections, replaces Key BD, checks Key BD cable, replaces Key BD, replaces main board.
- TV Won't Power On: Checks LED indicator (blue/red), power output, power cord, tries power on by RC/button, checks signal source, panel brightness, replaces IR BD/Keypad PCA, replaces main BD, replaces panel, replaces power BD.
- Audio Issues: Checks connector, speaker wire, speaker set, replaces main board, replaces power supply board.
- TV/VGA/HDMI Input (No Picture): Checks signal source, connection, cable, replaces main board.
- YPbPr Input (No Picture): Checks source work, connection, wires (Green, Blue, Red), replaces main board. (Note: K220 mould TV does not have YPbPr input).
- Video Input (No Picture): Checks source work, connection, cable/wires, replaces main board.