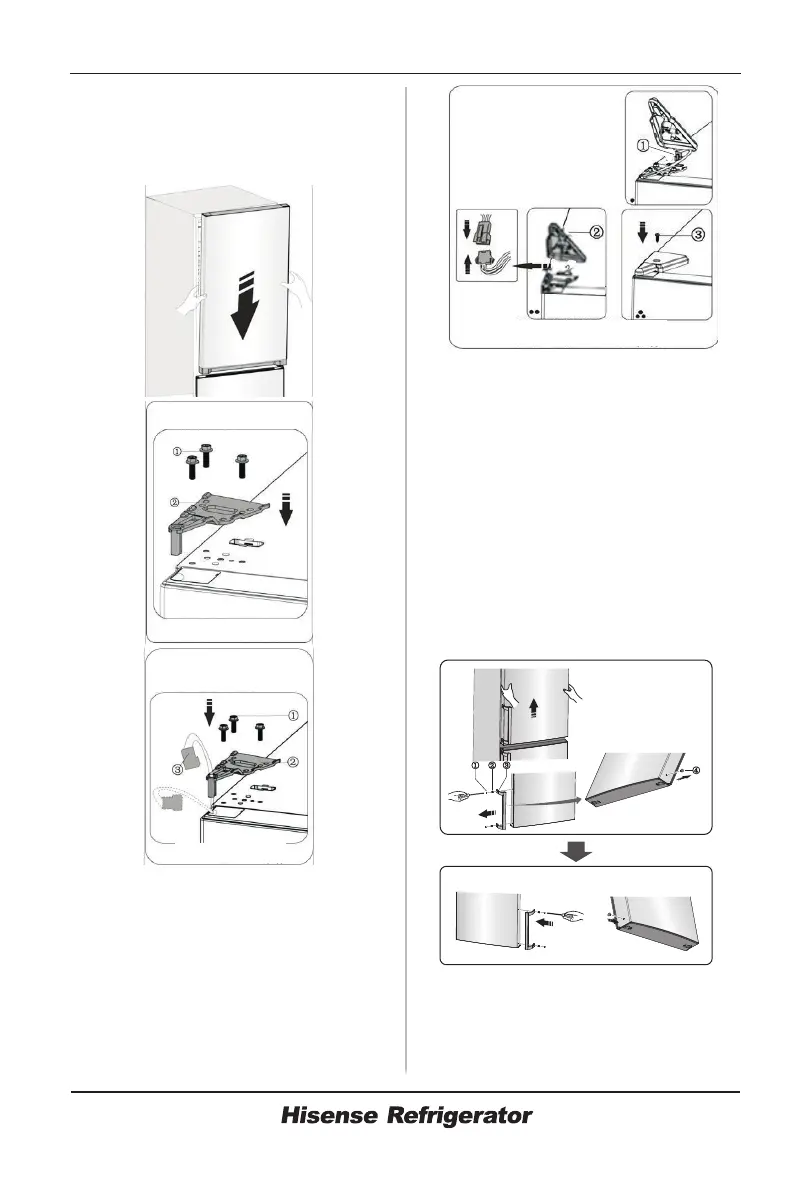
13
part byscrews .Beforefixpart ,
passconnector throughhinge
refertostep3.(Pleaseholdupper
doorbyhandwheninstalling)
Connectelectricalconnector
asshowninthepicture,thenfixpart
byscrew refertostep2.
②
①
① ②
③ ②
16.
② ③
17. Opentheupperdoor,mountdoor
racksandthencloseit.
Ifyourappliancehashandle,you
havetoreversehandlebyfollow
instructionsbelow.
Removetheupperdoorandplaceit
onasmoothsurfacewithitspanel
upwards.Leverpart andpart ,
thenloosescrews ,asshownin
thepicture.Changehandle tothe
rightside,theninstallscrews ,
part andpart inturn.
Note:
① ④
②
③
②
① ④
② Special screws
③ Handle
① Handle covers
④ Screw hole cover
① Specialflangescrews
② Upperhinge
MODEL WITHOUT DISPLAY
① Specialflangescrews
Upperhinge
Electricalconnector
②
③
MODEL WITH DISPLAY
①
②
③ -
electricalconnector
upperhingecover
self tappingscrew
MODEL WITH DISPLAY
 Loading...