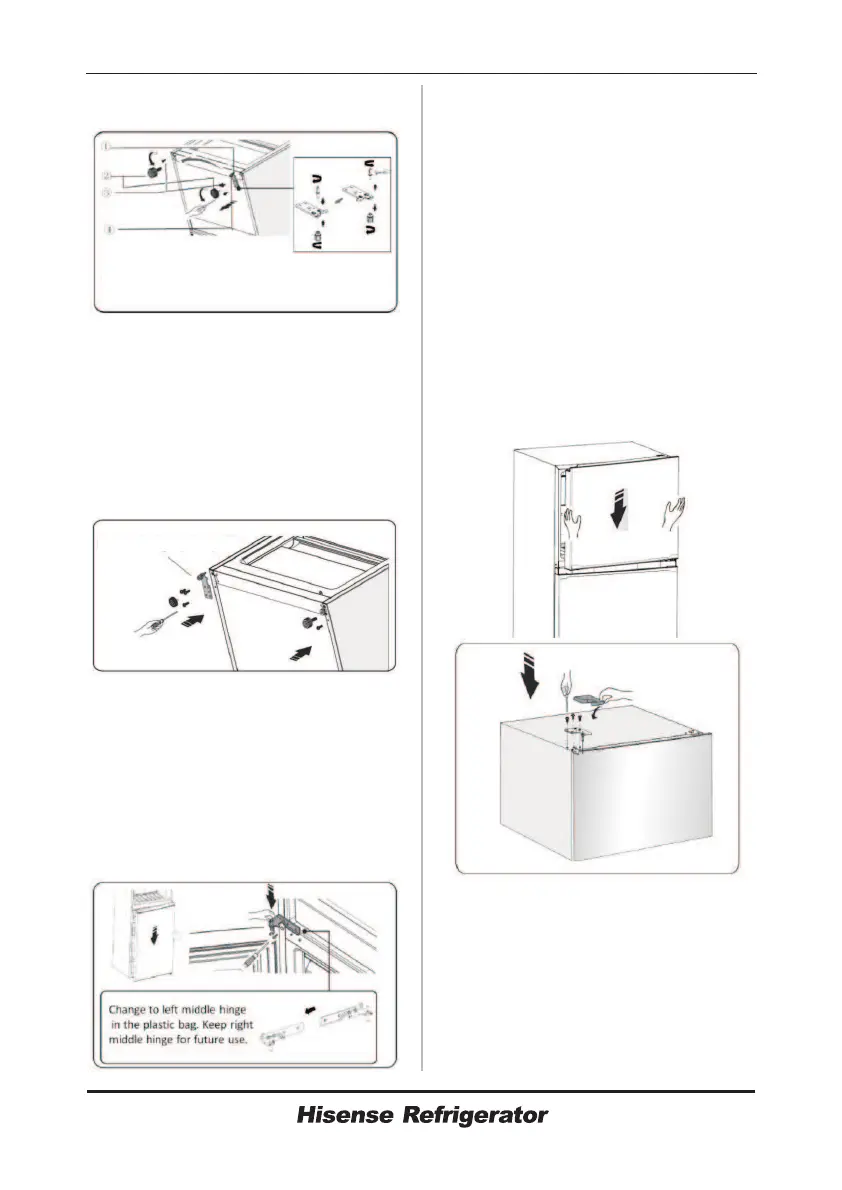
13
9. Tip the refrigerator back wards, remove
part ② and then remove screws ③.
② Adjustable bottom feet part
④ Adjustable bottom feet part
③ Self-tapping screws
① Lower hinge part(right)
10. Remove part ④ from the lower hinge
pin, loose out the lower hinge pin,
change it to the reverse hole site, and
then tighten into position, then install
part ④ on the lower hinge pin.
11. Replace the items remount in step 10,
change part ① to left and then fix them
with screws ③. Finally install part ②.
12. Stand the refrigerator upright and
carefully slot the lower door onto the
bottom hinge pin and hold in position.
Take out the left middle hinge from the
plastic bag, adjust the middle hinge to
the appropriate position and then install
it ensuring the lower door in secured in
place.
13. Carefully slot the upper door onto
the middle hinge pin and hold in
position. Move the upper door to an
appropriate position. Take out the left
upper hinge from the plastic bag, then fit
the left upper hinge pin into the left hinge
hole at the top of the door to secure the
door in place. Adjust upper hinge and
upper door, then fix the upper hinge part
with screws. Keep the right upper hinge
with the appliance for future reference.
(Please carefully hold upper door by
hand when installing)
14. Assemble the hinge cover-left
provided (in the plastic bag) to match the
hinge, install the door racks to original
position. Keep the hinge cover-right with
the appliance for future reference.
Lower hinge part (left)