21
I. MAIN CHASSIS ADJUSTMENT
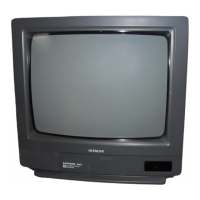
1. Multi Master I
2
C Bus System
M10LXU Chassis uses I
2
C Bus control system.
Fig. 1 shows this control system.
I001 (Master) controls other ICs (Slave). Adjustment
data is memorized in I003 (EEPROM). I001 reads
this data and controls other ICs (slave).
Adjustment items applied in this chassis are shown
in Table 1.
2. ADJUSTMENT PROCEDURE-START UP
2-1 How to Get to Adjustment Mode
Chassis adjustment can be done by using the front
control panel buttons with CTV set turned off. Press
“POWER” and “INPUT” keys at the same time, and
hold for more than 3 seconds. The CTV set turns on
in adjustment mode with OSD as follows.
“To Escape from Adjustment Mode”
Press “POWER” button of remo-con or front panel
once at anytime. Then set returns to normal state.
TABLE 1
Adjustment Code
* This data is an approximate service code data. Fine
adjustment must be done using the specified test
procedure and adjustment tools.
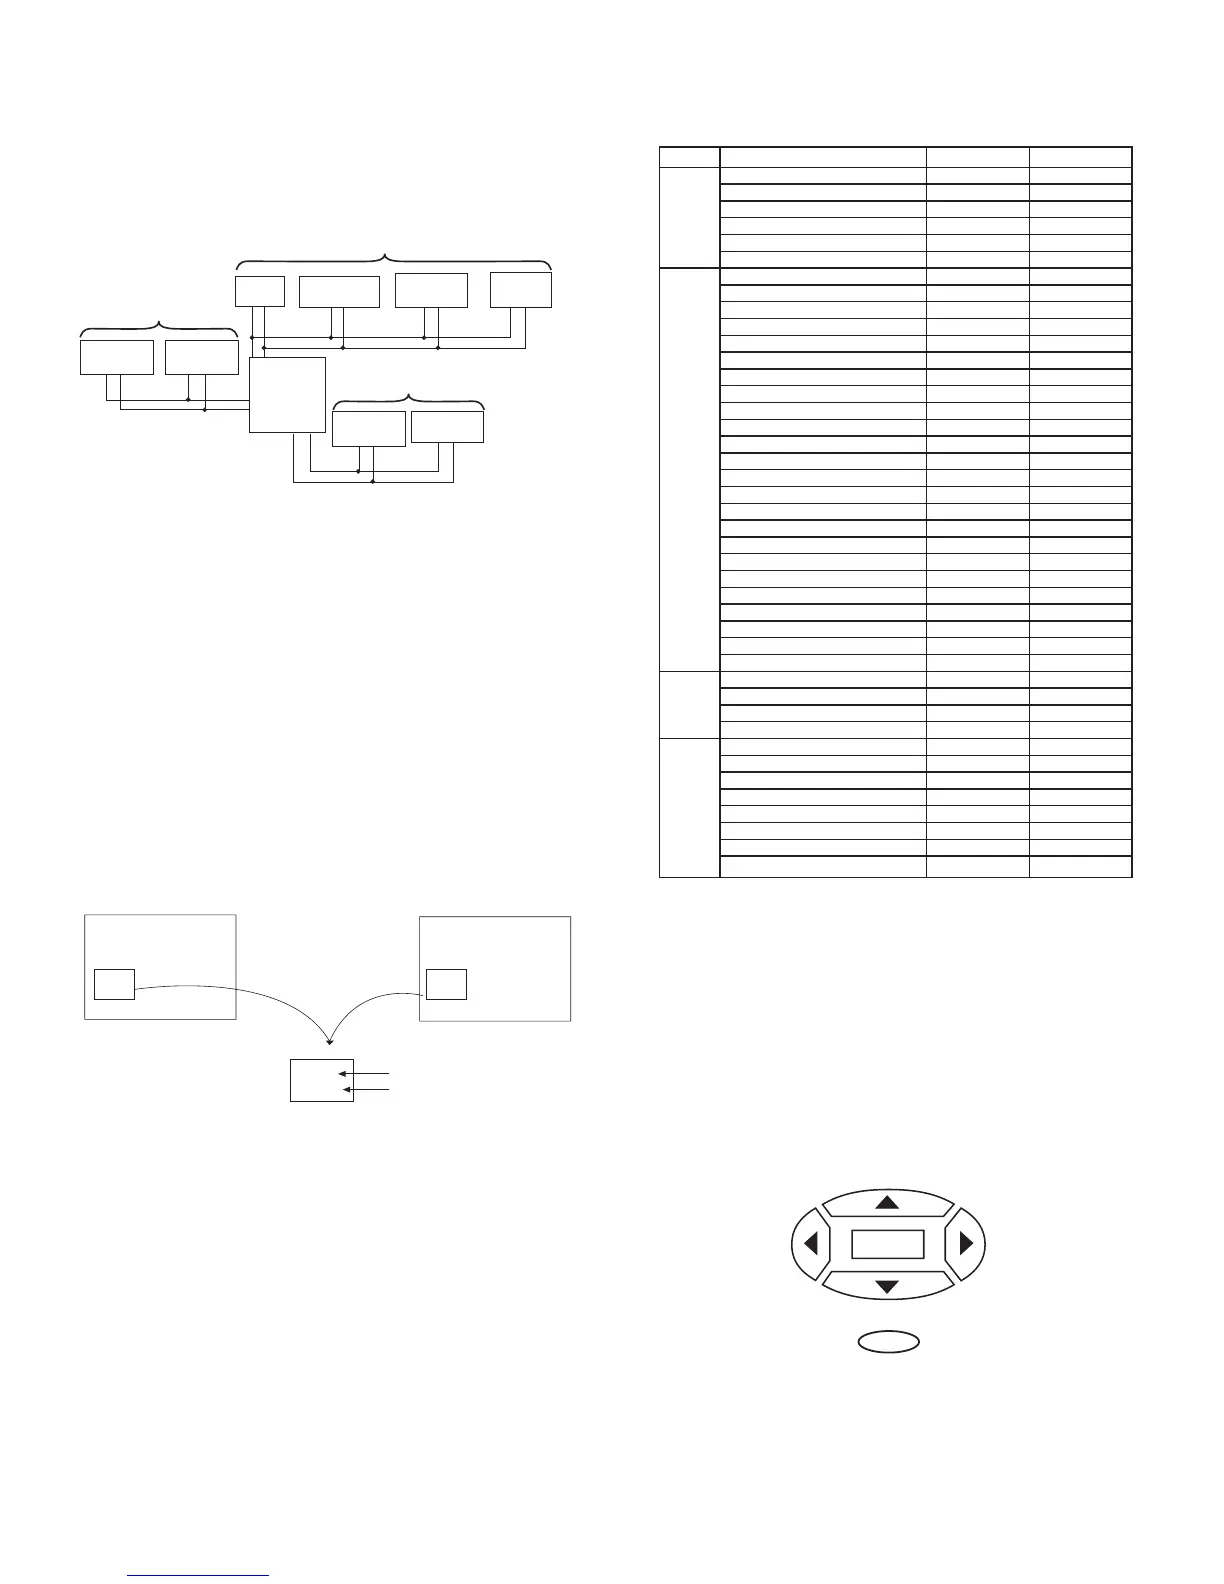
2-2 Changing Data and Adjustment Code
When the CTV set is in adjustment mode, the cur-
sor 왖,왔,왗,왘 and MENU keys of the remote control
will be the adjustment keys.
A. Use any Hitachi remote control when making an
adjustment.
왖,왔 keys are used for changing adjustment code.
왗,왘 keys are used for changing data.
MENU key is used for changing “Cut Off
Mode”/”Normal mode.” (Refer to cut off adjustment)
Mode Function Adjustment Data Adjustment Code
MTS Stereo VCO adjustment 63~0 A01
SAP VCO adjustment 63~0 A02
FILTER adjustment 63~0 A03
Input level adjustment 63~0 A04
Low pass separation adjustment 63~0 A05
High pass separation adjustment 63~0 A06
VIDEO G DRIVE adjustment 127~0 P01
B DRIVE adjustment 127~0 P02
R Cut off adjustment 255~0 P03
G Cut off adjustment 255~0 P04
B Cut off adjustment 255~0 P05
SUB Brightness adjustment 31~0 P06
RGB Brightness adjustment 7~0 P07
H POSITION adjustment 31~0 P08
H SIZE adjustment 31~0 P09
V POSITION adjustment 63~0 P10
V SIZE adjustment 63~0 P11
E/W TARABOLA adjustment 63~0 P12
V-S CORRECTION adjustment 63~0 P13
V-LIN CORRECTION adjustment 127~0 P14
E/W TRAPEZOID adjustment 127~0 P15
E/W CORNER adjustment 63~0 P16
V CENTER adjustment 63~0 P17
SUB CONTRAST adjustment 127~0 P18
SUB COLOR adjustment 127~0 P19
SUB TINT adjustment 3~0 P20
SUB SHARPNESS adjustment P21
W/B G adjustment P22
W/B B adjustment P23
SERVICE P24
OSD OSD H POSITION M01
CCD SLICE LEVEL adjustment M02
CCD SYNC TIPSLICE LEVEL adj. M03
OSD H size adjustment M04
PIP R OFFSET adjustment 31~0 S01
G OFFSET adjustment 63~0 S02
B OFFSET adjustment 31~0 S03
PIP SUB COLOR adjustment 31~0 S04
PIP SUB TINT adjustment 63~0 S05
PIP CONTRAST adjustment 31~0 S06
PIP H POSITION 225~0 S07
PIP BRIGHTNESS adjustment 31~0 S08
 Loading...