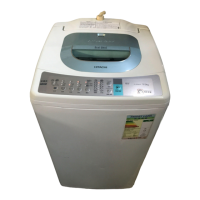
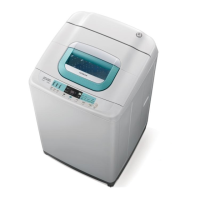
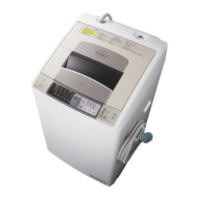
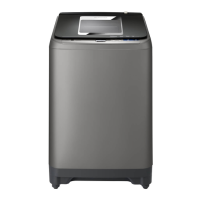
This document is a user manual for the Hitachi Fully Automatic Washing Machine, covering models AJ-S75MXP, AJ-S65MXP, and AJ-S75MX. It provides comprehensive instructions for operation, installation, maintenance, and troubleshooting.
Function Description
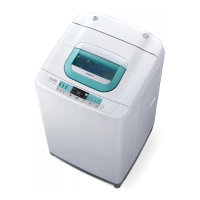
The Hitachi Fully Automatic Washing Machine is designed to provide efficient and convenient laundry care. It features six main laundry courses: Normal, Delicate, Blanket, Wool, Speedy, and Soak, each tailored for different types of fabrics and soil levels. The machine incorporates an "Infiltration Washing" system where detergent dissolves quickly to form a high-concentration solution that penetrates fabric fibers, facilitating dirt removal.
A key feature is the "Air-jet Drying" function, an economic drying mode that operates without heating. This function uses strong wind and high-speed spinning to shorten laundry airing time, prevent shrinkage and deformation caused by heat, and control black mildew in the washing basket. It is suitable for heat-sensitive items like swimsuits or underwear containing amino heat-insulation materials, and can dry up to 2kg of blending chemical fiber in approximately 3 hours.
The machine also includes a "Preset for Washing" function, allowing users to set a delayed finish time (6 or 9 hours later), which is convenient for washing while away or for morning drying. For safety, a "Lid Lock" function automatically locks the lid during washing, especially for child safety.
Important Technical Specifications
The manual provides detailed specifications for the three models: AJ-S75MXP, AJ-S65MXP, and AJ-S75MX.
General Specifications:
- Type: Fully automatic washing machine
- Power: 220V~50HZ
- Pressure of tap water: 0.03MPa~0.8MPa (0.3kgf/cm²~8kgf/cm²)
- Washing mode: Automatic reverse pulsator type (自動正反攪拌方式)
Model-Specific Specifications:
AJ-S75MXP / AJ-S75MX:
- Normal washing capacity: 7.5kg (quality of dry cloth)
- Normal spinning capacity: 7.5kg (quality of dry cloth)
- Normal water level: 60L ("NORMAL" process)
- Rating power: Washing: 440W; Spinning: 400W
- Profile dimension (W×D×H): 530mm×600mm×1020mm
- Weight: About 34kg
AJ-S65MXP:
- Normal washing capacity: 6.5kg (quality of dry cloth)
- Normal spinning capacity: 6.5kg (quality of dry cloth)
- Normal water level: 58L ("NORMAL" process)
- Rating power: Washing: 440W; Spinning: 400W
- Profile dimension (W×D×H): 530mm×600mm×1020mm
- Weight: About 34kg
The AJ-S75MXP and AJ-S65MXP models are top-drainage machines, while the AJ-S75MX is not. The highest water level for AJ-S65MXP is 58L.
Usage Features
Installation:
- Location: Install on a solid, horizontal surface to prevent noise and shaking. Maintain at least 1.5cm clearance from walls on all sides and at least 9cm on the side of the water drainage hose.
- Adjustable Leg: Use the adjustable leg to stabilize the unit. Loosen the lock nut, adjust the leg, then tighten the nut. Maximum adjustment range is 40mm.
- Water Drainage Hose (AJ-S75MXP, AJ-S65MXP): Connect the hose to the water drainage joint on the back, secure with a hose clipper, and insert the fixing holder into the mounting hole. The hanging height should not exceed 1m.
- Water Drainage Hose (AJ-S75MX): The hose is factory-installed on the right but can be moved to the left. Lay the unit down slowly on soft padding, remove the cover, loosen the clamp, and reinsert the hose into the desired groove.
- Water Supply Hose: Firmly tighten the union nut when connecting to the main unit. Optional extension tubes (1m, 2m, 3m) are available.
- One Touch Joint: Confirm water tap diameter (remove joint ring if >2cm), check gap between joints A and B (adjust to 4mm or less), press sealed pad evenly, and tighten screws.
Before Washing:
- Laundry Preparation: Secure strings, pull zips up, turn hair/silk-prone items inside out, remove soil/dirt, and empty pockets. Separate easily-fading colors. Place vulnerable items (lace, steel-wired underwear) in a wash string bag.
- Detergent/Bleach/Softener:
- Powder Detergent: Add to the dispenser. For concentrated powder, use the provided measuring spoon (approx. 37g for one spoon).
- Liquid Detergent/Bleach: Dilute with water and pour into the injection opening. Do not pour bleach directly onto clothes.
- Fabric Softener: Open the cap (max 120°), pour according to water level, and close the cap. It dispenses automatically during the final rinse.
- Loading: Distribute laundry evenly in the basket. For bulky items, put them in first. Do not overload (70-80% of indicated load for normal clothes).
Operation:
- Starting: Turn on power, select program, press "START." The machine will detect laundry weight and display detergent amount/water level.
- Water Level: Can be set manually or replenished during agitation by pressing and holding the "WATER LEVEL" button.
- WASH/RINSE/SPIN: Manually set or change these processes. Changes can only be made when the machine is paused.
- Washing Cap: Use in "WOOL" or "BLANKET" processes. Install by bending and pressing it into the basket, ensuring it slightly presses the laundry. Do not add clothes on top of the cap.
Air-jet Drying:
- After washing, rearrange laundry evenly in the basket.
- Press "POWER ON/OFF," then "AIR-JET" to set duration.
- The actual drying time may vary (5-30 minutes longer than preset) due to rearrangement and load adjustment.
- If drying is insufficient, continue the air-jet process.
Safety Features:
- Lid Lock: Automatically locks during washing for child safety. Cannot be opened during spinning.
- Safe Mode: Factory initial state. To remove, press "POWER ON/OFF," then press and hold "WASH" for 3 seconds.
- Automatic Power Off: The machine automatically turns off at the end of operation or after 5 minutes of no activity with power on. It also turns off if paused, lid open, or an abnormality alarm occurs for over 1 hour.
Maintenance Features
Regular Maintenance:
- Detergent Dispenser: Remove for cleaning if detergent residue adheres. Wipe with water or use warm water (40°C) and a toothbrush for severe dirt.
- Lint Filter: Clean after each use. Press the hasp, pull out the filter, remove the net from the encasing, and clean floss. Replace if severely blocked or damaged.
- Washing Basket: Perform bimonthly "TUB CLEAN" process using an oxidizing bleach (approx. 250g). Do not use regular detergent or put clothes in during this process.
- Nanometer Titanium Filter Net: Clean stains with a soft cloth or dust collector. Replace if stains are severe.
- Water Supply Opening: Turn off tap, disassemble hose, and clean the filtering net. Ensure the net is recovered to its original shape.
- Main Unit: Wipe dirt with a soft cloth. Do not use gasoline, thinner, strong/weak-alkali detergents, wax, or brushes. Avoid spraying water directly on the unit.
Troubleshooting:
- Abnormality Alarms: If an alarm occurs (flashing indicator, buzzer), pause, restart. If the error persists, check the indicated part (e.g., tap on/off, water supply, drainage hose, lid status, laundry balance).
- Icing: If icing is possible, turn off the tap, disassemble the water supply hose, and drain remaining water. Set "TUB CLEAN" for 30 minutes, then "Spinning" for 1 minute. If icing has already occurred, disassemble the water supply hose, put it in 40°C warm water, pour 40°C warm water into the basket, then reconnect the hose and check water supply/drainage.
- Common Issues: The manual lists various non-failure phenomena such as water supply during washing/spinning, pulsator stopping during charging, sounds during operation (liquid balance, clutch mode switch, motor electromagnetic sound), and variations in water level/drying time.
Safety Precautions:
- Never attempt self-repair.
- Unplug the power cord with dry hands before maintenance or if abnormalities occur.
- Use a single 220V, 10A socket.
- Do not install in humid places or exposed to rain.
- Do not put hands into the basket until it has completely stopped.
- Do not use damaged wires or plugs.
- Keep children away from the machine.
- Do not place candles, mosquito-repellent incense, or dog-ends near the machine.
- Do not wash waterproof fabrics or clothes.
- Do not connect to hot water supply (above 50°C).
- Ensure water supply hose is tightly screwed.
- Hang the water drainage hose properly.
- Do not stand or put weight on the unit.
- Do not use sharp-edged articles to press buttons.