-11-
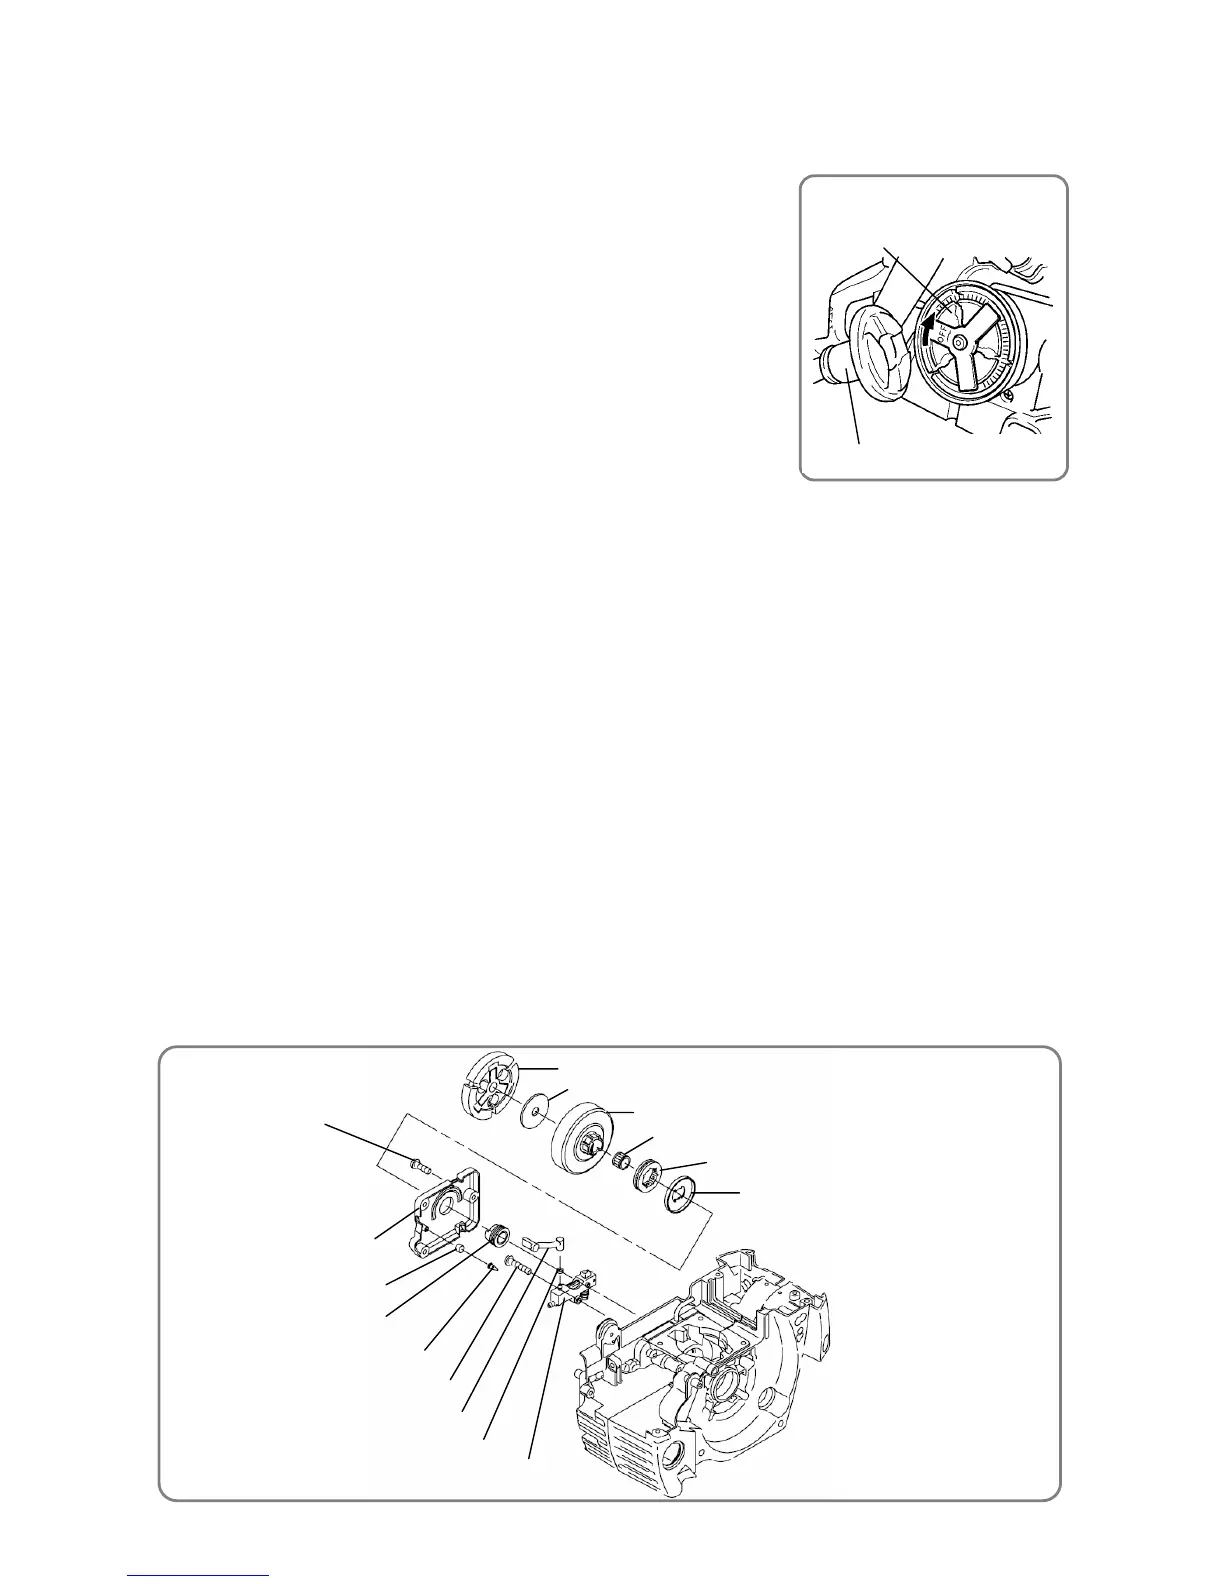
Clutch [131]
Clutch Washer (B) [132]
Clutch Housing [133]
Needle Bearing [134]
Rim Sprocket [135]
Clutch Washer [136]
Seal Lock Screws M4 x 10 [16]
Oil Pump Cover [137]
Worm [138]
Oil Pump [30]
Oil Pipe [29]
Clip [31]
Machine Screw M4 x 16 [28]
Air Vent Valve (B) [140]
Ɣ Clutch and oil pump
Air Vent Sponge [139]
5. Disassembly and reassembly of the clutch and oil pump
[Tools required]
Ɣ J-361 jig (No.6698723) (clutch puller)
Ɣ Phillips screwdriver
(1) Disassembly
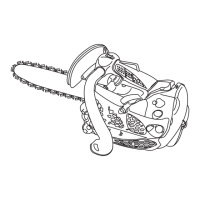
Ɣ Align the pawl of the J-361 jig (clutch puller) with the Clutch [131],
and then use an impact driver to turn it in the arrow direction as
shown in the illustration on the right to remove the Clutch [131].
Remove Clutch Washer (B) [132], the Clutch Housing [133], Needle
Bearing [134], Rim Sprocket [135], and Clutch Washer [136].
CAUTION: Note that the Clutch [131] is screwed into the Crank
Shaft [83] with left-hand threads. Do not remove Spark
Plug BPM-7A/BPMR7A [46] from the Cylinder [73]. Turn
off the Decomp. [45] (by pulling it toward you).
Ɣ Remove the three Seal Lock Screws M4 x 10 and [16] Oil Pump Cover [137].
CAUTION: The threads of the Seal Lock Screws M4 x 10 [16] may be easily broken. Therefore,
do not tighten the screws too much.
Ɣ Remove the Machine Screw M4 x 16 [28] and Clip [31], and then remove the Oil Pipe [29] from the Oil
Pump [30]. Finally, remove the Oil Pump [30] from the main body.
(2) Reassembly
Reassembly can be conducted by reversing the disassembly procedure. However, special attention
should be given to the following items.
Ɣ Before mounting the Worm [138], apply 0.1 to 0.3 gram of Alvania Grease RL3 to its inner diameter.
Ɣ Before mounting the Oil Pump
[30]
, apply 0.6 to 1.0 gram of Alvania RL3 on the gear portion of the Worm
[138]
.
Ɣ Securely engage the Oil Pump [30] with the gears of the Worm [138].
Ɣ Place the Clutch Washer [136] on the protrusions of the Worm [138] for assembly. (See the illustration
titled “Mounting the clutch washer” on the next page for details.)
Ɣ Before mounting the Clutch [131], degrease the female threads of the Clutch [131] and the threads of
the Crank Shaft [83].
Ɣ Use the Hitachi 14.4V impact driver to tighten the Clutch [131] for about one second, in order to obtain
the specified torque.
CAUTION: Ɣ Never tighten excessively. Otherwise, the flange of the Worm [138] may break and
thus inhibit removal.
Ɣ Run the assembled chain saw and make sure the Clutch [131] is firmly tightened.
Ɣ Removing the clutch
J-361 jig (clutch puller)
Clutch [131]
 Loading...