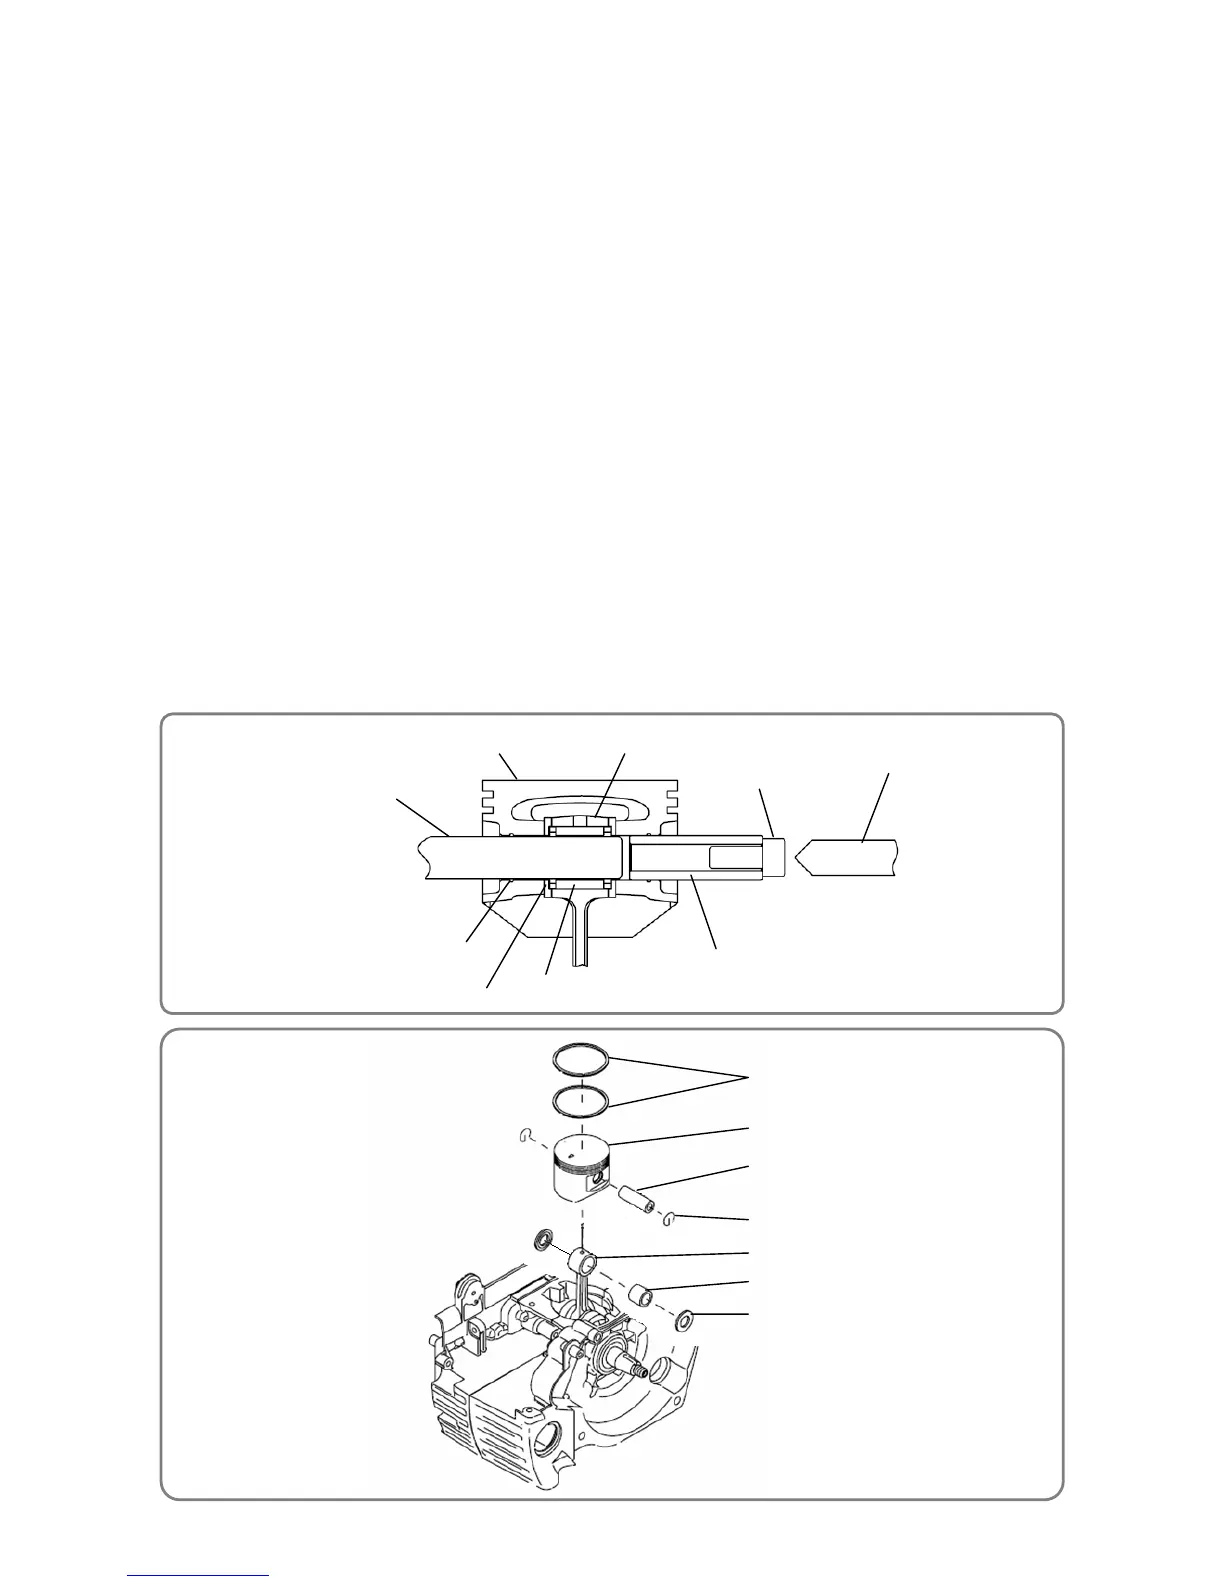
Piston Pin Collar (C51) [79] Needle Bearing (A) [86]
Circlip mounting groove
Connecting rod small end
Ɣ Piston and piston ring
Piston Ring [76]
Piston (44) (M) [77]
Piston Pin [85]
Needle Bearing (A) [86]
Piston Pin Collar (C51) [79]
Circlip [78]
Connecting rod small end
Ɣ Insert the Piston Pin [85] by following the procedure below. (See “Mounting the piston.”)
(1) Insert the Piston Pin [85] into the Piston (44) (M) [77] by about 7 mm.
CAUTION: Be sure to support the flat portion (casting surface) of the Piston (44) (M) [77]
when using a hand press. Do not tilt the Piston Pin [85].
(2) Set the J-359 jig (piston pin extraction tool ass’y) to the Piston (44) (M) [77], and then set a hex.
socket hd. bolt M5 x 12 into the pushing side of the Piston Pin [85].
(3) Set Needle Bearing (A) [86] and the two Piston Pin Collars (C51) [79] to the connecting rod small
end, and then cover it with the Piston (44) (M) [77]. (Align the triangular arrow on top of the Piston
(44) (M) [77] with the direction of the exhaust port of the Cylinder [73].) Insert a round bar about
9.8 mm in diameter (e.g., borer 10 mm in diameter) into the Piston (44) (M) [77] opposite the side
where the Piston Pin [85] is inserted, in order to prevent Needle Bearing (A) [86] and the two
Piston Pin Collars (C51) [79] from becoming misaligned.
CAUTION: Mount the Piston Pin Collar (C51) [79] with its concave portion facing Needle
Bearing (A) [86].
(4) With the round bar 9.8 mm in diameter inserted, turn the pin pullout bolt of the J-359 jig (piston pin
extraction tool ass’y) clockwise, and then push in the Piston Pin [85] just before the circlip
mounting groove of the Piston (44) (M) [77].
CAUTION: Do not get the Piston Pin Collars (C51) [79] caught in other parts.
Ɣ Use long-nose pliers to fit the tip of the Circlip [78] (2 pcs.) into the groove of the Piston (44) (M) [77],
and then turn it until the Circlip [78] is completely mounted.
Ɣ Align the opening of the Piston Ring [76] (2 pcs.) with the knock pin of the Piston (44) (M) [77].
Ɣ After mounting the Piston (44) (M) [77], lightly apply 2-cycle oil to Needle Bearing (A) [86].
 Loading...