6
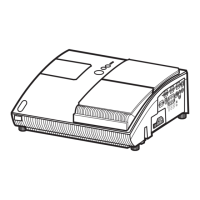
CP-A100 / ED-A100 / ED-A110 (A1DN)
4. Adjustment
4-1 Before adjusting
4-1-1 Selection of adjustment
When any parts in the table 4-1 are changed, choose the proper adjusting items with the chart.
Table 4-1: Relation between the replaced part and adjustment
Replaced
part
Adjustment
Flicker
(Chap.4-2)
Ghost
(Chap.4-3)
DC OFF
(Chap.4-4)
E-POS
(Chap.4-5)
White
balance
(Chap.4-6)
Color
uniformity
(Chap.4-7)
Dichroic
optics unit
LCD/LENS
prism
assembly
PWB
assembly
Main
Lamp
unit
assembly
: means need for adjustment. : means not need for adjustment.
: means recommended.
4-1-2 Setting of condition before adjustments
1. Before starting adjustments, warm up projector
for about 20~30 minutes.
Set the projector horizontal. Use the no bend screen.
2. Set D Zoom to 100 and project an image with
more than 1m (40 inches) in diagonal size.
3. Normalizing the video adjustments
Press the [MENU] button to display the EASY
menu. If Advanced menu comes up, move to the
Easy menu.
Select the RESET in the EASY menu and press
the [
] or [ENTER] button to open the RESET
dialog. Choose the EXECUTE with the [ ] button.
Note that the projector will not allow you to reset
its adjustment values with no signal input.
4. Perform all adjustments from the FACTORY
MENU. Operate as follows to display the
FACTORY MENU.
When you use the remote control...
a. Press the [MENU] button of the remote
control to display the Easy menu. (If the
Advanced menu appears, move to the Easy
menu.)
b. Select the RESET in the Easy menu, and
then press the [
] or [ENTER] button.
c. Next, press the [RESET] button one time. And
hold the [RESET] button for 3 seconds or lon-
ger (the FACTORY MENU will appear).
When you use the keypad of the projector...
a. Press the
[ ],
[]
button of the projector to
display the Easy menu. (If the Advanced
menu appears, move to the Easy menu.)
b. Select the RESET in the Easy menu, and
then press the [
] or [ENTER] button.
c. Next, press the [ ] button one time. And re-
press and hold the [
] button together with
the [INPUT] button for 3 seconds or more (the
FACTORY MENU will appear).
 Loading...