This document describes the Hitachi Split Type Air Conditioner, covering both the indoor and outdoor units, their functions, usage, and maintenance.
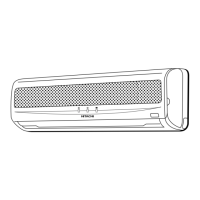
Indoor Unit
The indoor unit features an Air filter designed to prevent dust from entering the unit, ensuring cleaner air. The Front panel provides access to the internal components for maintenance. Indoor unit indicators are light indicators that show the current operating condition of the unit. The Horizontal deflector and Vertical deflector (Air Outlet) control the direction of the airflow. The Remote controller sends operation signals to the indoor unit, allowing you to operate the entire system.
The indoor unit indicators include an OPERATION LAMP that lights up during normal operation. During heating, this lamp flashes in two scenarios: during preheating (for about 2-3 minutes after startup) and during defrosting (for 5-10 minutes, approximately once an hour, when frost forms on the outdoor unit's heat exchanger). The TIMER LAMP lights when the timer function is active. The FILTER LAMP illuminates after approximately 100 hours of operation to remind you to clean the air filter. This lamp turns off when the POWER SWITCH is set to OFF and then ON again.
An AUTO RESTART SWITCH is also present. In the event of a power failure, the air conditioner will automatically restart in the previously selected mode once power is restored. If a power failure occurs during TIMER operation, the timer will reset, and the unit will either start or stop operating based on a new timer setting.
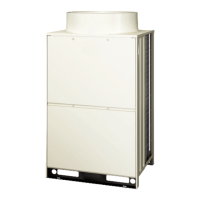
Outdoor Unit
The outdoor unit includes a Drain pipe for condensed water to drain outside. Connecting cord and insulation pipe for piping facilitate the connection between the indoor and outdoor units. Air enters the outdoor unit through the Air inlet (Back and Left side) and is discharged through the Air outlet. During heating operation, it's important not to close the drain outlet portion in chilly areas to prevent water from freezing.
Remote Control Unit
The remote controller allows you to manage various functions of the air conditioner. It has a Signal emitting window/transmission sign that blinks when a signal is sent to the indoor unit. The Display shows the selected room temperature, current time, timer status, function, and circulation intensity.
Key buttons include:
- START/STOP button: To start or stop the operation.
- SLEEP button: To set the sleep timer.
- TEMPERATURE buttons: To raise or lower the temperature setting. Holding these buttons changes the value more quickly.
- TIME button: To set and check the time and date.
- RESET buttons: For resetting settings.
- FUNCTION selector: To choose between AUTO, HEAT, DEHUMIDIFY, COOL, and FAN modes.
- FAN SPEED selector: To adjust the fan speed (AUTO, HI, MED, LOW).
- AUTO SWING button: To control the angle of the horizontal air deflector.
- TIMER control: To set the timer functions. This includes OFF-TIMER button (turn OFF time), ON-TIMER button (turn ON time), RESERVE button (time setting reservation), and CANCEL button (cancel time reservation).
Precautions for Remote Control Use: Avoid placing the remote controller in direct sunlight or near a heater. Handle it carefully to prevent dropping or water damage. After the outdoor unit stops, it will not restart for about 3 minutes as a protective measure. Pressing the FUNCTION selector button during operation may also cause the device to stop for about 3 minutes for protection.
Operation Modes
Automatic Operation: The device automatically selects HEAT, COOL, or DEHUMIDIFY mode based on the initial room temperature. The selected mode remains constant even if the room temperature changes. You can adjust the temperature setting by up to 3°C. The display does not show the preset temperature in AUTO mode, but a beep will sound if you change the setting.
- Over 27°C: COOL (27°C), FAN SPEED HI at start, then MED or LOW.
- 23~27°C: DEHUMIDIFY (slightly lower than room temperature), FAN SPEED LOW.
- Under 23°C: HEAT (23°C), FAN SPEED HI at start, then MED or LOW.
Heating Operation: Use when the outdoor temperature is under 21°C. The heating function may not work above 21°C to protect the device. Recommended room temperature for heating is 18-22°C.
- Select HEAT mode with the FUNCTION selector.
- Set FAN SPEED: AUTO (HI at first, then MED), HI (economical, quick warming), MED (quiet), LOW (more quiet).
- Adjust room temperature using TEMPERATURE buttons.
Dehumidifying Operation: Use when the room temperature is over 16°C. The function will not work below 15°C. Recommended room temperature for dehumidifying is 20-26°C.
- Select DEHUMIDIFY mode with the FUNCTION selector. FAN SPEED is automatically set to LOW.
- Adjust room temperature using TEMPERATURE buttons.
- If room temperature is higher than the setting, the unit dehumidifies to the preset level. If lower, it dehumidifies at a slightly lower temperature than current, stopping when the room temperature falls below the setting.
Cooling Operation: Use when the outdoor temperature is 22-39°C. High indoor humidity (80%) may cause dew to form on the indoor unit's air outlet grille. Recommended room temperature for cooling is 25-28°C.
- Select COOL mode with the FUNCTION selector.
- Set FAN SPEED: AUTO (HI at first, then MED), HI (economical, quick cooling), MED (quiet), LOW (more quiet).
- Adjust room temperature using TEMPERATURE buttons.
- The cooling function will not start if the temperature setting is higher than the current room temperature, even if the OPERATION lamp is lit. It will start once the temperature is set below the current room temperature.
Fan Operation: This mode allows the device to function as an air circulator, useful for drying the indoor unit at the end of summer.
- Select FAN mode with the FUNCTION selector.
- Press the FAN SPEED button to change the display setting, but the actual fan speed cannot be directly changed from HI to LOW in this mode.
- In AUTO fan speed mode during cooling/heating, fan speed adjusts automatically based on the difference between room and setting temperatures.
Timer Settings
The timer can be set as an OFF-timer, ON-timer, or ON/OFF-timer. First, set the current time.
- Setting Current Time: Use the TIME button to set the current month and day.
- OFF-Timer: Set the device to turn off at a specific time.
- ON-Timer: Set the device to turn on at a specific time.
- ON/OFF-Timer: Set both turn-off and turn-on times. The switching occurs at the earlier preset time.
- Cancel Reservation: Point the remote controller at the indoor unit and press the CANCEL button.
Sleep Timer: The device operates for a designated number of hours and then turns off. It controls FAN SPEED and room temperature automatically for comfort. You can set it to turn off after 1, 2, 3, or 7 hours.
- Heating: Room temperature is controlled 5°C below the setting, and FAN SPEED is set to LOW 30 minutes after setting the sleep timer.
- Cooling/Dehumidifying: Room temperature is controlled 2°C above the setting, and FAN SPEED is set to LOW 30 minutes after setting the sleep timer.
- If date or current time is not set, the sleep timer cannot be set. If set after other timers, it takes precedence. Other timers cannot be set during sleep timer operation.
Adjusting Air Deflector
- Upward and Downward Directions: The horizontal air deflector automatically adjusts to the proper angle. Pressing the AUTO SWING button once makes it swing continuously; pressing it again stops it at the current position. Allow about 6 seconds for movement to start. When stopped, it closes the air outlet.
- Caution: During cooling, avoid continuous swinging of the horizontal air deflector for long periods, as it may cause condensation and dripping.
- Left and Right Directions: Hold and manually adjust the vertical air deflector to direct air left or right.
Battery Exchange
To replace batteries in the remote controller:
- Remove the cover and take out old batteries.
- Install new batteries, ensuring correct polarity.
- Caution: Do not mix new and old batteries or different types. Remove batteries if the remote controller won't be used for 2-3 months.
Ideal Ways of Operation
- Suitable Room Temperature: Avoid freezing temperatures, which are unhealthy and waste energy.
- Install Curtain or Blinds: Reduce heat entering the room through windows.
- Ventilation: Periodically open doors and windows to allow fresh air in.
- Effective Usage of Timer: Use OFF or ON timer modes, especially at night, to maintain a comfortable room temperature.
- Clean Air Filter: Clean the air filter every 2 weeks to maintain air volume and cooling efficiency, preventing energy waste.
- Adjust Suitable Temperature for Baby and Children: Pay attention to room temperature and airflow direction for infants, children, and elderly individuals with limited mobility.
- Air Conditioner and Heat Source: If the heat in the room exceeds the unit's cooling/heating capacity (e.g., many people, heating equipment), the preset temperature may not be achieved.
- Not Operating for a Long Time: If the indoor unit is not used for an extended period, switch off the main power. Even in "OFF" mode, the indoor unit consumes about 8W for its control circuit if mains power is still on.
- When Lightning Occurs: To protect the unit, stop operation and unplug it from the socket during a thunderstorm.
- Interference from Electrical Products: To avoid noise interference, place the indoor unit and remote controller at least 1m away from other electrical products like inverter-type fluorescent lamps or TVs.
- Notes on Operation: Slight flowing noise of refrigerant or rubbing noise from the fan casing may occur during quiet operation or when stopping, which is normal. Odors may be emitted if smoke, foodstuffs, or cosmetics stick to the air filter and evaporator, requiring regular cleaning.
Maintenance
Cleaning and maintenance should only be performed by qualified service personnel. Always stop operation and switch off the power supply before cleaning.
1. Air Filter
- Clean the air filter regularly to prevent dust buildup, which can reduce airflow, cooling capacity, and cause noise.
- Procedure:
- Open the front panel by holding it at both sides.
- Gently lift and remove the air cleansing and deodorizing filter from the air filter frame.
- Push upward to release the claws and pull out the main air filter.
- Vacuum dust from both filters. If heavily soiled, rinse under running tap water and gently brush with a soft bristle brush. Allow filters to dry in the shade.
- Re-insert the air cleansing and deodorizing filter into its frame. Ensure the "FRONT" mark faces forward.
- Slot both filters back into the original state.
- Push the front panel at the three arrow portions and close it.
- Caution: Do not bend the air cleansing and deodorizing filter. Do not wash with hot water above 40°C, as it may shrink. Shake off moisture completely and dry in the shade, away from direct sunlight. Do not use detergent on the air cleansing and deodorizing filter, as it may deteriorate its electrostatic performance.
- Note: Air cleansing and deodorizing filters should be cleaned monthly or sooner. They may lose deodorizing function over time and are recommended to be replaced every 3-6 months. Do not operate the air conditioner without filters, as dust may enter and cause faults.
2. Washable Front Panel
- Remove the front panel and wash with clean water and a soft sponge. Use neutral detergent, then rinse thoroughly.
- If not removed, wipe with a soft dry cloth. Wipe the remote controller thoroughly.
- Removing the front panel: When fully opened, push the right arm inward to release it, then pull the panel slightly forward while closing it.
- Attaching the front panel: Align the projections of the left and right arms with the flanges in the unit and securely insert them into the holes.
- Caution: Do not splash water directly on the unit. Do not use hot water (above 40°C), benzine, gasoline, acid, thinner, or a brush, as these will damage the plastic surface and coating.
3. Maintenance at Beginning of Long Off Period
- Run the unit in COOL mode, set temperature to 32°C, and fan speed to HI for about half a day on a fine day to dry the entire unit.
- Switch off the power plug.
Regular Inspection
Please have the following points checked by qualified service personnel either every half-yearly or yearly:
- Is the earth line disconnected or broken?
- Is the mounting frame seriously affected by rust, and is the outdoor unit tilted or unstable?
- Is the power line plug firmly plugged into the socket (ensure no loose contact)?
After Sale Service and Warranty
When Asking for Service, Check the Following Points:
- If it does not operate: Is the fuse alright? Is the voltage extremely high or low? Is the circuit breaker "ON"?
- If it does not cool/heat well: Was the air filter cleaned? Does sunlight fall directly on the outdoor unit? Is the air flow of the outdoor unit obstructed? Are doors or windows open, or is there a heat source in the room? Is the set temperature suitable?
Contact your sales agent immediately if the air conditioner still fails to operate normally after these inspections. Provide the model, production number, date of installation, and a description of the fault. The power supply must be connected at the rated voltage; otherwise, the unit may break or not reach its specified capacity.