EasyManua.ls Logo

Hitachi Ultrastar 7K3000 - User Manual

Hitachi Ultrastar 7K3000
3 pages
Print Icon
To Next Page IconTo Next Page
Loading...
Quick Installation Guide
Hitachi Ultrastar 7K3000
& Ultrastar 5K3000
Models: HUA723030ALA640
HUA723030ALA641
HUA723020ALA640
HUA723020ALA641
HUA5C3030ALA640
HUA5C3020ALA640
HUA5C3030ALA641
HUA5C3020ALA641
System Requirements for Serial ATA
The following are needed to install a Serial ATA
(SATA) drive to a system:
SATA capable motherboard or controller card
SATA hard drive
SATA cable (1 meter or less in length)
Handling precautions
Set the drive down gently to prevent damage
from impact or vibration.
Do not open the ESD bag containing the drive
until needed.
Handle the drive carefully by the edges. Do not
touch the exposed printed circuit board or any
electronic components.
Do not press on the top or bottom of the drive.
Before handling the drive, discharge any static
electricity from yourself and your clothing. With
one hand, touch an unpainted metal surface on
your computer chassis, then touch the ESD bag
with the other hand. Remain in contact with the
chassis and the bag for a minimum of two
seconds.
Quick installation procedure
Note: Back up all data before installing drive.
1. Turn off the computer.
2. Unplug the computer.
3. Remove the computer cover as instructed by
the computer system manual.
4. Discharge static electricity (see Handling
precautions).
5. Note the mounting position of existing drives
and cables. If you are replacing a drive or any
cable, remove it now.
6. Remove the drive from the ESD bag.
7. Record the model, the part number, and the
serial number of the drive for future reference.
8. Attach the Serial ATA cable to the drive. Match
key on cable to connector on drive
Mounting instructions
Note: The mounting hole and connector locations are
shown in figures 1 and 2.
1. Mount the drive securely.
2. Verify all attachments.
3. Replace the computer cover.
4. Plug in the computer.
5. Turn on the computer.
6. Verify that the hard disk is recognized by the
BIOS. Instructions for accessing your BIOS
can be found in the computer system manual
or in the motherboard manufacturer
documentation. If the drive is not recognized in
the BIOS, check the following:
Page 1 version 1.0
Question and Answer IconNeed help?

Do you have a question about the Hitachi Ultrastar 7K3000 and is the answer not in the manual?

Summary

Hard Drive Installation and Handling

System Requirements for Serial ATA

Lists required components like SATA motherboard, SATA hard drive, and SATA cable for installation.

Handling Precautions

Provides essential safety guidelines for handling the drive, including static discharge and physical contact.

Quick Installation Procedure

Outlines the step-by-step process for installing the drive, including powering off and connecting cables.

Mounting Instructions

Details how to securely mount the drive within the computer system and verify its recognition.

Mounting Recommendations

Guidelines for drive orientation, screw torque, and depth to ensure reliable operation and prevent excessive motion.

Overview

This document provides a quick installation guide for the Hitachi Ultrastar 7K3000 and Ultrastar 5K3000 series hard drives. It covers system requirements, handling precautions, installation procedures, mounting instructions, and mounting recommendations.

Function Description

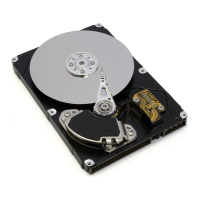
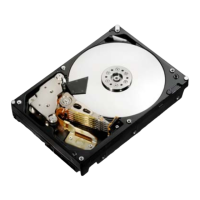
The Hitachi Ultrastar 7K3000 and 5K3000 are hard disk drives designed for data storage. The guide outlines the steps for physically installing these Serial ATA (SATA) drives into a computer system and ensuring they are recognized by the system's BIOS. It also provides guidance on preparing the drive for use with an operating system, including partitioning and formatting. The drives support various interface speeds (6Gbps, 3Gbps, and 1.5Gbps), with the actual speed being dependent on the Host Bus Adapter (HBA) or SATA chipset of the system.

Important Technical Specifications

  • Models Covered:
    • HUA723030ALA640
    • HUA723030ALA641
    • HUA723020ALA640
    • HUA723020ALA641
    • HUA5C3030ALA640
    • HUA5C3020ALA640
    • HUA5C3030ALA641
    • HUA5C3020ALA641
  • Interface: Serial ATA (SATA)
  • Interface Speeds Supported: 6Gbps, 3Gbps, and 1.5Gbps. The actual speed is determined by the system's HBA or SATA chipset.
  • Mounting Hole Dimensions (Figure 1):
    • Thread Type: 6-32UNC
    • Dimensions (in mm):
      • (1): 41.28±0.5
      • (2): 44.45±0.2
      • (3): 95.25±0.2
      • (4): 6.35±0.2
      • (5): 28.5±0.5
      • (6): 60.0±0.2
      • (7): 41.6±0.2
    • Maximum Penetration: 4.5 mm (6X) for side view, 4.0 mm (4X) for bottom view.
  • Connector Location Dimensions (Figure 2):
    • Overall Length: 41.13 mm (REF)
    • Width: 13.43 mm (REF)
    • Height: 3.5 mm
    • Distance from edge to connector: 33.39 mm
  • Mounting Screw Torque Recommendation: 0.6 - 1.0 Nm (6-10 Kgf.cm)
  • Mounting Screw Depth Recommendation: 4 mm maximum for bottom mounting, 4.5 mm maximum for horizontal mounting.
  • Capacity Notice: One GB is equal to one billion bytes and one TB equals 1,000 GB (one trillion bytes). Accessible capacity will vary due to formatting, partitioning, operating system, and other factors.
  • Operating Orientation: The drive will operate in all axes (6 directions). Performance and error rate will remain within specification limits even if operated in orientations different from how it was formatted.

Usage Features

  • System Requirements: To install a SATA drive, a SATA-capable motherboard or controller card, the SATA hard drive itself, and a SATA cable (1 meter or less) are required.
  • Installation Procedure:
    1. Back up all data before installation.
    2. Turn off and unplug the computer.
    3. Remove the computer cover.
    4. Discharge static electricity (see Handling precautions).
    5. Note existing drive/cable positions; remove if replacing.
    6. Remove the drive from its ESD bag.
    7. Record the model, part number, and serial number for future reference.
    8. Attach the SATA cable to the drive, matching the key on the cable to the connector.
    9. Mount the drive securely.
    10. Verify all attachments.
    11. Replace the computer cover.
    12. Plug in and turn on the computer.
    13. Verify that the hard disk is recognized by the BIOS. If not, check connections and BIOS settings.
  • BIOS Recognition: Ensure "Auto Detect" is enabled for the port the hard disk is connected to. Verify secure and undamaged SATA and power cable connections. Ensure the latest BIOS version is loaded onto the system.
  • Large Capacity Drives (>2.2TB): For drives larger than 2.2TB, specific considerations apply to take advantage of full capacity. Users are advised to refer to Hitachi's "High Capacity Technology Brief" and "Above 2TB" web page for more information.
  • Operating System Setup: The operating system setup utility will guide users through partitioning and formatting the drive before installing the operating system. Additional support information is available on the Hitachi GST website.
  • Mounting Recommendations: The drive should be mounted securely to prevent excessive motion or vibration during operation. Appropriate screws or equivalent mounting hardware should be used.
  • Vibration and Shock Testing: Drive-level vibration and shock tests are to be conducted with the drive mounted to a table using the bottom four screws.

Maintenance Features

  • Handling Precautions:
    • Set the drive down gently to prevent damage from impact or vibration.
    • Do not open the ESD bag until needed.
    • Handle the drive carefully by the edges; avoid touching the exposed printed circuit board or electronic components.
    • Do not press on the top or bottom of the drive.
    • Before handling, discharge static electricity by touching an unpainted metal surface on the computer chassis and then the ESD bag for a minimum of two seconds.
  • Troubleshooting (if drive not recognized by BIOS):
    • Check if "Auto Detect" is enabled for the port.
    • Verify that SATA and power cables are connected securely and are not damaged.
    • Ensure the latest BIOS version is loaded onto the system.
  • Documentation: Instructions for accessing the BIOS can be found in the computer system manual or motherboard manufacturer documentation. Additional support and product specification information is available on the Hitachi GST website.
  • Product Specifications: Specifications provided are samples and subject to change. Actual specifications for unique part numbers may vary. Users should visit the Support section of the Hitachi GST website for the latest information.

Hitachi Ultrastar 7K3000 Specifications

General IconGeneral
BrandHitachi
ModelUltrastar 7K3000
CategoryStorage
LanguageEnglish

Related product manuals