This document is an operating manual for HIYASU Room Air Conditioners, specifically wall-mounted types. It covers various indoor and outdoor unit models, including HSE-7C/R, HSE-9C/R, HSE-12C/R, HSE-16C/R, HSE-17C/R, HSE-20C/R, HME-9C2/R2, HME-127C3/C4, HOE-7C/R, HOE-9C/R, HOE-12C/R, HOE-16C/R, HOE-17C/R, HOE-20C/R, HOME-18C2/R2, HOME-24C3/C4.
Function Description:
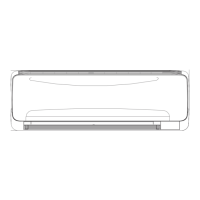
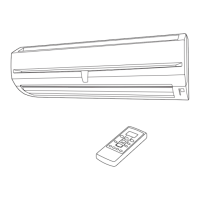
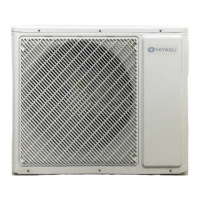
The HIYASU room air conditioner is designed for cooling and heating indoor spaces, depending on the model. It features a wall-mounted indoor unit and an outdoor unit. The indoor unit includes an inlet grill, a mildewproof air filter, and an outlet with vertical and horizontal louvers for adjusting airflow direction. A remote signal receiver on the indoor unit generates a digital beeping sound when a signal from the wireless remote controller is received.
The indoor unit's control panel (for some models) includes a power indicator, timer mode indicator, and operation mode indicator. Some models also feature a test running switch (manual) for cooling when the room temperature is below 16°C (not for normal operation) and an emergency switch (manual) for temporary operation if the remote controller is lost or defective.
The remote controller is the primary interface for operating the air conditioner. It features buttons for:
- Power ON/OFF: To start and stop the unit.
- TEMP: To select the desired temperature.
- FAN: To select fan speed (LO, MED, HI, AUTO).
- SWING: To set auto fan direction (vertical flap adjustment).
- MODE: To select operation modes (AUTO, COOL, DRY, HEAT, FAN).
- SLEEP: To activate sleep mode.
- CLOCK: To set the correct time.
- SET: To confirm Timer and Clock settings.
- TIMER: To select TIMER ON, TIMER OFF, or TIMER ON/OFF operations.
- HOUR: To set clock and timer settings.
- LOCK: To lock buttons and LCD display.
- RESET: To reset the controller to normal condition.
The air conditioner supports various operation modes:
- AUTO RUN: The unit automatically selects the appropriate mode.
- COOL: For cooling, recommended in summer.
- HEAT: For heating, recommended in winter (not available on cooling-only units).
- DRY: For dehumidification, recommended in spring, autumn, and damp climates.
- FAN: For fan-only operation.
The Comfortable SLEEP function adjusts the temperature automatically during sleep. In COOL mode, the temperature increases by 1°C after one hour, and another 1°C after another hour, then stops after 6 hours. In HEAT mode, the temperature decreases by 2°C after one hour, another 2°C after another hour, runs at this temperature for 3 hours, then increases by 1°C and stops automatically 3 hours later. This function is not available in FAN mode.
The Power Failure Resume Function (available on some models) allows the unit to automatically restart with previous settings after a power failure, with a 3-minute delay for compressor protection.
Important Technical Specifications:
- Applicable Ambient Temperature Range:
- Cooling (Indoor): Max D.B./W.B. 32°C/23°C, Min D.B./W.B. 18°C/14°C
- Cooling (Outdoor): Max D.B. 43°C, Min D.B. 15°C
- Heating (Indoor): Max D.B. 27°C, Min D.B. 15°C
- Heating (Outdoor): Max D.B./W.B. 24°C/18°C, Min D.B./W.B. -7°C/-8°C
- Power Supply: 220V-230V voltage.
- Connecting Wire Type: H05RN-F or HO7RN-F.
- Fuse on PC Board: 50F.3.15A/250V (for series 16,17,20) or 50F.2.5A/250V (for series 07,09,12).
- Distance between indoor unit and floor: Should be more than 1.8m.
- Remote Controller Batteries: 2 R-03 batteries.
- Remote Controller Signal Range: Within 7m, without obstacles.
Usage Features:
- Installation: Requires professional installation by Sales/Service Points to prevent electric shock, fire, or water leakage. An "earth" cable must be connected.
- Power Connection: Connect the power supply cord completely to the outlet. Do not use extended or bundled cords.
- Airflow Adjustment: Vertical airflow is adjusted via the remote controller (SWING button). Horizontal airflow is adjusted manually using a knob on the air conditioner.
- Timer Operation: Allows scheduling unit start or stop times up to 24 hours in advance. The clock must be set correctly before using the timer.
- Emergency Operation: If the remote controller is defective or lost, the unit can be operated via an emergency switch. This mode has fixed temperature and airflow settings (26°C/AUTO/COOL if >23°C, 23°C/AUTO/HEAT if <23°C). Timer operation is not available in this mode.
- Test Operation: For testing purposes when the room temperature is below 16°C. Pressing the test operation switch for more than 5 seconds starts cooling with "Hi" airflow.
- Safety Precautions:
- Do not install near flammable gas leakages, fireplaces, or heating devices.
- Avoid exposure to vapor or oil steam.
- Ensure proper drainage hose installation.
- Do not operate the power switch with wet hands.
- Do not insert objects into air inlet/outlet.
- Do not channel airflow directly at people, especially infants and elderly.
- Do not repair or reconstruct the air conditioner yourself.
- Do not stop/start by disconnecting/connecting the power supply cord.
- Do not use for storing food, artwork, precise equipment, or breeding animals/growing plants.
- Ensure good condition of the unit installation stand.
- Do not pour water onto the unit for cleaning.
- Do not place objects on the unit or climb on it.
- Do not place flower vases or water containers on top of the unit.
- Ensure young children are supervised and do not play with the appliance.
- In case of burning smell or other abnormalities, immediately stop the unit and cut off power.
Maintenance Features:
- Cleaning of Unit Casing: Cut off power supply. Wipe with a soft, dry cloth. For heavy stains, use a neutral detergent, squeeze water from the cloth, and wipe off detergent completely. Do not use water, glass cleaner, or chemical-soaked cloths.
- Cleaning of Remote Controller: Use a dry cloth.
- Cleaning of Air Filter:
- Open the inlet grill by pulling it upward.
- Remove the air filter by pushing up its center tab slightly and pulling it down.
- Clean the filter using a vacuum cleaner or by washing with water.
- Dry the filter completely in the shade.
- Attach the filter behind the stopper, ensuring the "Front" indicator faces forward.
- Close the inlet grill.
- It is recommended to clean the air filter every 15 days for optimal performance.
- Replacement of Electrostatic Filter (if applicable):
- Detach the air filters.
- Detach the electrostatic filters.
- Replace the old filter with a new one into the frame.
- Open the frame of the filter.
- Attach the electrostatic filters (white side up).
- Attach the air filters and close the inlet grill.
- If the electrostatic filter can no longer be used, a new one should be purchased.
- Battery Replacement: Use two new same-typed R-03 batteries. If the remote controller malfunctions, press the reset key with a sharp pointed item. Remove batteries if the unit won't be used for a long period.
- General Recommendations:
- Keep doors and windows closed during operation.
- Use curtains or blinds to block direct sunlight during cooling.
- Avoid blocking the inlet or outlet.
- Do not pull the power plug to stop the unit.
- Let fresh air into the room periodically, especially if a gas appliance is running.
- Maintain a temperature difference of 3-5°C between indoor and outdoor temperatures in COOL mode to reduce load and power consumption.