Do you have a question about the HME IC300 and is the answer not in the manual?
Forms and lists for verifying installation and training completion.
Covers store layout, audio, settings, base location, antennas, switcher board, IC300.
Techniques for splicing cables when needed for installation.
Contacting GC's Superintendent and required cabling.
Guidelines for mounting the base station and IC300 unit.
Integrating cabled intercom, DM5 mic, and SP10 speaker.
Installing EC10/EC30 antennas and handling mode switch setup.
Train personnel, complete IVF, Training Checklist, submit photos.
Base station location above soffit in the counter area.
Mount EOS base on J-box and attach to cover plate.
Do not mount EOS base above or below J-box.
Have GM notch the plate for cable routing.
Connect provided CAT6 cable to network connector inside J-Box.
Packing speaker/mic in foam and identifying DM5 microphone.
Use a ladder to access bolts holding the back panel.
Tilt or disassemble rear panel for removal.
Removing front panel to access mic housing and feeding cables.
Using EC30 for outdoor/indoor coverage; utilization of all components.
Understanding EC30 coverage range and flexible mounting.
EC30 will have line-of-sight to order points.
Line-of-sight with height indicators for order points.
Includes flush, corner, and pole-mount brackets.
Antenna built from fiberglass radome for durability and aesthetics.
Location based on customer preference, aesthetics, and coverage.
Connect components and test coverage with personnel.
Mount at 12'-15', drill holes, seal wall penetration.
Determine corner location, repeat flat wall steps.
Mount at 12'-15', connect arrestor and ground wire.
Connect EC30 antenna adapter cable to base station.
List of EC30 antenna kit components provided.
List of equipment and tools not provided for installation.
Details of the HyperLink Technologies Lightning Surge Arrester.
Example ground clamp and installer responsibility for grounding.
Connect adapter cable directly to base station for optimal coverage.
Must use entire cable length for FCC compliance.
Use splitter if second antenna is needed for coverage.
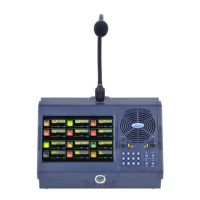
Wiring scheme for microphone, speaker, and IC300 to switcher board.
Specific wire connections for the DM1 microphone.
Specific wire connections for the IC300 interface cable.
S1 switch must be OUT; S2 switch IN/OUT based on backup.
Set presence tone, inbound/outbound audio, and VAA sensitivity.
Attenuation should only occur when order taker speaks into the microphone.
Turn dedicated mode ON in Operator Mode.
Train customer on activating Speed Team ON and OFF.
Set the system time and date.
Set store hours, including Sunday opening/closing times.
Set lane configuration for single or dual/Y lane stores.
Turn Auto Handsfree ON for Com/Headset.
Ensure microphone is set for DM5 for both lanes.
Save installer settings after all system programming is complete.
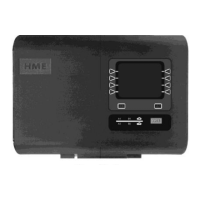
Check IC300 switch settings to ensure COMBO mode.
Mount IC300 flat on wall near J-Box with conduit connection.
Install new wiring for IC300; do not use old system wiring.
Install 18-pin connector with wires facing up.
Optional bracket for parallel wall mounting of the C-15.
Mount bracket to wall or single gang box.
Training on Com functions, navigation, speed team, audio, and greetings.
Verify store hours, save settings, handle training refusal.
Checklist for management/crew; use manuals, complete details.
Submit copy of checklist with System Verification paperwork.
Check headset rack location with CFA staff ('Manager's Choice').
Checklist items for equipment locations and ION operation.
Checklist items for wired intercom and Speed Team operation.
Checklist items for Message Center and equipment maintenance.
Checklist for leaving manuals and miscellaneous requirements.
Diagram for indicating equipment location and range areas.
In-line splice for menu boards up to 400' from base station.
HME provides 8 cable reels for dual lane extension.
Solder connections and isolate splices with tape/tubing.
Double cables, stagger connections, solder, and wrap.
| Brand | HME |
|---|---|
| Model | IC300 |
| Category | Conference System |
| Language | English |