– 6 –
PL-41252-1
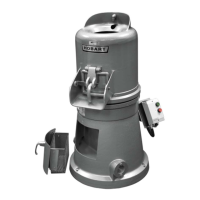
LATCH KNOB
TOP KNIFE COVER
CARRIAGE TRAY /
SUPPORT ARM
CARRIAGE TRAY
KNOB
PL-41403-1
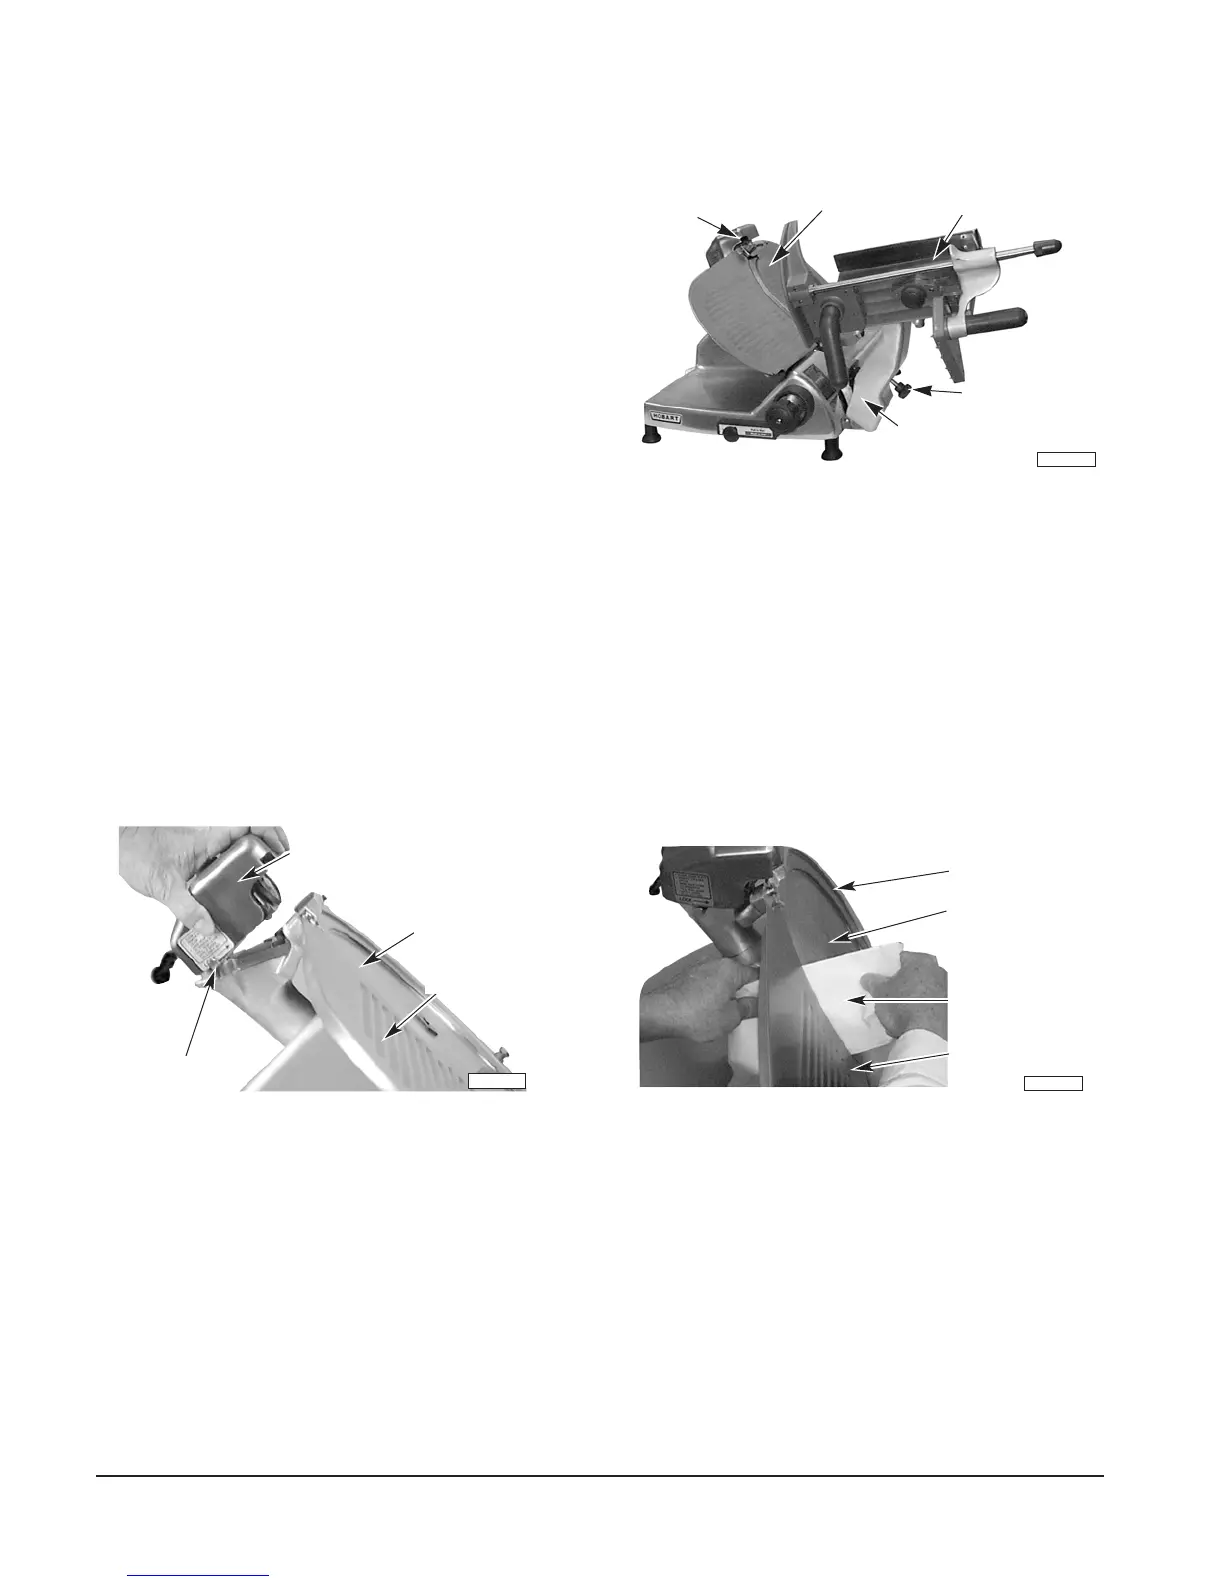
GAUGE PLATE
KNIFE
RING GUARD
PAPER TOWEL
PL-41402-1
GAUGE PLATE
KNIFE
SHARPENER
LOCK LEVER
CLEANING
This machine must be thoroughly cleaned and sanitized after each day’s operation or after being idle
for an extended period of time.
WARNING: THE SLICER KNIFE IS VERY SHARP.
EXERCISE EXTREME CAUTION WHEN WORKING
NEAR THE KNIFE.
WARNING: UNPLUG MACHINE POWER CORD
AND TURN THE INDEX KNOB FULLY CLOCKWISE
BEFORE CLEANING THE SLICER.
Use a clean cloth soaked in mild detergent and warm
water to wipe all surfaces of the machine. Rinse using
a fresh cloth and clean water. Use only products
formulated to be safe on stainless steel or aluminum.
To clean the Carriage Tray, close the gauge plate and pull the Carriage all the way to the front. Unscrew
the Knob on the Carriage Tray / Support Arm (Fig. 4). Tilt the Carriage Tray / Support Arm to the right
until almost horizontal (Fig. 4). The Carriage Tray / Support Arm can be cleaned while in this horizontal
position, or it can be removed by grasping with both hands and lifting straight up. Once removed, the
Carriage Tray / Support Arm can be cleaned in a sink. NOTE: The last three digits of the slicer serial number
are etched on the Key (Fig. 8) so you can make sure the Carriage Tray stays with its own slicer.
Remove the Top Knife Cover by rotating the Latch Knob (Fig. 4) counterclockwise and lifting it free of the
guide pins. Remove the Defl ector (Fig. 1) from its mount below the slicer knife by rotating downward. Clean
both Top Knife Cover and Defl ector with warm soapy water in a sink. Rinse with clean water.
Fig. 5 Fig. 6
Remove the sharpener by pushing the Lock Lever to the left (Fig. 5). Tilt the right side up, clearing the right
guide pin, then lift the sharpener up, clearing the left guide pin. Wipe out any residue remaining inside the
sharpener housing and clean the sharpener in a sink. Rinse with fresh water.
Clean completely around the Ring Guard by working a moistened, folded paper towel between
the Ring Guard and Knife. Insert the towel at the base of the Ring Guard. Manually rotate the knife and the
towel will wipe the Ring Guard and the edge of the Gauge Plate as it follows the knife (Fig. 6).
Wash and rinse both sides of the knife by wiping outward from the center. Use a mild detergent or sanitizer
solution only. Never clean any part of the slicer with steel pads.
Do not exceed chemical manufacturer’s recommended concentrations for detergent or sanitizer. Do
Fig. 4
 Loading...