WWW.HOBBYEAGLE.COM 11 / 15
up as shown below.
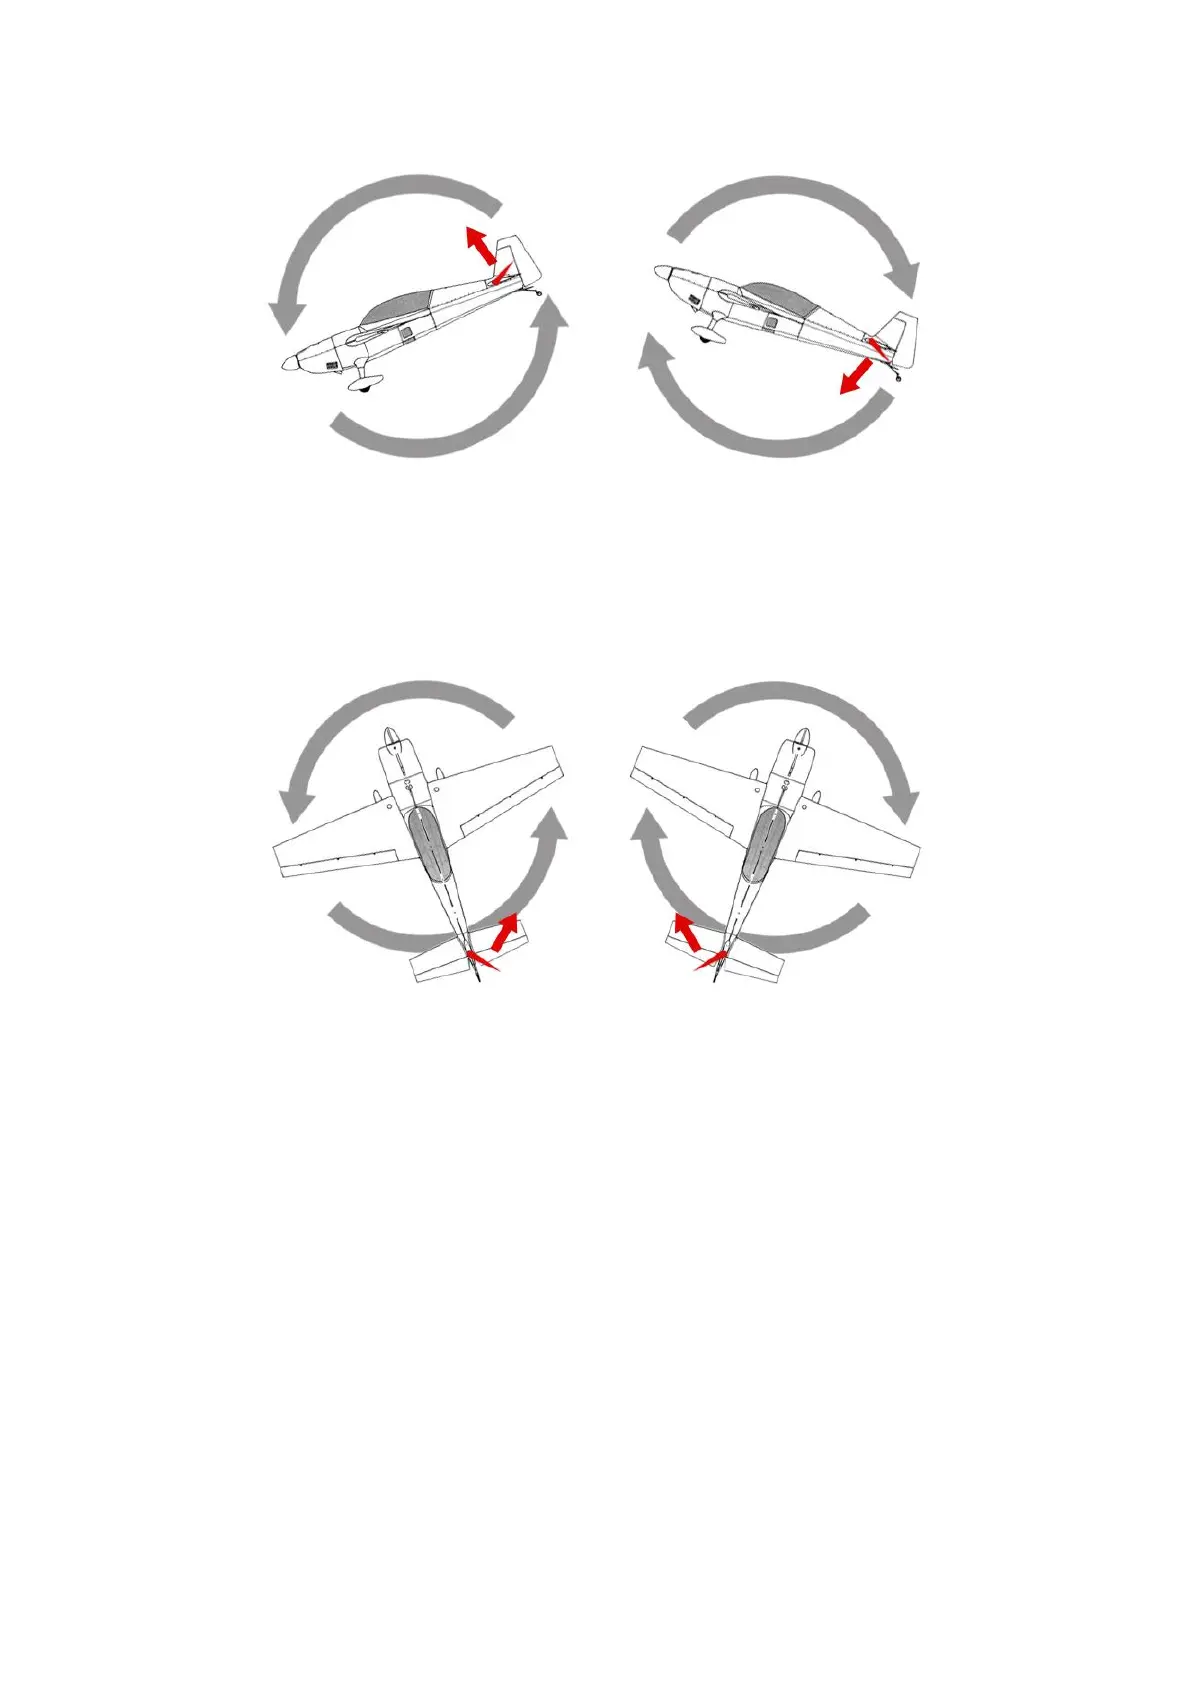
Check the gyro direction for Rudder
Quickly move the nose of the airplane to the left around the yaw axis, the rudder surface should flap right
as shown below.
5. Level Calibration
When flying in ANGLE mode or LEVEL mode, A3 Pro V2 needs to know the angle of the airplane in both
roll and pitch directions, this is achieved by calculating the attitude of its own. A small angle deviation
caused by installation can lead to an unexpected behavior when flying in ANGLE mode or LEVEL mode.
For this reason, a level calibration is recommended to offset the error caused by installation and to
establish a proper level reference of your airplane after installing the gyro.
Before calibrating, the airplane should be placed on the horizontal ground and make the wing parallel to
the ground. Make the airplane slightly nose-up because a certain elevation angle is usually required to
maintain level flight for most airplanes.
Short press the button when LED is flashing 5 times in the Setup Menu, then LED will start blink Blue
rapidly for several seconds, do not move the airplane and keep its attitude until the calibration is done.
6. Hover Calibration
As a same reason, a hover calibration is recommended to perform after installation if you want to fly with