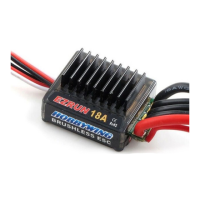
To access the programming mode turn off the ESC, then press and hold the SET key as you turn it on
again. Keep holding the SET key as the ESC does a series of 13 short beeps while flashing the red LED,
and then keep holding the SET key as the ESC signals which programmable item it is up to. It will signal
which item it is at by beeping a sequence of short and long beeps and flashing the Green LED. Only release
the SET key when you have got to the item you want to set.
After you release the set key, the ESC will signal what its current setting is by beeping and flashing its red
LED in a sequence of short and long beeps. To change the setting, press the Set button. The ESC will
signal the new setting. Keep pressing the SET key to advance through the settings until you get to the one
you want. When you reach the setting you want, turn the ESC off. To set other items, hold the SET button
and turn the ESC back on again, repeating the process describes above. Believe me when I say it takes a
while to do.
To illustrate this with an example, if you want to set the Low Voltage Cut-Off Threshold to 2.8V/cell, press and
hold the SET key as you turn on the ESC. Keep holding it while the ESC beeps 13 times while flashing the
RED LED, then flashes the Green LED once. Keep holding the SET button until the ESC signals that it is at
item No 3 with three short beeps and three flashes of the green LED. Release the SET key. The ESC will
signal with one beep and flash of its red LED that its current setting is 1 – Non-protected. Press the Set key
once and the ESC will signal with two beeps and two flashes of its red LED that it is now set for 2.6V/cell.
Press the SET button again and it will beep three times and flash the red LED three times to signal that it is
now set for 2.8V/cell. Switch the ESC off. To set other items, go through the process again.
Factory Reset
To return to the default settings if you truly muck it up, set the throttle to neutral and turn on the ESC. Press
and hold the SET button for 3 seconds. The ESC's green and red LEDs will both flash and the ESC will be
back to it's default settinsg read for you to start the process again.
Testing the ESC
Having the Servo Tester attached to the ESC means that you can quickly test some of the settings once you
have completed programming it. With the servo tester knob at the midpoint of its range, switch the ESC on.
Moving the knob either way should give a nice smooth acceleration and deceleration in either direction.
Calibrating the ESC
Once you have programmed each setting as outlined in the table above, the ESC can be calibrated.
Because this was going to be run by an Arduino and the ROV sketch defines the PWM signals for the servo
positions, it is best to use an Arduino to calibrate the ESC by providing the same PWM signals. The circuit
shown below uses the Arduino to provide the servo signals to the ESC in the correct sequence required for
calibration. Two LEDs and a 16x2 LCD display shield provide instructions to the user about what they need
to do.
The LCD shield is not strictly required, but it tells the user when to press the SET button.
The maximum and minimum PWM signal figures in the sketches ESC.attach(3,600,2250); command
must match the figures used in the ROV sketch. These figures may vary depending on the ESCs you are
using.

 Loading...