Installing the Rudder-Bracket
There are two molded-in inserts at the stern of the boat that
are intended for mounting the rudder bracket. If your boat has
seen some use prior to installing the bracket, be sure to wash
out the holes in the inserts to remove any sand that may have
collected in the threads.
1. Orient the bracket on the
back of the boat with the longer
bend of the bracket at the top.
2. Place a couple drops of
Loctite ® onto the 1/2” machine
screw threads, then thread them
in until the bracket is tight
against the hull.
Installing the Rudder Lift Cleat
A cleat needs to be installed that holds the line when the
rudder is in the up position.
1. On the right-rear paddle holder, you will
notice a flat spot on top with 2 holes. Place
the cleat on this flat as shown below.
2. Using a screwdriver, thread in the 3/4”
sheet metal screws until the bracket is tight against the hull.
Do not overtighten the screws!
Installing the Steering Pedals
Important Note: Earlier models of the Quest have slightly
different design elements for accepting this rudder
package. See the pictures and descriptions below to find
out which instructions you need to reference.
If you have two pulleys on
the pedals...go to the
current model pedal
installation instructions
below
If you have one pulley at
the top of the pedal...go to
the older model pedal
installation instructions on
the following page.
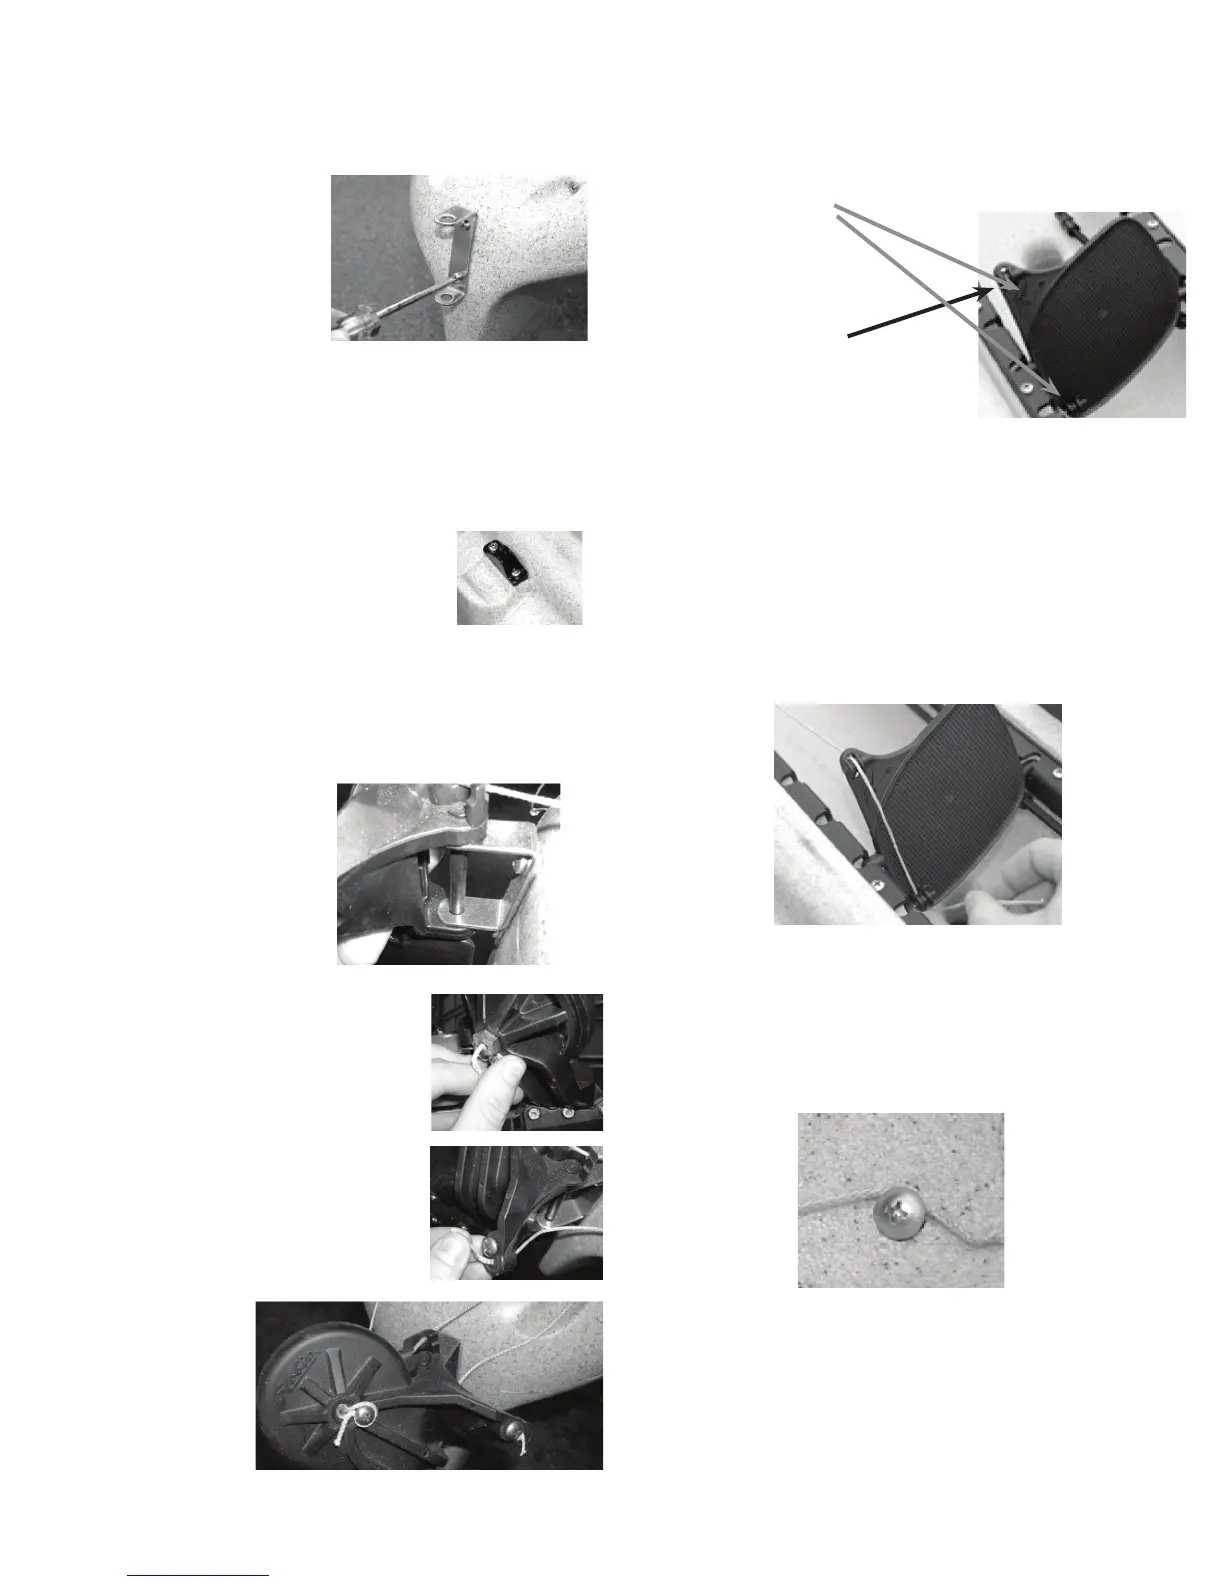
Current Model Pedal Installation Instructions
1. Run the lines that are coming out of the side of the cockpit
through the pulley at the top of the pedal, down the back of the
pedal, and through the pulley at the bottom of the pedal. Do
this to the pedals on both sides of the kayak.
2. There is a screw that is threaded into a brass insert on the
forward wall of the foot wells. Back the screw a few threads so
that there is a small gap between the head of the screw and
the kayak. Take the end of the steering line, pull it under the
screw head and wrap it around the screw a couple of times.
Do not tighten down the screw yet...there are a couple things
that you need to look at.
By pulling on each of the steering lines, you will notice that the
rudder will turn left and right. Balance the pull on each line so
that the rudder is centered. Also, the pedals should be tilting
slightly forward, or to whatever is most comfortable for you.
Once you have everything set just right, tighten down the
screw on the footwell to hold the line in place. Now get inside
the kayak to see if it is comfortable for you. The steering
system can be fine tuned to fit all kayakers. Proceed to the
section on Up/Down Control Line Installation.
Mounting Your Rudder and Attaching the Steering Lines
1. Locate the holes on the
rudder over the holes on the
steel bracket that is attached to
the stern. Pass the pastic pin
through all of the parts to lock
the rudder onto the boat. Make
sure that the pin is all the way in.
2. Take the left side steering line and pass
it through the hole in the bolt which holds
the rudder together. Once the end comes
through the top, tie a small knot at the end
of the line to prevent it from falling back
through the hole.
3. Take the right side steering line and
pass it through the hole on the right side
steering arm. As you did with the left
steering line, tie a small knot at the end of
the line to prevent it from falling back
through the hole.
4. To fasten the
steering lines, wrap the
ends of the lines around
the screws and tighen
them down to clamp on
the line.
 Loading...