3 of 8
Installation
Your Retractable Hose Reel should be installed nearest
to your chosen water source for convenience of use.
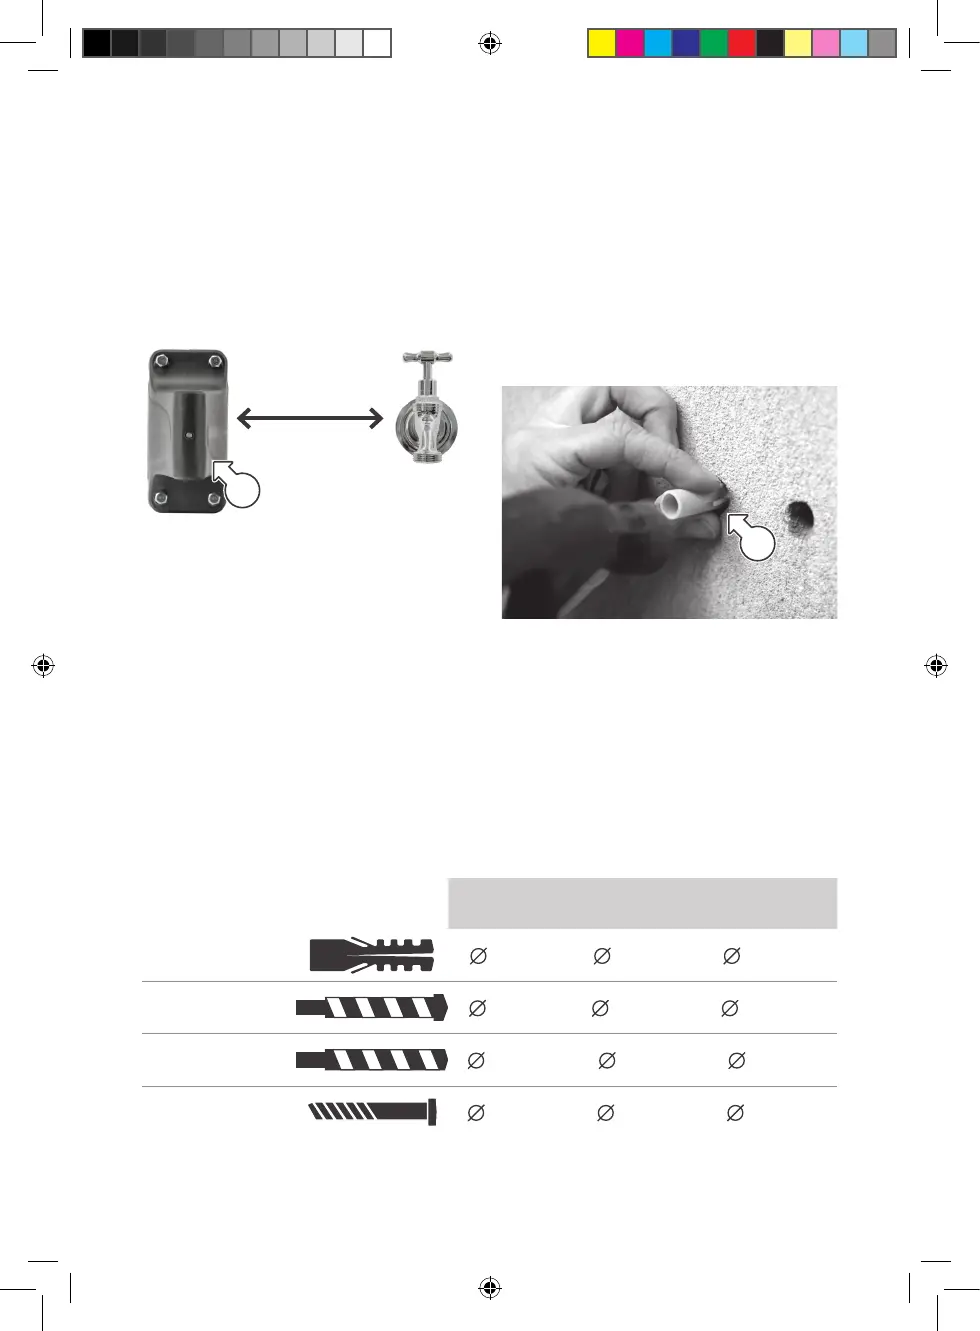
1. Check the TAP-TO-REEL HOSE can reach your
tap prior to installing the WALL BRACKET
2. Take the WALL BRACKET and place it
against either a wall or wooden post
3. Mark inside the centre of each of the
bracket holes to prepare for drilling
» If you are attaching your Hose Reel to a wooden
post, you will not require the WALL PLUGS as the
COACH BOLTS can screw directly into wood.
4. Use the table below to select the correct
drill bit for your Hose Reel
» If using plugs that were not included with your
Hose Reel, drill slightly undersize as masonry
materials all have different properties which
will ensure the wall plugs have a secure fit.
It is very important to use the correct size drill bit,
so a very secure fit of the wall bracket is made
before installing the Retractable Hose Reel.
5. When ready, drill all four holes, then
hammer the WALL PLUGS gently into
your wall (if attaching to a wall)
1110H 10m
1120H or
CH1120 20m
1130H or
CH1130 30m
PLUG
7.7mm 11.7mm 11.7mm
MASONRY DRILL
7.5mm 10.0mm 10.0mm
WOOD DRILL
5.0mm 7.0 mm 7.0 mm
BOLT
6.0mm 8.0mm 8.0mm
MAX 1m (1110H)
MAX 2m (1120H/
CH1120/1130H/CH1130)
d
c
1110H 1120H 1130H CH1120 CH1130 Manual 2023 v4.indd 31110H 1120H 1130H CH1120 CH1130 Manual 2023 v4.indd 3 27/6/2023 9:04 am27/6/2023 9:04 am