button to set your Sharp setting. Sharp has three settings: H/M/L (High/Med/Low Sharpness). Press the and
buttons to adjust Sharp. After selecting your Sharp setting, press and hold the button to return to the
previous menu.
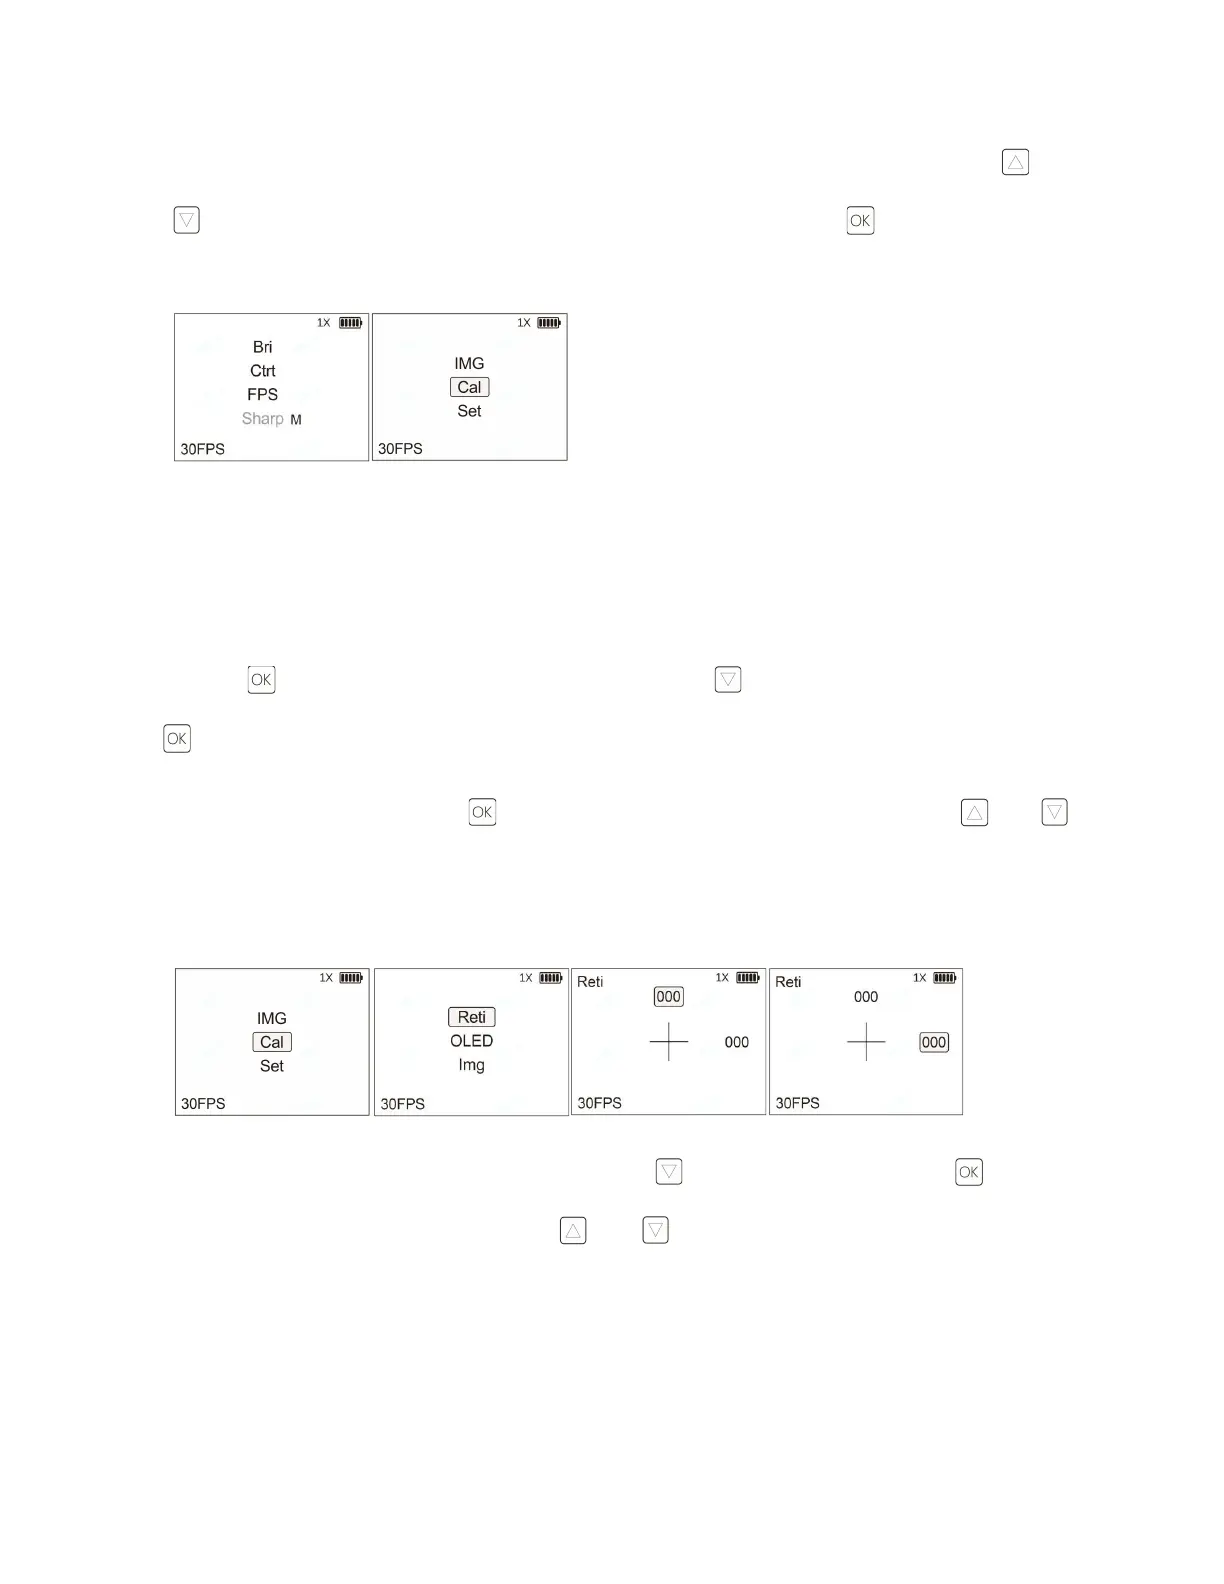
2)Cal (Zero Calibration Function)
The Cal (Calibration) setting is used to set your zero and to adjust the projected image alignment with your sight
picture.
Press the button to enter the main menu interface. Press the button to select Cal, and then click the
button to enter the Cal settings interface.
a. Digital Reticle Zeroing: Click the button to enter the Reti settings interface. Press the and
buttons to adjust the horizontal (H: -150~150) and vertical (V: -150~150) parameters and adjust the reticle
position. This adjustment will move the digital reticle to match your point of aim with your point of impact or co-
witness with your red dot sight reticle.
b. OLED Display Calibration: From the CAL menu, press the button to select OLED, click the button to
enter the OLED settings interface. Press the and buttons to adjust the vertical (Y: -50~50) and
horizontal (X: -50~50) parameters and adjust the display image position. The reticle and display images move
synchronously during this calibration step.