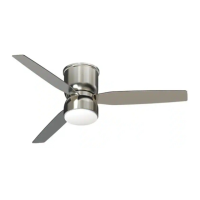
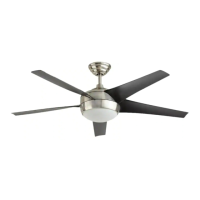
This document is a user and care guide for the Ossa 52-inch Smart Ceiling Fan from Home Decorators Collection. It covers installation, operation, maintenance, and troubleshooting for models CF2001-N and CF2001-B, with item numbers 1008926194 and 1008872986.
The ceiling fan is designed to provide both air circulation and lighting, with smart features allowing control via remote, a mobile app (Hubspace), and voice assistants like Alexa and Google Assistant. It is equipped with a DC motor, which is noted for quieter operation and energy efficiency compared to standard AC motor fans.
The manual emphasizes several safety precautions. To reduce the risk of electric shock, the electricity must be turned off at the circuit breaker or fuse box before installation. All wiring must comply with the National Electrical Code ANSI/NFPA 70-1999 and local electrical codes, and installation should be performed by a qualified licensed electrician. The fan must be mounted to an outlet box marked "acceptable for fan support of 35 lbs (15.87 kg) or less," using the provided mounting screws. Most outlet boxes for lighting fixtures are not suitable for fan support and may need replacement. The fan blades must be at least 7 ft (2.1m) above the floor to prevent injury. Users are warned not to bend the blade brackets during assembly or after installation, and not to insert objects into the path of the blades. The reversing switch should not be operated while the blades are in motion; the fan must be turned off and blades stopped first. The fan should not be used with any solid-state speed control device, except for the specified LEEDARSON LIGHTING CO., LTD. fan speed control part no. D-SLF-A17-01-A. All setscrews must be checked and retightened before installation. If unusual oscillating movement is observed, the fan should be stopped immediately, and a qualified electrician contacted. Children should be supervised to ensure they do not play with the fan.
Technical Specifications:
The Ossa 52-inch Smart Ceiling Fan operates at 120 Volts.
- Size: 52 inches
- Weight:
- Net Weight: 16.09 lbs (7.3 kg)
- Gross Weight: 21.83 lbs (9.9 kg)
- Airflow (CFM) and Speed:
- Speed 1: 70 RPM, 1800 CFM, 3 Watts, 0.06 Amps
- Speed 2: 94 RPM, 2300 CFM, 5 Watts, 0.09 Amps
- Speed 3: 124 RPM, 3100 CFM, 9 Watts, 0.14 Amps
- Speed 4: 154 RPM, 3900 CFM, 15 Watts, 0.23 Amps
- Speed 5: 179 RPM, 4600 CFM, 23 Watts, 0.33 Amps
- Speed 6: 206 RPM, 5500 CFM, 39 Watts, 0.53 Amps
These measures are approximate and do not include the amps and wattage used by the light kit.
Wireless Protocol:
The fan supports Wi-Fi (2.4GHz channel required) and Bluetooth connectivity. The Wi-Fi CERTIFIED™ Logo and Bluetooth® mark indicate compliance with respective standards.
Warranty:
The fan motor is warranted to be free from defects in workmanship and material for a lifetime from the date of purchase. All other fan parts, excluding glass or acrylic blades, are warranted for two years from the date of purchase. The warranty does not cover damage from accident, misuse, improper installation, or affixing accessories. Changes in brass finish due to climatic conditions (rusting, pitting, corroding, tarnishing, peeling) are also not covered. Normal "wobble" is not considered a defect. Servicing by unauthorized persons invalidates the warranty. The warranty disclaims all other warranties, including merchantability and fitness for a particular purpose, to the extent permitted by law. Shipping costs for warranty returns must be paid by the customer.
Assembly and Installation:
The installation process involves several steps:
- Mounting Plate Installation: Secure the mounting plate to the ceiling outlet box using provided screws and washers. The outlet box must be UL-listed for fan support.
- Fan-Motor Assembly Hanging: Lift and hang the fan-motor assembly onto the hook of the mounting plate, ensuring it is securely suspended.
- Wiring Connection: Connect the fan's black (line voltage), white (neutral), and green (ground) wires to the corresponding wires from the outlet box using wire nuts.
- Fan-Motor Assembly Installation: Carefully lift the Wi-Fi antenna through the mounting plate gap. Align the fan-motor assembly's keyholes with the bottom screws on the mounting plate, rotate clockwise to secure, and reattach/tighten all bottom screws.
- Ceiling Housing Installation: Align the ceiling housing's keyholes with the side screws on the mounting plate, rotate clockwise to secure, and reattach/tighten all side screws. Care should be taken with the Wi-Fi antenna during this step.
- Trim Ring Installation: Lift the trim ring, align its slotting with the side screws, rotate clockwise to secure, and ensure the Wi-Fi antenna is close to the ceiling. Remove the sticker from the antenna and stick it to the ceiling outside the fan.
- Blades Installation: Remove all blade screws from the rotary plate. Insert the blades into the rotary plate holes, reattach blade screws through blade washers, and tighten securely.
- Light Housing Installation: Remove one screw and loosen two others from the connect plate. Align the light housing's keyholes with the loosened screws, reattach the removed screw, and tighten all three screws.
- LED Module Installation: Remove three pre-installed screws from the light housing. Connect the terminal from the LED module to the fan-motor assembly. Align the LED module's screw holes with the light housing, reattach the three screws, and tighten securely.
- Glass Shade Installation: Rotate the glass shade clockwise until it is secure.
- Remote Bracket Installation: Use the remote bracket as a guide to mark and drill two holes. Install anchors and insert screws to secure the bracket.
Remote Operation (433 Remote Control):
The fan comes with a remote control to operate speed and lights.
- Warm Weather (Forward): Downward airflow creates a cooling effect.
- Cool Weather (Reverse): Upward airflow moves warm air off the ceiling.
- Calibration Cycle: On startup, the fan will oscillate back and forth, which is normal for DC ceiling fans during calibration.
- Light ON/OFF: Press once to turn on, press again to turn off.
- Fan ON/OFF: Press once to turn on, press again to turn off.
- Brightness Change: While the light is on, press and release to cycle brightness (10%, 50%, 100%, then dim 50%, 10%). Default is 100%. If pressed when off, light turns on at last setting.
- Correlated Color Temperature (CCT) Change: While the light is on, press and release to cycle CCT (2700K, 3000K, 3500K, 4000K, 5000K, 6500K). Default is 3000K. If pressed when off, light turns on at last setting.
- Fan Direction: Press and release to reverse fan direction.
- Natural Wind: Press and release to enter/exit natural wind mode, where fan speed varies automatically.
- Fan Speed: The fan has 6 speeds. Press and release to change speed. Default is level 6.
- Timer Buttons (2H, 4H, 8H): Select desired duration for the fan to remain on.
- Pairing/Reset:
- To pair remote and fan (within 30 seconds of power on), press and hold the light power button for over 5 seconds.
- To reset to factory default settings (3000K CCT, 100% brightness, forward fan, speed level 6), press and hold the fan power button for over 5 seconds. Reset status closes after 2 seconds.
- Override: Disconnect power supply or wall control switch to override intelligent or remote control.
Smart Setup Operation (Hubspace App):
The fan can be controlled via the Hubspace app.
- Download App: Download Hubspace from the App Store or Google Play.
- Create Account: Sign in or create a Hubspace account.
- Connect Fan to Power: Power on the fan and follow app instructions. The device requires a 2.4GHz Wi-Fi channel.
- Add Fan: Tap the '+' button in the app to add the ceiling fan. Bluetooth access is required for device setup.
- Scan QR Code: Scan the QR code located in the quick start guide or on the ceiling fan (diffuser needs to be removed). Manual code entry is also possible.
- Using Smart Ceiling Fan: Control the fan (on/off, schedules, auto-off timers) from the Hubspace app.
- Voice Assistant Setup: Connect the fan to Google Home and Alexa via the Hubspace app or directly through the voice assistant apps.
Voice Commands:
The manual provides examples of voice commands for Alexa and Google Assistant to control fan power, light power, brightness, white temperature, fan speed, and comfort breeze.
Care and Cleaning:
- Always turn off power before cleaning.
- Check support connections, brackets, and blade attachments twice a year for looseness.
- Clean periodically with a soft brush or lint-free cloth; avoid water, as it can damage the motor or wood, or cause electrical shock.
- The plating is sealed with lacquer to minimize discoloration.
- A light coat of furniture polish can be applied to wood for protection and beauty; shoe polish can cover small scratches.
- The fan motor has permanently-lubricated sealed ball bearings and does not require oiling.
Troubleshooting:
The guide offers solutions for common issues:
- Fan will not start: Check wall switch, circuit breakers/fuses, power source connection, remote battery, and remote/receiver matching.
- Fan is noisy: Check for damage, tight blade bracket screws, fixed/tight hanging units, secure glass shade, and debris in motor assembly.
- Fan wobbles: Blades cannot be replaced with different types. Check tight blade bracket screws and fixed/tight hanging units. If normal, use the balancing kit.
- Lighting source not working: Check power connection, LED module terminal connection, and if LED module is damaged.
- Ceiling fan uncontrollable by remote device: Check for disturbance from same frequency controller; rematch device if needed.
- Fan moves backwards and forwards when turned on: This is normal for DC motor fans during calibration.
- Hubspace device not connecting to Wi-Fi: Check power source, Internet connection, and Wi-Fi network status.
- Device cannot find Wi-Fi networks: Ensure a 2.4GHz Wi-Fi network is within range.
- Device in location without Wi-Fi: Use the app on a phone with LTE, ensuring the phone is within Bluetooth range and has Bluetooth enabled.
- Cannot find QR code: It's on the ceiling fan housing and included in documentation.
- QR code damaged/lost: Enter the numbers under the QR code manually or use the "Search" button in the Hubspace app to add the device.
- Device on another account: Scan the QR code to transfer it to your account.
- Device offline for long periods: Check Wi-Fi signal strength; consider moving router, mesh Wi-Fi, or Wi-Fi extenders.
- App cannot connect after scanning QR code: Turn phone's Bluetooth off/on, then try again.
- Cannot scan same QR code for multiple products: Each product has a unique QR code.
The balancing kit guide explains how to use the provided clip and weights to correct fan wobble by identifying the blade causing the most wobble and applying the weight at the optimal position.