15
How to Mount the Battery Powered Alarm
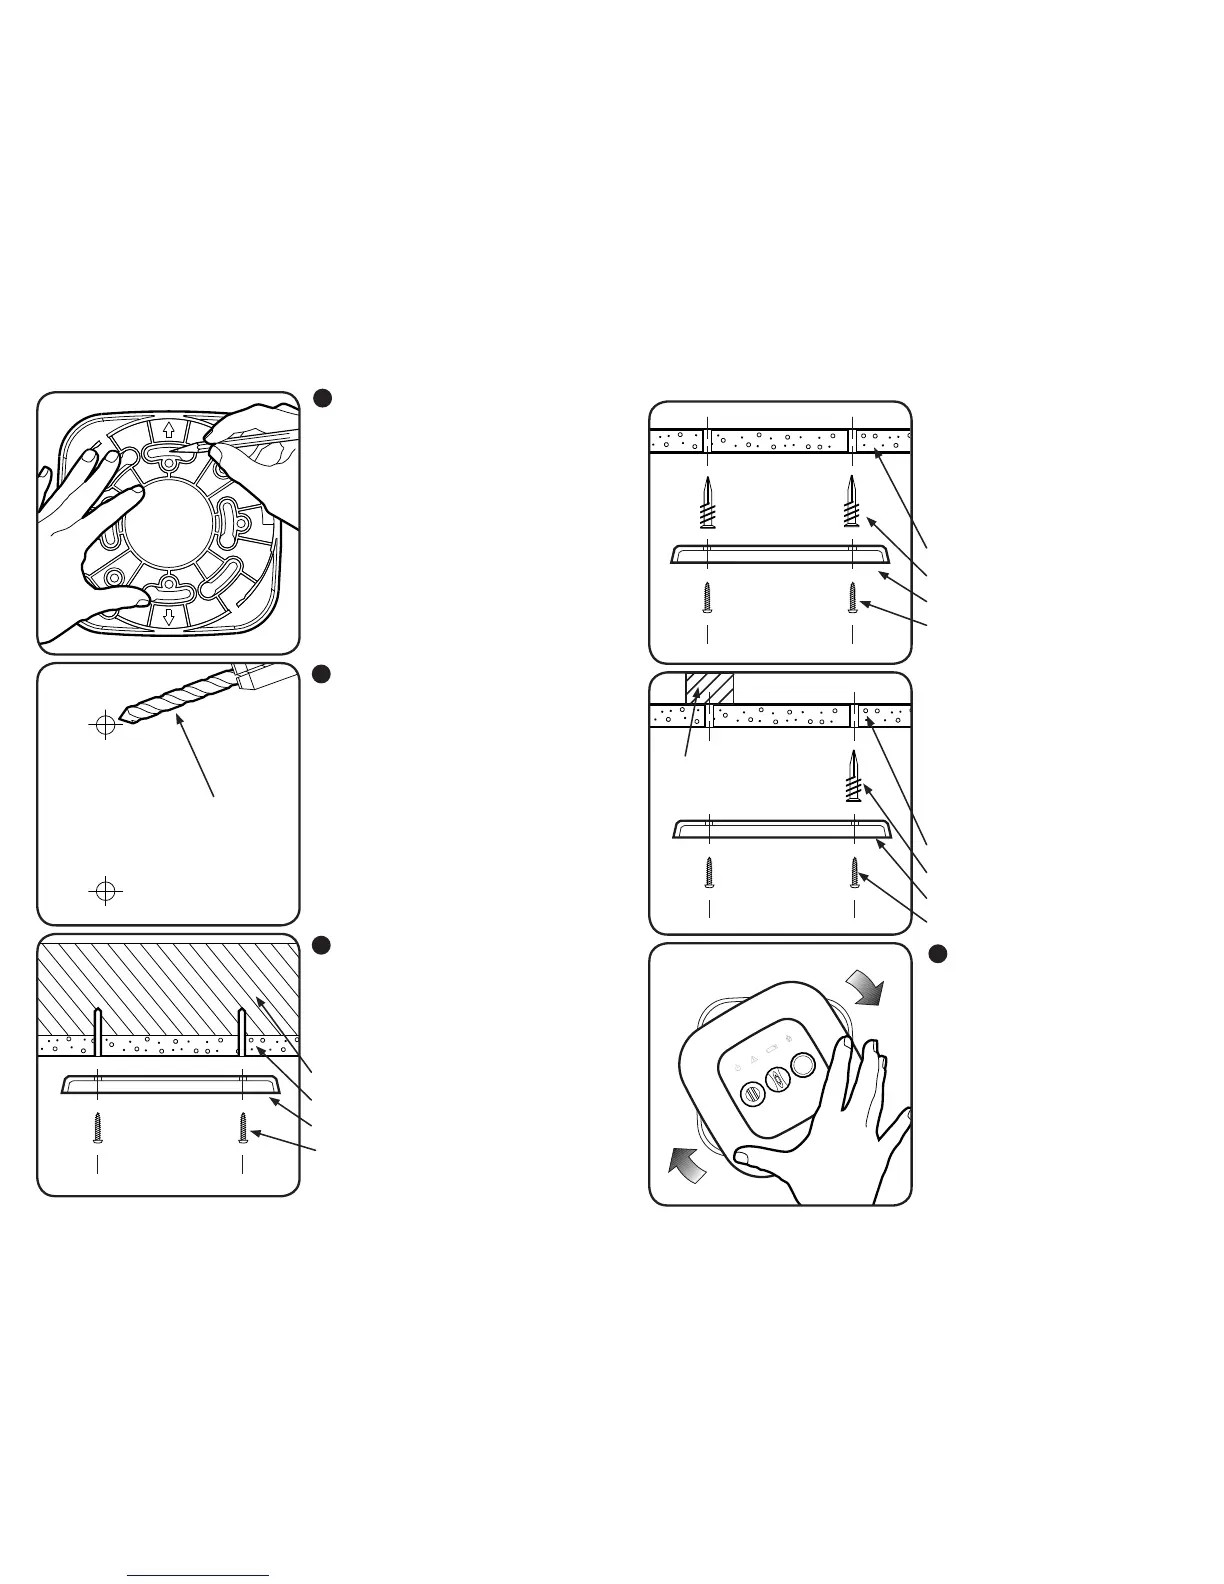
1 Mark
Place the mounting bracket against the
ceiling or wall, and using the mount-
ing bracket as a template, mark the
top and bottom holes with a pencil.
2 Drill
Using a 1/8” (3mm) drill bit, drill
two pilot holes in the center of the
two marked hole locations. This will
determine if a wood beam or stud is
present.
3 Fasten Bracket
Situation A: Wood
If wood is present behind the drywall,
securely fasten the mounting bracket
to the wall using the two 1” screws.
1/8” (3mm) drill bit
Wood
Drywall
Mounting Bracket
1” Screws
If installing an AC powered alarm,
with the electrical power off to the
line, simply attach the bracket to the
electrical box with the existing screws.
See wiring diagram in this manual for
connection information.
16
How to Mount the Battery Powered Alarm
Drywall
Plastic Anchors
Mounting Bracket
1” Screws
Situation B: No Wood
If no wood is present, use a Phillips
screwdriver to screw the two plastic
wall anchors into the pre-drilled holes
until fully seated. Then secure the
mounting bracket to the wall anchors
using the two 1” screws.
Situation C: Combination
Where there is no wood present, first
screw the plastic wall anchor into
the pre-drilled hole using a Phillips
screwdriver.
Then secure the mounting bracket in
place using the two 1” screws.
Drywall
Plastic Anchors
Mounting Bracket
1” Screws
Wood
4 Lock Into Place
With the batteries installed and the
alarms fully networked together
,
position the Smoke Alarm onto
the center of the bracket and turn
clockwise. The Alarm will lock into
place.



 To Next Page