Page 6 of 12
3 Components – Change Images
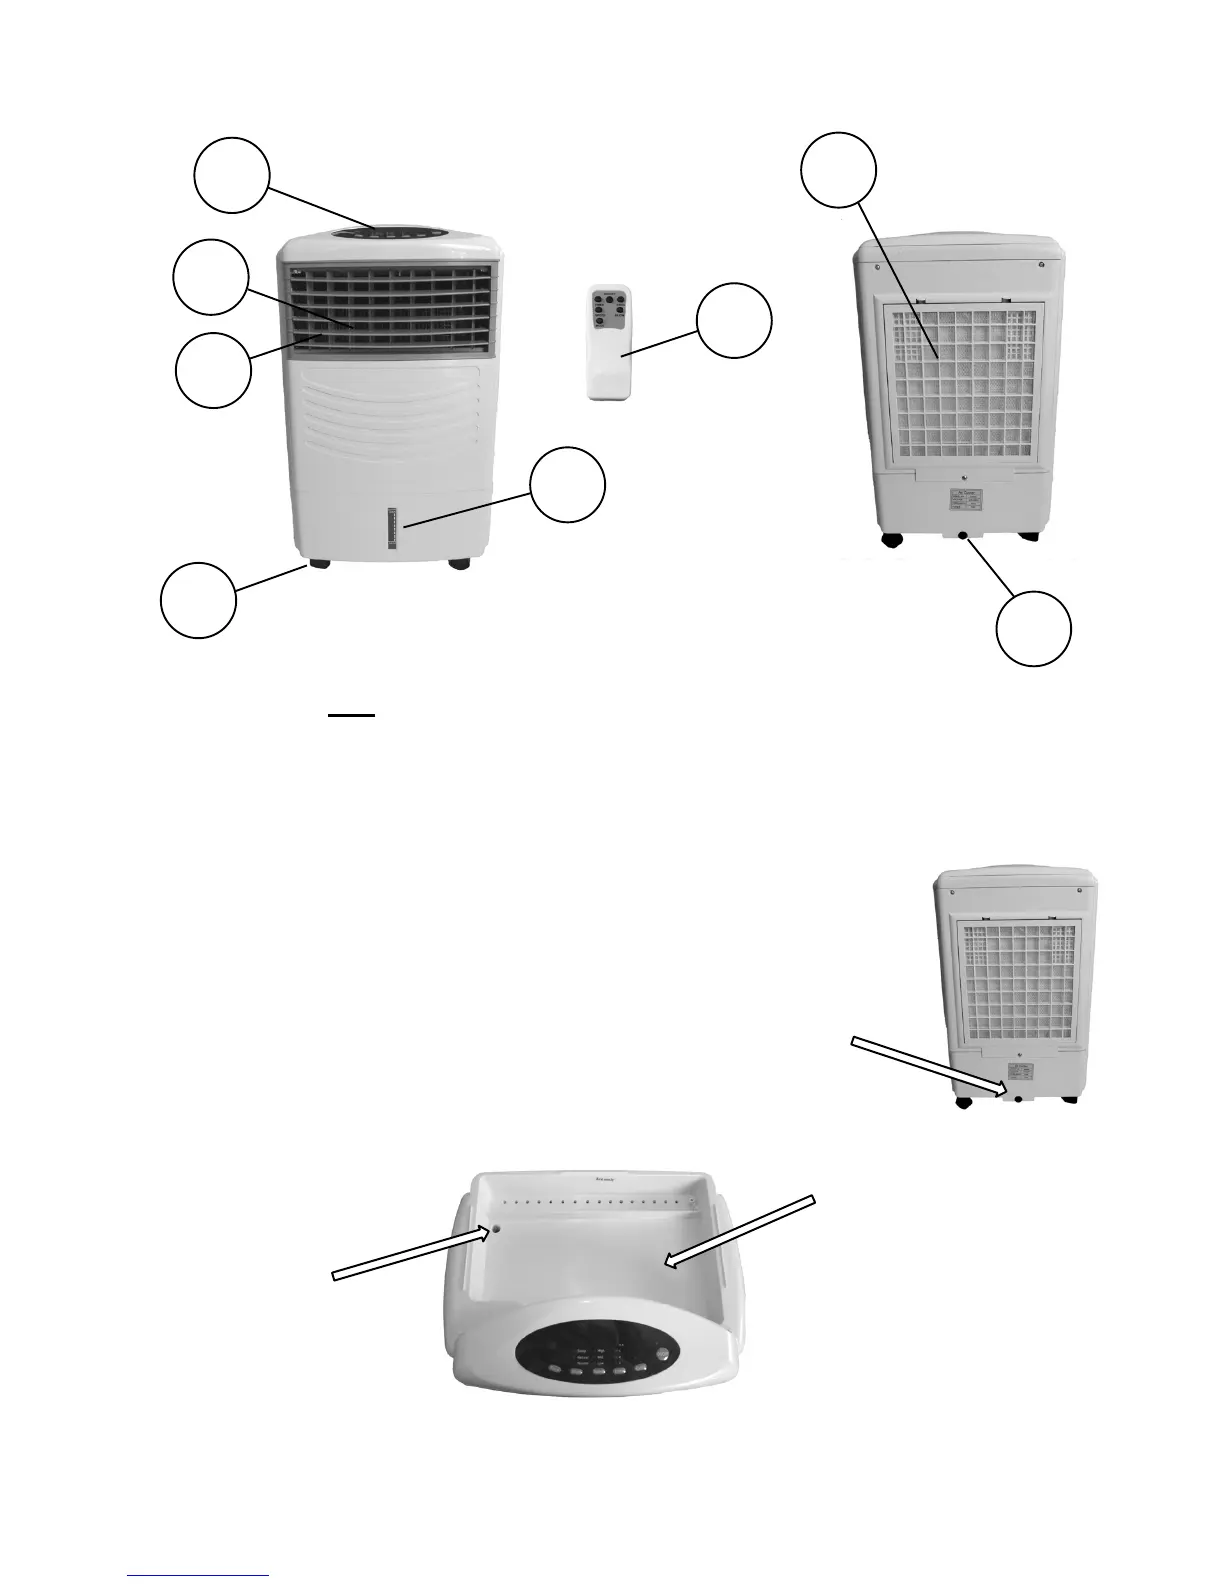
4 Preparation
• When ready to use the cooler, make sure that the power switch is set to OFF and
the unit is disconnected from the power point.
• Ensure the rubber drain plug is fully inserted
into the hole (located in the rear of the unit
at the bottom).
• Remove the top cover and pour clean cold water into the water tray.
• The water will drain down through the small hole into the water tank inside.

 Loading...