Do you have a question about the Honda 08U55-MCA-101 and is the answer not in the manual?
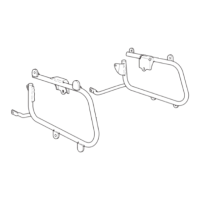
Steps for installing the accessory socket kit on Honda GL1800 models up to 2005.
Steps for installing the accessory socket kit on Honda GL1800 models from 2006 onwards.
This document provides detailed installation instructions for the Honda Accessory Socket Kit, part number 08U55-MCA-101, designed for the GL1800 motorcycle. The kit allows for the addition of an accessory power outlet, enhancing the motorcycle's utility by providing a convenient power source for various electronic devices. It is crucial to note that this accessory socket is specifically designed for powering accessories and should not be used with a cigarette lighter, as explicitly stated in the installation notes. This distinction is important for ensuring proper function and preventing potential damage or hazards.
The installation process is meticulously outlined, beginning with essential preparatory steps to ensure safety and proper execution. Before commencing any work, it is imperative to disconnect the negative (-) terminal from the battery. This step is a standard safety precaution in automotive electrical work, preventing accidental short circuits or electrical shocks during the installation process. Following this, specific parts of the motorcycle need to be removed to gain access to the installation area. The instructions differentiate between "Up to 05 model year" and "From 06 model year" motorcycles, indicating that there might be slight variations in the removal process or component locations depending on the manufacturing year of the GL1800. For models up to 2005, the left pocket needs to be removed. For models from 2006 onwards, both the left pocket and the left fairing molding must be removed. These initial steps are critical for providing clear access to the installation site and ensuring that the accessory socket can be properly integrated into the motorcycle's existing structure.
The core of the installation involves modifying the left pocket to accommodate the new accessory socket. This requires drilling a 30 mm hole through a marked area on the side of the left pocket. The instructions specify the use of an electric drill motor and a 30 mm holesaw for this task. Accuracy in drilling is paramount to ensure a snug and secure fit for the socket. After drilling, it is essential to remove any burrs from the edge of the newly created hole using a file. This step is important for preventing damage to the accessory socket harness during installation and for achieving a clean, professional finish. The instructions provide a visual guide for this process, showing the marked area and the subsequent filing required to smooth the edges. The dimensions for filing are also provided, indicating a 5 mm depth and a 3 mm width, ensuring that the modification is precise and minimal.
Once the hole is prepared, the accessory socket harness is routed through it. From the inside of the left pocket, the harness connector is guided out through the 30 mm hole. Subsequently, the accessory socket itself is inserted into the hole. To secure the socket in place, a nut is used, which must be removed from the socket before routing the harness through the hole. This sequence ensures that the socket is firmly attached to the left pocket, preventing it from dislodging during use or vibration. The instructions include clear diagrams illustrating this routing and securing process, again differentiating between the "Up to 05 model year" and "From 06 model year" configurations, although the fundamental steps remain consistent.
The final electrical connection involves connecting the accessory socket harness to the motorcycle's existing harness connector. The accessory socket harness connector is designed to mate with a 3-pin connector (red) on the motorcycle's harness. After making this connection, a connector cover is pulled over the connectors to protect them from environmental elements and ensure a secure connection. This step is crucial for the proper functioning of the accessory socket and for maintaining the integrity of the electrical system. The instructions provide a visual representation of this connection, showing the left pocket, the 3-pin connector, and the harness connector cover.
Upon completion of the electrical connections and securing of the accessory socket, the installation process moves to reassembly. All parts that were removed at the beginning of the installation, such as the left pocket and the left fairing molding (if applicable), must be reinstalled in the reverse order of removal. This ensures that the motorcycle is returned to its original state, with the new accessory socket seamlessly integrated. The final step is to reconnect the negative (-) terminal to the battery, which was disconnected at the very beginning. This restores power to the motorcycle's electrical system, allowing the newly installed accessory socket to function.
The document also includes a "PARTS LIST" which specifies that the kit contains one "Accessory socket." This simple list confirms that the kit is self-contained for the primary component. The "TOOLS AND SUPPLIES REQUIRED" section is comprehensive, listing an electric drill motor, a 30 mm holesaw, a file, a metric ruler, and a marker. These tools are standard for such an installation and are readily available. The inclusion of a metric ruler and marker emphasizes the need for precise measurement and marking before drilling, reinforcing the importance of accuracy in the modification process.
Overall, the installation instructions are well-structured, clear, and comprehensive, providing both textual descriptions and illustrative diagrams to guide the user through each step. The differentiation between model years ensures that the instructions are applicable to a range of GL1800 motorcycles. The emphasis on safety precautions, such as disconnecting the battery, and the detailed steps for modification and connection, contribute to a successful and safe installation of the accessory socket kit. The explicit warning against using the socket with a cigarette lighter highlights a specific usage feature that users must adhere to for optimal performance and safety. This accessory socket kit is designed to be a practical addition for GL1800 owners, offering a reliable power source for their electronic devices while on the road, provided the installation guidelines are followed meticulously.
| Part Number | 08U55-MCA-101 |
|---|---|
| Category | Motorcycle Accessories |
| Manufacturer | Honda |
| Material | Chrome |
| Mounting Position | Rear |
| Intended Use | Passenger Support |