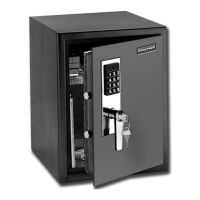
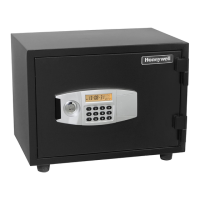
SETUP & OPERATION
STEP 4: PROGRAM NEW USER CODES
SECURITY NOTE: To insure privacy, this procedure should be repeated for
both of the factory pre-set codes
1. Unlock the safe with the first factory pre-set (or
current active) code.
1.
2. If correct code is entered, “OPEN” will appear
on the LCD panel, and you will hear a chime
tone indicating the safe is unlocked.
2.
3. Immediately enter “” then a new 4-8 digit
code followed by the “
#” key.
3.
__ __ __ __
4. If entered correctly, “IN” will appear on blue
display followed by a chime and the new code
number will appear for 1 second.
4.
Repeat this process to reprogram the second factory pre-set code.
Your new code is now ready to use and the previous code is erased from
memory. If you wish to change your new code, simply repeat the process
with current active user code(s) and enter new code(s).
TO OPEN THE SAFE USING NEW USER CODE(S):
Repeat the process described in STEP 3: UNLOCK AND OPEN SAFE,
substituting the new user code(s) for the factory preset user code(s)
SECURITY FEATURES
PRIVACY MODE:
If you wish to prevent your personal code from
being read on the digital readout, it can be
hidden from view by inserting the “
” after “#”.
Example: “
# 1 2 3 4 #”.
INCORRECT CODE ENTRY:
If an incorrect code is entered, the word
“
ERROR” will appear on the digital readout
and an alert tone will sound. At this time, re-
enter the correct code.
SECURITY LOCKOUT PERIOD:
If an incorrect code is entered (3) times, the system will enter lockout mode
for 5 minutes.
The LCD will read “HOLD-05” showing the
minutes remaining. During the first minute the
security alarm will sound. During the entire 5-
minute period, the safe cannot be entered.
If incorrect codes continue to be entered once
the first five minute period has finished, a new
15-minute lockout period will begin and the
alarm will sound during the first minute.
SECURITY ALARM:
This safe is equipped with a security alarm.
To activate alarm, press “
0” with door closed.
Display will read “ALERT-ON”.
The alarm will sound whenever:
The wrong code is entered 3 or more times to gain entry
The safe is tilted more than 20° degrees
The safe is shaken or experiences forceful impact.
To de-activate alarm or turn off alarm siren, enter an active user code.
 Loading...