EasyManua.ls Logo

Honeywell BELMAR - User Manual

Honeywell BELMAR
20 pages
Print Icon
To Next Page IconTo Next Page
Loading...
BELMAR 52” CEILING FAN
MODELS #50193, 50194
Questions, problems, missing parts? Before returning to your retailer, call our customer
service department at 1-877-361-3883, Monday - Thursday, 8 am - 6 pm, EST and Friday,
8 am - 5 pm, EST.
Español p. 21
Question and Answer IconNeed help?

Do you have a question about the Honeywell BELMAR and is the answer not in the manual?

Summary

Preparation

Tools Required for Assembly

Lists tools needed for fan assembly, including electrical tape and screwdrivers.

Helpful Tools

Lists optional tools for fan installation and maintenance, like an AC tester.

Care and Maintenance

Fan Weight

States the net weight of the fan is 17.6 lbs (7.98 kg).

Package Contents

Safety Information

Electrical Precautions

Advises against solid-state controls and emphasizes proper wiring and grounding for electrical safety.

Installation Guidelines

Stresses secure mounting, outlet box support, and blade clearance for safe installation.

Mounting Options

Standard Mounting

Describes the standard installation method suitable for ceilings 8 ft. or higher.

Angled Mounting

Details angled installation for vaulted ceilings, noting potential need for longer downrods.

Closemount Installation

Explains closemount installation for ceilings lower than 8 ft.

Mounting Bracket Installation

Detaching Bracket

Instructions on loosening and detaching the mounting bracket from the canopy.

Securing Bracket

Guidance on securely attaching the mounting bracket to the outlet box using provided hardware.

Standard or Angle Mounting Instructions

Preparing the Motor Housing

Instructions on loosening set screws in the motor housing yoke for downrod insertion.

Downrod Assembly

Steps for removing the downrod pin/clip and threading wires through the canopy.

Installing the Downrod

Details on sliding the downrod into the yoke, aligning holes, and securing it with pins/clips.

Lead Wire Management

Instructions for cutting and stripping lead wires for easier wiring connections.

Seating the Downrod Ball

Explains how to insert the downrod ball into the mounting bracket opening, aligning the slot and tab.

Closemount Instructions

Preparing for Closemount

Instructions on removing the canopy cover and noting unused parts for this installation type.

Attaching Canopy

Steps for aligning and securing the canopy to the motor housing using closemount screws and washers.

Hanging the Fan

How to hang the fan on the mounting bracket hook for wiring.

Wiring

Basic Wiring Connections

Details connecting green, black, blue, and white wires from the fan to the supply wires according to diagram.

Optional Light Wiring

Explains connecting the blue wire to a second hot power wire for separate light control.

Canopy Installation

Securing the Canopy

Guides on lifting the canopy and securing it to the mounting bracket using screws and washers.

Blade Installation

Blade Arm Attachment

Instructions on removing motor screws and attaching blade arms to the motor using the Fast Attach™ system.

Securing Blades

Steps for inserting and securely tightening motor screws to attach each blade arm and isolator to the motor.

Light Kit Installation

Installing Fan Without Light Kit

Steps to remove the light kit and wiring assembly if the fan is installed without a light.

Connecting Light Kit

Guides on connecting the light kit plug to the motor assembly plug, matching colors for proper function.

Securing Light Kit Housing

Instructions for aligning and securing the switch housing cap with screws and washers.

Bulb and Finial Installation

Steps for installing bulbs and then assembling the finial cap, nut, and finial for the light kit.

Assembling Glass Globe

Details on feeding pull chains through the glass globe, rubber washer, and nut to secure the globe.

Attaching Pull Chains

Explains how to attach pull chain extensions or custom pull chains to the fan and light pull chains.

Operating Instructions

Using the Reverse Switch

Explains the function and operation of the fan's reverse switch for seasonal airflow.

Warmer Weather Operation

Describes setting the reverse switch for downward airflow to create a cooling effect.

Cooler Weather Operation

Details setting the reverse switch for upward airflow to circulate warm air and save energy.

Replacement Parts List

Parts Identification

Lists and identifies key fan components such as blade arms, blades, and glass globes with their model-specific part numbers.

Troubleshooting

Fan Not Moving

Provides steps to diagnose and fix issues when the fan fails to operate, including checking power and connections.

Fan is Noisy

Offers solutions for a noisy fan, such as tightening screws and checking for cracked blades.

Excessive Wobbling

Outlines checks for loose screws, blade balancing, and mounting bracket security to resolve wobbling.

Lights Not Working

Troubleshooting steps for when the fan operates but the lights do not, focusing on bulb and connection checks.

Limited Lifetime Warranty

Warranty Coverage

Details the warranty for fan motor and parts, excluding glass and finishes, with coverage periods specified.

Claim Procedures

Explains how to make claims, responsibilities for costs, and voiding conditions like improper installation or ownership transfer.

Overview

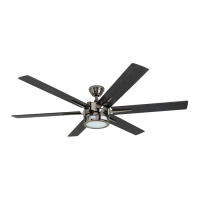
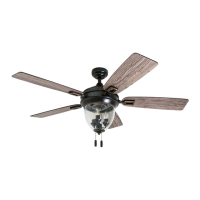
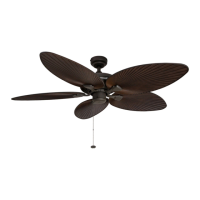
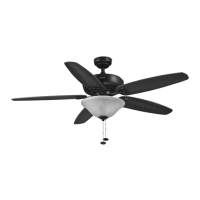
This document is a user manual for the Honeywell Belmar 52" Ceiling Fan, models #50193 and #50194. It provides comprehensive instructions for assembly, installation, operation, and maintenance, along with safety information and a limited lifetime warranty.

Function Description:

The Honeywell Belmar 52" Ceiling Fan is designed to provide air circulation and illumination for indoor spaces. It offers three mounting options: standard, angled, and closemount, making it adaptable to various ceiling heights and types. The fan features a reversible motor, allowing it to create a downward airflow for a wind chill effect in warmer weather and an upward airflow to circulate stagnant hot air in cooler weather, thereby contributing to energy savings. The fan can be installed with or without a light kit, offering flexibility based on user preference. It includes a pull chain system for controlling both the fan speed and the light.

Important Technical Specifications:

  • Fan Weight: The net weight of the fan is 17.6 lbs. (7.98 kg).
  • Blade Clearance: A minimum clearance of 7 ft. (2.14 m) from the blades to the floor and at least 30 in. (76 cm) from the end of the blades to any obstruction is required for safe operation.
  • Mounting Options:
    • Standard Mounting: Best suited for ceilings 8 ft. or higher.
    • Angled Mounting: Best suited for angled or vaulted ceilings, with a maximum angle of 16°. A longer downrod (sold separately) may be necessary for proper blade clearance.
    • Closemount Mounting: Suitable for ceilings lower than 8 ft. (2.44 m) high.
  • Outlet Box Support: The fan must be mounted to an outlet box marked "ACCEPTABLE FOR FAN SUPPORT" that can support at least 35 lbs. (15.88 kg) of moving weight.
  • Electrical Connections: All electrical connections must comply with local codes, ordinances, the National Electrical Code, and ANSI/NFPA 70-199.
  • Light Kit (if applicable): The manual mentions a limiter for the light, indicating that the light should not exceed 190W.
  • Blade Attachment: The fan utilizes a "Fast Attach™" system for blade installation, involving twist lock connectors.
  • Motor: The fan motor is covered by a limited lifetime warranty.

Usage Features:

  • Seasonal Performance Optimization: The fan includes a reverse switch, typically located on the side of the light kit, to optimize performance for different seasons.
    • Warmer Weather: Pushing the reverse switch to the left results in downward airflow, creating a wind chill effect. This allows for raising the thermostat setting while maintaining comfort and saving energy.
    • Cooler Weather: Pushing the reverse switch to the right and setting the fan to low speed results in upward airflow, which helps move stagnant hot air off the ceiling area. This mixes the air, potentially reducing the frequency of heating system operation and yielding energy savings.
  • Control: The fan and light are controlled via pull chains, with extensions provided for convenience.
  • Installation Flexibility: The option to install the fan with or without a light kit allows users to customize the fan to their specific lighting needs.
  • Wiring Options: The manual details wiring for standard fan and light control, as well as an optional setup for separate fan and light control if a second hot power wire is available.

Maintenance Features:

  • Regular Inspection: At least twice a year, the canopy should be lowered to check the downrod assembly, and all screws on the fan should be tightened.
  • Cleaning:
    • Motor Housing: Clean with only a soft brush or lint-free cloth to avoid scratching the finish.
    • Blades: Clean with a lint-free cloth. A light coat of furniture polish may occasionally be applied to wood blades for added protection.
  • Safety Precaution for Maintenance: Always shut off the main power supply before beginning any maintenance tasks. Do not use water or a damp cloth to clean the ceiling fan.
  • Troubleshooting Guide: The manual includes a troubleshooting section to address common issues such as the fan not moving, noisy operation, excessive wobbling, and lights not working. This guide provides steps to diagnose and resolve problems, including checking connections, tightening screws, replacing cracked blades, balancing the fan, and re-installing bulbs.
  • Replacement Parts: A replacement parts list is provided with model-specific part numbers for blade arms, blades, glass globes, and loose parts bags (containing mounting hardware, blade attachment hardware, electrical hardware, pull chains, and wire connectors). Customers can contact the customer service department for replacement parts.

Warranty:

The Honeywell Belmar 52" Ceiling Fan comes with a Limited Lifetime Warranty. The fan motor is warranted to be free from defects in workmanship and material for the life of the product. All other ceiling fan parts (excluding the motor and parts made in whole or in part with glass) are warranted for one year from the date of purchase. The warranty covers defects in workmanship and materials, with HKC agreeing to replace defective parts or the entire fan at its option. The warranty does not cover ordinary wear and tear, accidents, misuse, improper installation, or damage to glass parts and finishes of metal and other surfaces. Purchasers are responsible for removal and reinstallation costs. The warranty is void if the original purchaser ceases to own the fan or if service is performed by a non-licensed electrician.

Honeywell BELMAR Specifications

General IconGeneral
BrandHoneywell
ModelBELMAR
CategoryFan
LanguageEnglish

Related product manuals