HE120 BY-PASS DRUM HUMIDIFIER
69-1860EF—01 8
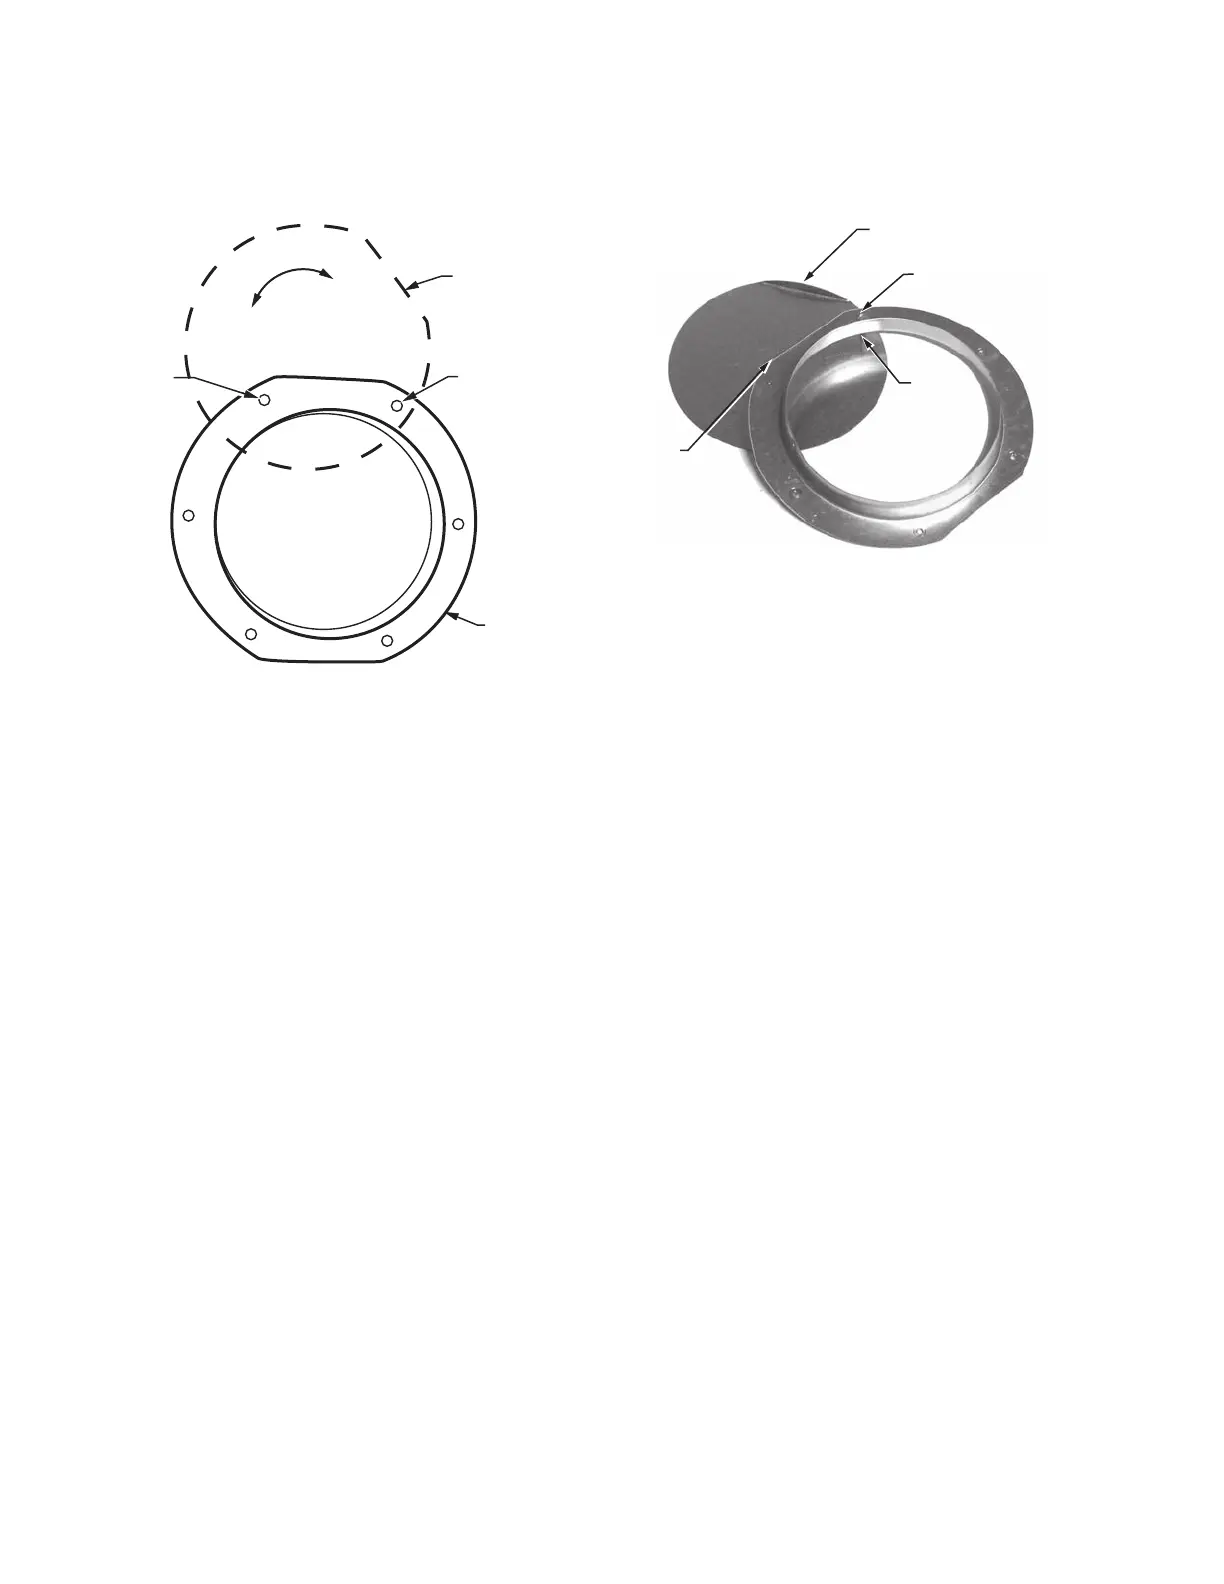
4. Pre-drill the mounting holes using a 1/8 in. drill bit. If you
are installing the optional Damper, do not drill the hole
where the damper blade will swing. See Fig. 10.
Fig. 10. Drill pattern.
5. If you are installing the Optional Damper, place a #8 X
3/4 in. Sheet Metal Screw through the Bypass Collar
and Damper, as shown in Figure 11.
Fig. 11. Installing Optional Damper.
6. Place the Damper into position and install using
#8 x 3/4 in. Sheet Metal Screws.
7. If you installed the optional Damper, check that it opens
and closes correctly. (If necessary, tighten or loosen the
pivot screw to make it open and close correctly.)
NOTE: The Damper will not cover all of the opening in the
duct when closed. A small amount of leakage when
closed is acceptable.
OPTIONAL
DAMPER
PIVOT
POINT
BYPASS
COLLAR
DO NOT DRILL
THIS SCREW
LOCATION
IF OPTIONAL
DAMPER IS USED
M13615
CLOSE
OPEN
BENT UP EDGE OF
DAMPER
SHEET METAL
SCREW (PIVOT SCREW)
HOLE IN
DAMPER
FLAT SIDE
OF BYPASS
COLLAR
M13621
 Loading...