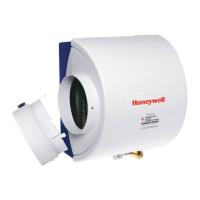
HE220, HE260 HUMIDIFIER AND INSTALLATION KIT
69-2516EF—01 4
Fig. 5. Cutting bypass opening.
11. Assemble the summer shutoff damper into the
starter collar. Verify that the damper rotates freely
between the open and closed positions. Make sure
the handle is accessible. Mark the damper Closed
position as Summer and the Open position as Win-
ter. See Fig. 6.
Fig. 6. Installing the starter collar.
12. Remove liner to expose foam adhesive. Position
starter collar over opening.
13. Slide one end of the flexible ducting over the starter
collar and secure with one of the connecting straps.
14. Insert the plain collar into the humidifier port and
secure with sheet metal screws. Connect the flex-
ible ducting over the collar and secure with a con-
necting strap. See Fig. 7.
Fig. 7. Connecting bypass ducting.
15. Seal the duct connections with duct tape (not
included).
16. Reinstall the humidifier pad assembly in the humidi-
fier housing.
17. Hinge the cover in place and secure with the thumb-
screw located at the bottom of the cover.
Connecting the Plumbing
1. Shut off the water.
Chemical Hazard.
Can cause personal injury or equipment
damage.
Do not use any line connected to an air
conditioner.
Do not use gas line.
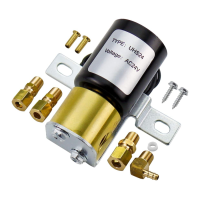
2. First, connect 1/4-in. line to the humidifier’s sole-
noid valve, located at the bottom of the humidifier.
a. Remove the compression nut.
b. Discard the brass ring, replacing it with the plas-
tic ring.
c. Install the brass insert into the end of the tubing.
d. Insert the tubing into the solenoid valve fitting
and support the valve while tightening the com-
pression nut.
NOTE: Do not over-tighten the compression nut. Moder-
ate tightness prevents leaking.
3. Use the saddle valve (included) to tap into the water
supply line at the location selected. See Fig. 8. If
tapping into galvanized pipe, drain line and pre-drill
3/17-in. tap for saddle valve.
NOTE: The saddle valve is not designed to regulate
water flow. The valve is either open or closed.
IMPORTANT
To prevent debris from clogging the solenoid in-
line filter, be sure to install the saddle valve han-
dle pointing toward the ceiling.
STARTING
HOLE
6 IN. ROUND TEMPLATE
M20172
M20785
PLAIN COLLAR
HUMIDIFIER PORT
 Loading...


