5
CLEANING INSTRUCTIONS (CONTINUED)
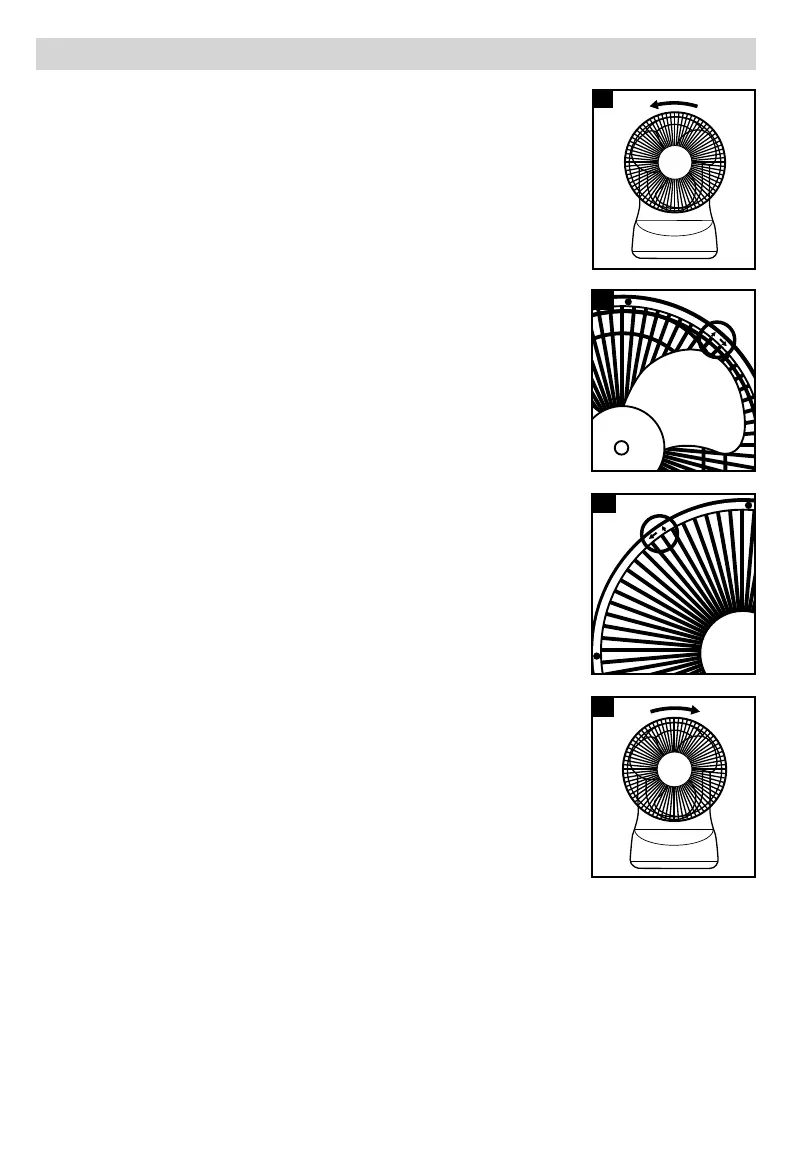
Once the screws are removed, grab the front grille and turn counter-clockwise.
(Fig. 8) There will be a small bump felt that means the twist lock is disengaged.
Gently pull the front grille off. If it does not come off, rotate slightly more
counter-clockwise to ensure the twist lock is fully disengaged.
Clean the plastic parts of the fan with a soft, damp cloth by gently wiping.
DO NOT use a damp cloth on the motor or any electrical parts.
To reassemble, locate the arrows on the rear grille. (Fig. 9)
Locate the arrows on the front grille. (Fig. 10)
Match the arrows on the rear grille with the arrows on the front grille. Gently
push the front grille onto the rear grille, keeping the arrows aligned.
Rotate the front grille in the direction of the second arrow or clockwise. (Fig. 11)
Rotate the grille until a click is felt or heard and it will not rotate anymore.
The Honeywell logo should be horizontal when the grille is fully rotated.
Use a Philips head screwdriver to re-install the 3 screws on the rear grille.
For storage, clean the fan carefully as instructed. Store the fan in the original
packaging or cover the product to protect it from dust.
8
9
10
11

 Loading...