Home Automation
Schedules
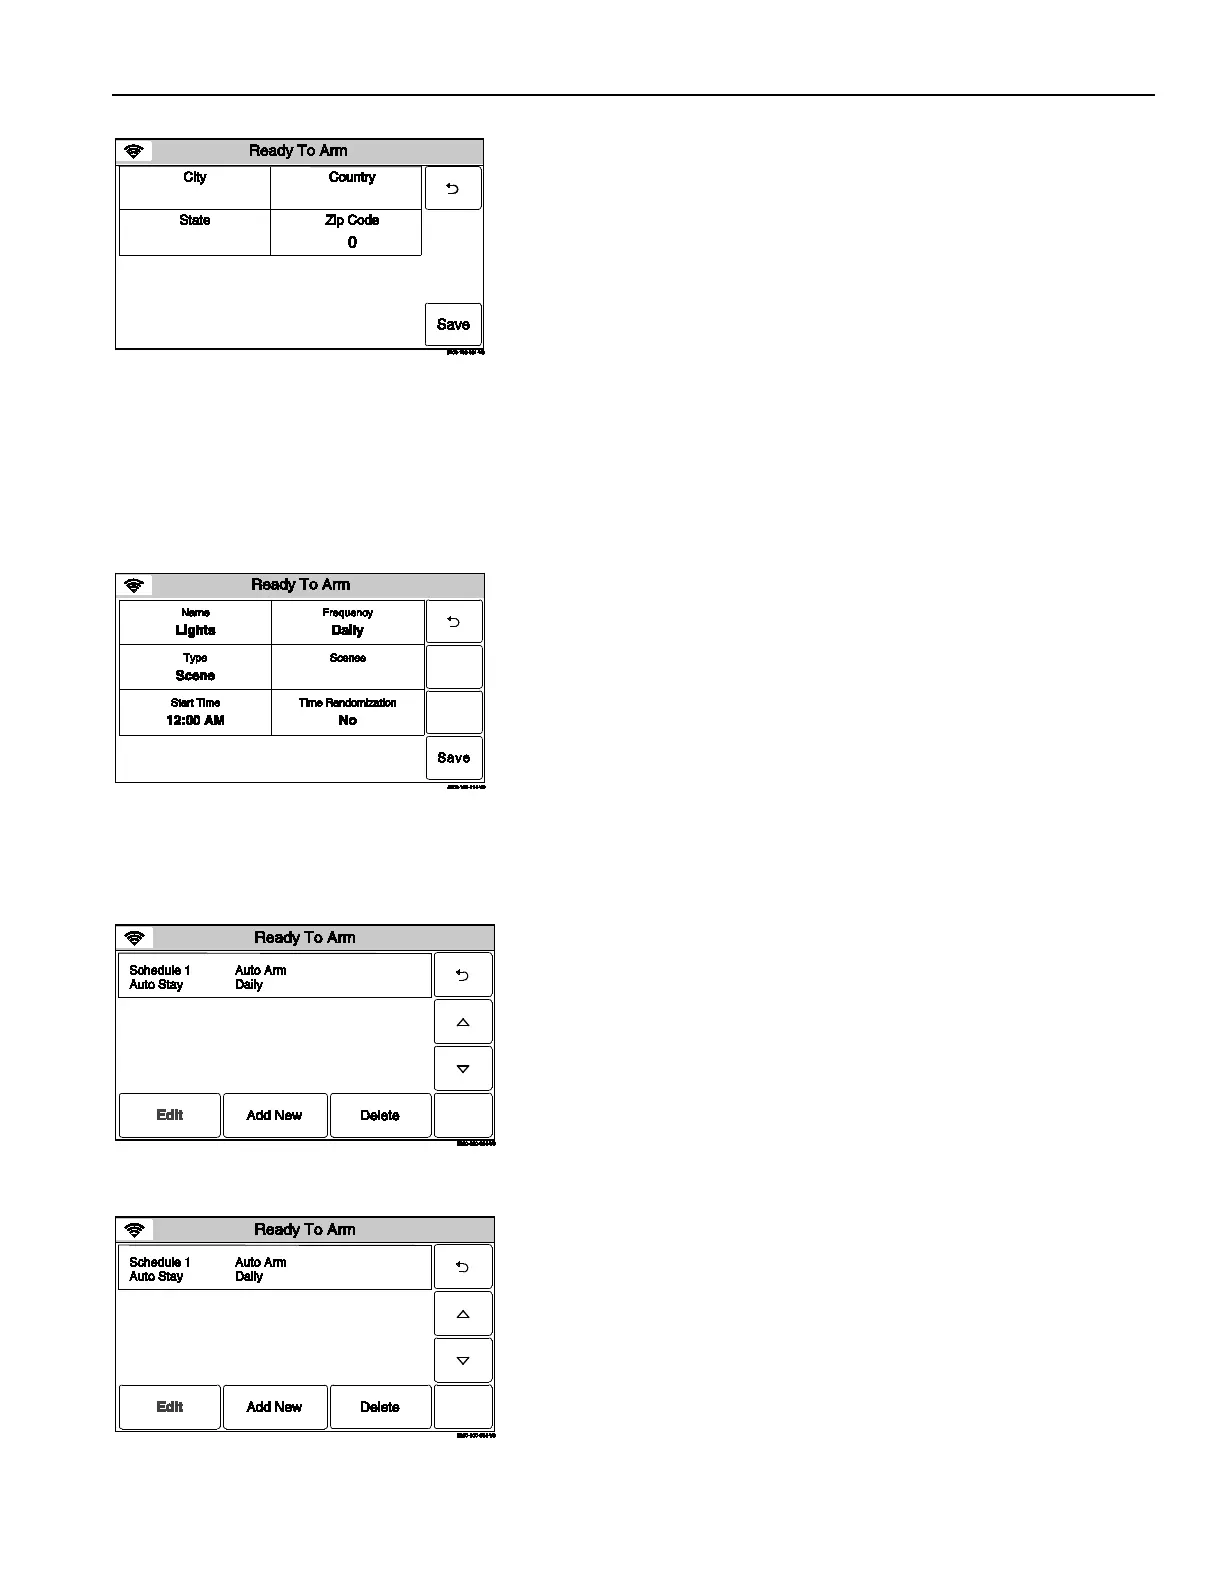
8. Select “City”, “Country”, “State” and “Zip Code” and enter the
required information on the displayed keypad then select
“Done”. Select “Save” when all fields are complete. Proceed to
step 13.
9. Program the options below, based upon the Type selected in
Step 6 and the Frequency selected in step 7 or if “Scene” is
selected proceed to Step 13.
Once Start Time/End Time/ Date
Daily Start Time/End Time
Weekday Start Time/End Time
Weekly Start Time/End Time/Day of the Week
Monthly Start Time/End Time/Day of the Month
10. Select “Rules” then select a Rule from the displayed list (Rules
1 through Rules 20).
11.
Enter a Start Time and End Time on the displayed keypad
then select “Save”.
12. Select the “” button to return to the Automation programming
screen or the Home key to return to the Home Screen.
13. Select “Scenes”. Select the desired scene from the displayed
list.
14.
Enter a Start Time and End Time on the displayed keypad
then select “Done”.
15. If “Daily”, “Weekday”, “Weekly” or “Monthly” was selected for
“Frequency”, the Randomization field is displayed. Select
“Randomization”, the system toggles between “No” and Yes”.
Note: If using the Randomization feature scheduled events should
not be programmed within one hour of each other.
16. Select “Save”. The system displays to the list of programmed
Schedules.
17. Select the “” button to return to the Automation programming
screen or the Home key to return to the Home Screen.
Editing a Scheduled Function
1. At the Schedules screen, select the Schedule you wish to edit.
Note: Rules 21-40 are only accessible through TotalConnect Service.
2.
Select the “Edit” button. The Schedule programming screen
will appear. Follow the steps as noted above i
programming a Scheduled Function section to edit and save
your changes.
Deleting a Scheduled Function
1.
At the Schedules screen, select the Schedule you wish to
delete.
Note: Rules 21-40 are only accessible through TotalConnect Service.
2. Sele
ct the “Delete” button. A confirmation screen will be
displayed. Select “Yes” to confirm the deletion.
3. Select the “” button. The system returns to the Automation
programming screen.
- 13 -
 Loading...