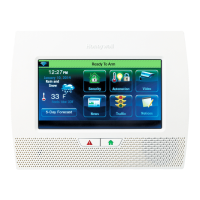
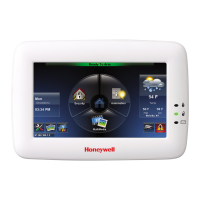
Home Automation
- 4 -
Include/Add a Door Lock
Z-Wave® door locks are encrypted, and for security purposes, enroll at a low power transmission range,
approximately 6 feet. This may require enrolling the lock before it is installed in the door.
Assemble the Z-Wave® door lock (if required); install batteries and connect necessary cables (refer to the
Door Lock’s Instruction Guide). Enroll the door lock adjacent to the control (within 6 feet) and mount within
the proper Z-Wave range (refer to the “Important Notes” section for further information). To Include a door
lock into a Z-Wave network, perform the following:
ACTION NOTES
1. At the Dashboard screen or Security Home Screen select the
“Automation” icon
2. At the Automation Screen, select “Tools”.
3. At the “Device Management” screen, select “Include Devices”.
4. The panel displays “Ready to include device. Press the function button
on device”. Within one minute press the device’s Function button or
activate in accordance with the manufacturer’s instructions.
5. If the module has been successfully enrolled, the panel displays
“Device Found! Please Wait” and then the device information is
displayed.
6. After successfully including a lock, the device’s information will be
added to the top of the inclusion list.
7. To include next device press the “include” button.
8. Once you have finished including devices, press the “Home” key to
return to the Dashboard screen or select the “2” button to return to the
previous screen.
• Program the user code in the control panel
prior to programming that user code into the
door lock. User Codes must be 4-digits.
When programming user codes into the panel,
determine if the user code will have access to
the Z-Wave lock. If so, the user code will be
transferred to the lock.
• Door lock devices may vary; follow the
instructions provided with your specific door
lock to Include properly and to program a new
user code.
• If locks will be associated with a Scene, the
lock’s autolock feature must be disabled.
• Due to Low Power Inclusion Mode of secure
devices, Include the Z-Wave Lock first, if not
using an Inclusion Tool/Remote Control. The
lock should be installed before including other
devices.
Include/Add a Honeywell Thermostat
Install a Honeywell Thermostat according to the manufactures instructions. Device should be mounted in
the final location and tested before adding it to the system. To Include a Honeywell Thermostat into a Z-
Wave network, perform the following:
Note: Some thermostats do not update temperature status automatically (i.e., Wayne Dalton).
IMPORTANT: Honeywell is not responsible for property damages due to improper setting of the thermostat modes.
ACTION NOTES
1. At the Dashboard screen select the “Automation” icon.
2. At the Automation Screen” screen, select “Tools”.
3. At the “Device Management” screen, select “Include Devices”.
4. The panel displays “Ready to include device. Press the function button
on device” Within one minute Include the Z-Wave thermostat.
a. Press “System” on the ZW-STAT.
b. Press and Hold the 4
th
(or center) button on the bottom row of the
ZW-STAT.
c. Press the first down arrow T to change display to “rf10”.
d. Press the right (last) up arrow S to Include the ZW-STAT.
5. Refer to the Installation Instructions provided with the thermostat for
“Z-Wave inclusion”.
6. To complete inclusion, press “Done”.
7. Press “Done” on the thermostat to return to normal operation.
8. After successfully including a thermostat, the device’s information will
be added to the top of the inclusion list.
9. Once you have finished including devices, press the “Home” key to
return to the Dashboard screen or select the “
2” button to return to the
previous screen.
• If you are installing another brand of
thermostat, follow the instructions provided
with your specific device to Include properly.
• When using Z-wave thermostat control on the
LYNX Touch, the scheduling feature within
thermostat should not be used.
• When the HOLD button on the LYNX Touch
Thermostat control screen is highlighted, Z-
wave scenes driven by rules or schedules will
not affect the thermostat operation.
Additionally, if your system is connected to
TotalConnect Service, the remote 7-day
schedules will also not affect the thermostat
operation.
• For threshold monitoring to be configurable on
the Total Connect Remote Services LYNX
TOUCH Z-wave thermostat screen, the
respective zones will first need to be assigned
with a response type in zone programming.
• You must program both Zones for each
respective thermostat (i.e..; Zone 80 & 81 for
thermostat #1, Zone 82 & 83 for thermostat #2
and Zone 84 & 85 for thermostat #3).
 Loading...