Manually Activating Z-
ave Devices (Continued)
5200-100-099-V0
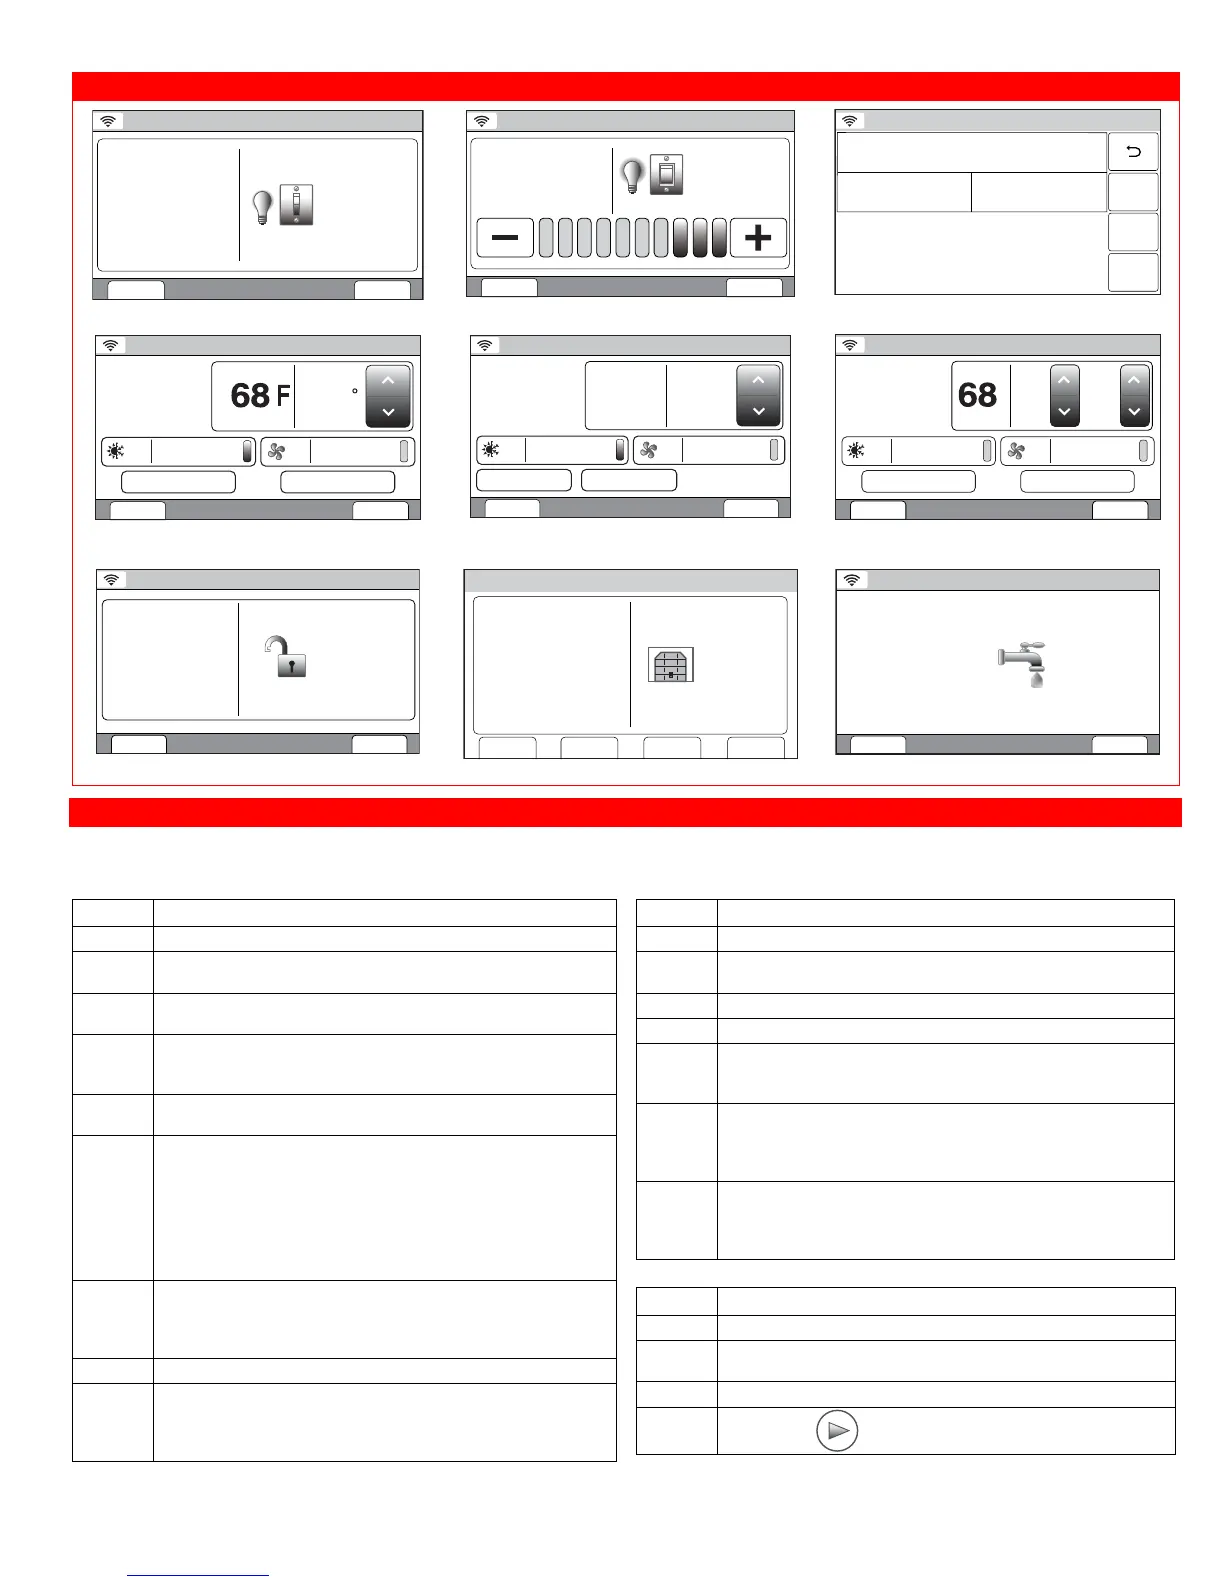
Press to Turn Off
Den Lamp
ON
Ready To Arm
BackEdit
Switch Control Screen
5200-100-100-V0
Den Lamp
ON 70%
Ready To Arm
BackEdit
Press to Turn Off
Dimmer Switch Control Screen
Ready To Arm
5200-100-104-V0
Unknown 001 Secured
1 Unknown Type: 0000 ID: 0000
Node:2 Sigma Designs (Sigma Designs)
Basic Off Basic On
OFF
Unsupported Device Control Screen
5200-100-101-V0
EDIT BACK
73
Set to
Threshold Monitoring
FanMode
AUTO
Living Room
HEAT
Hold
Ready To Arm
Thermostat Control Screen
5200-100-103-V0
EDIT BACK
25.5C 23.0
Set to
Saving Off
FanMode AUTO
Living Room
HEAT
NORMAL
Ready To Arm
Thermostat Energy Savings Control
Screen
5200-100-102-V0
EDIT BACK
84
Cool
Setpoint
73
Heat
Setpoint
Threshold Monitoring
FanMode
AUTO
Living Room
AUTO
Hold
Ready To Arm
Thermostat Dual Setback Control
Screen
5200-100-098-V0
Press to Lock
Front Door
Unlocked
Ready To Arm
BackEdit
Lock Control Screen
Ready To Arm
5100-100-106-V0
Garage Door 1
CLOSED
Press to open
Edit Back
Close in Close at
Garage Door Control Screen
5200-100-054-V0
Press to Turn Off
Switch 003
Water On
BackEdit
Ready To Arm
Water Valve Control Screen
Programming/Editing/Deleting Scenes
The steps described below should be accomplished at the LYNX Touch control in order to program Scenes used to control Z-Wave
devices. For more detailed information regarding Scenes refer to the full Home Automation Guide P/N 800-16091 or higher.
Program a Scene
Step Action
1. Select the “Automation” icon from the Home Screen.
2. Select the “Scenes” icon from the second page of the
“Automation” screen. The Scenes screen is displayed.
3. Select “Add New Scene”. The system displays a keypad
along with the next available Scene number.
4. If desired, select clear then enter a name (limited to 13
characters) for the scene on the displayed keypad then
select “Done”.
5. Select the “Add New Device” button. The system displays
the available Z-Wave device types.
6. Select one of the following options:
Switches
Thermostats
Locks
Garages
Water Valves
Sirens
7. Select the desired device type, then select the applicable
device from the displayed list. The device’s operational
screen is displayed. Select “Save” when finished. Up to 10
devices may be associated with a scene.
8. Set the desired options.
9. Select Save when complete. The system returns to the Z-
Wave device screen. Select the “” button as required to
return to the Automation programming screen or the
Home key to return to the Home screen.
Edit or Delete a Scene
Step Action
1. Select the “Automation” icon from the Home Screen.
2. Select the “Scenes” icon from the second page of the
“Automation” screen. The Scenes screen is displayed.
3. Select the scene you wish to edit or delete.
4. Select the “Edit” or “Delete” button.
5. If “Edit” was selected, the system advances to the
Scene. Edit as required and proceed to Step 6. If delete
was selected proceed to Step 7.
6. Select Save when complete. The system returns to the
Z-Wave device screen. Select the “” button as required
to return to the Automation programming screen or the
Home key to return to the Home screen.
7. The system displays a confirmation screen and then
returns to the previous screen. Select the “” button as
required to return to the Automation programming
screen or the Home key to return to the Home screen.
Manually Run a Scene
Step Action
1. Select the “Automation” icon from the Home Screen.
2. Select the “Scenes” icon from the second page of the
“Automation” screen. The Scenes screen is displayed.
3. Select the scene you wish to run.
4.
Select the
“ ”button to run the scene.

 Loading...