Do you have a question about the Honeywell RTH6360 Series and is the answer not in the manual?
Lists essential tools required for thermostat installation.
Lists optional tools that may be helpful for installation.
Safety steps to turn off power and confirm the heating/cooling system is off.
Instructions on identifying, labeling, and disconnecting wires from the old thermostat.
Guide to installing the UWP mounting system and wall anchors.
Steps for connecting thermostat wires and inserting batteries.
Attaching the thermostat to the UWP and turning power back on.
Guide to configuring the thermostat's date, time, and clock format.
Configuration of heating/cooling system types and equipment.
Selecting and activating system and fan operating modes.
Setting personalized heating and cooling schedules for weekdays and weekends.
Instructions for temporary and permanent schedule holds.
Specific instructions for wiring conventional heating and cooling systems.
Specific instructions for wiring heat pump systems.
Steps to enter and navigate the thermostat's advanced settings menu.
Explanation of the Smart Response feature for optimized comfort.
Guidance on replacing batteries and re-setting the time.
Configuring date, temperature units, and understanding alert codes.
Solutions for frequently encountered thermostat operational problems.
Details regarding the product's warranty coverage and terms.
Contact information and important safety/disposal guidelines.
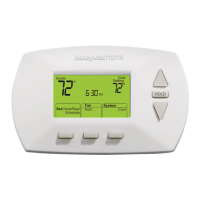
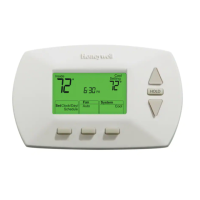
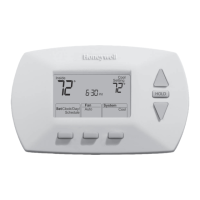
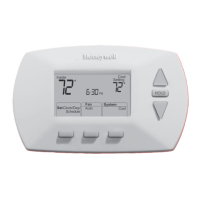
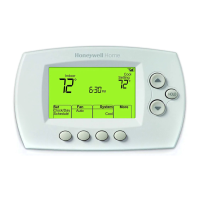
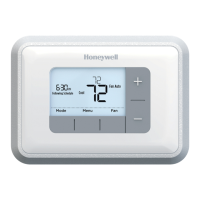
This document describes the Honeywell RTH6360 Series Programmable Thermostat, a device designed for managing home heating and cooling systems. This quick installation guide provides comprehensive instructions for setting up, operating, and maintaining the thermostat, including details on wiring, programming schedules, and troubleshooting common issues.
The Honeywell RTH6360 Series is a programmable thermostat that allows users to control their heating and cooling systems with precision. It supports various system types, including conventional forced air heat, heat pumps, and radiant heat systems. The thermostat offers different programming options, such as non-programmable, 1-week programmable, and 5-2 programmable schedules, enabling users to customize temperature settings for weekdays and weekends.
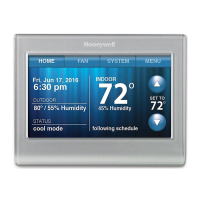
A key feature is the "Smart Response® Technology," which allows the thermostat to "learn" how long it takes for the furnace or air conditioner to reach programmed temperature settings. This ensures that the desired temperature is achieved by the scheduled time, optimizing comfort and energy efficiency. For example, if the Wake time is set to 6:00 AM and the temperature to 70°F, the system will activate before 6:00 AM to ensure the house is at 70°F by the time the user wakes up. During this pre-activation period, the message "Recovery" is displayed on the screen.
The thermostat also includes system changeover functionality, allowing it to automatically switch between heating and cooling modes to maintain a desired indoor temperature. This "automatic" system mode can be enabled or disabled, giving users the option to control heating or cooling manually if preferred.
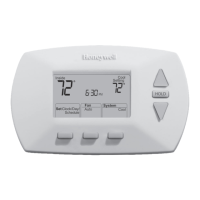
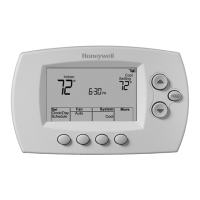
The RTH6360 thermostat is designed for user-friendly operation, with a clear display and intuitive controls.
Installation and Setup: The installation process begins with ensuring the power to the heating/cooling system is turned off at the breaker box. Users are guided to remove their old thermostat's faceplate, taking care not to disconnect any wires initially. A crucial step involves taking a picture of the old thermostat's wiring to serve as a reference. Wire labels are provided to help identify wires, especially if colors have faded or multiple wires share the same color. Jumpers, if present on the old thermostat, must be removed as the RTH6360 does not require them.
The guide provides detailed instructions for connecting wires to the Universal Wiring Plate (UWP), ensuring at least 1/4-inch of each wire is exposed for proper insertion. The R-switch position on the UWP must be set correctly based on the number of R-wires (one or two). Wall anchors are recommended for mounting the UWP, with instructions for leveling, marking, drilling, and inserting the anchors. Once the UWP is mounted and the wiring is confirmed, two AA alkaline batteries are installed in the back of the thermostat, and the thermostat faceplate is snapped onto the UWP.
Basic Operation:
After installation, users are instructed to turn the power back on and set the date and time. This involves adjusting the year, month, day, hour, and minutes using the + or - buttons and confirming each selection with the Select button. Users can also choose between a 12-hour or 24-hour clock format.
The thermostat offers various system operation modes, including Auto (thermostat selects heating or cooling as needed), Heat (controls only the heating system), Cool (controls only the cooling system), Em Heat (for heat pumps with auxiliary heat, where the compressor is not used), and Off (heating and cooling system is off, though the fan can still operate if set to On). Users cycle through these modes using the Mode button.
Fan operation settings include Auto (fan runs only when heating or cooling is on) and On (fan is always on). These modes are selected using the Fan button.
Programming Schedules:
The thermostat allows for programming up to four time periods each day: Wake, Away, Home, and Sleep. Pre-set energy-saving settings are recommended. To adjust program schedules, users access the Menu, select PROG, and then choose the day or set of days to edit. For each period, users can set the start time and desired "Heat" and "Cool" setpoint temperatures. The ON option allows users to keep a schedule period active, while pressing + and Select can turn it off. Once programming is complete, pressing Home saves the settings and returns to the main screen.
Temperature Override:
The thermostat supports both temporary and permanent overrides of programmed schedules. A temporary override is initiated by simply adjusting the temperature using the + or - buttons. This new setpoint will be maintained until the next scheduled time period begins. To cancel a temporary hold, users press + or - and then Cancel. For a permanent hold, after adjusting the temperature, users press the Hold (Mode) button while "TEMPORARY HOLD" is flashing to change it to "Permanent Hold." This hold can be canceled by pressing + or - and then Cancel.
Advanced Menu:
An advanced menu, accessible by pressing and holding the Menu and + buttons for approximately 5 seconds, allows users to configure system setup options (ISU menu). This includes settings for scheduling options (non-programmable, 1-week, 5-2), temperature indication scale (Fahrenheit or Celsius), heating system type (conventional forced air, heat pump, radiant heat), heating equipment type (e.g., standard efficiency gas, air-to-air heat pump), reversing valve O/B settings, cool/compressor stages, heat/backup heat stages, system changeover, Smart Response, air filter replacement reminders, and daylight saving time.
The RTH6360 Series thermostat is designed with minimal maintenance requirements, primarily focusing on battery replacement and alert management.
Battery Replacement: The thermostat requires two AA alkaline batteries for power. A low battery icon will appear on the display approximately two months before the batteries are depleted, signaling that replacement is needed. Even without the icon, it is recommended to replace batteries once a year or before leaving home for an extended period (more than a month). If batteries are replaced within two minutes, the time and day settings will be retained; otherwise, they may need to be reset. All other settings are permanently stored in memory and do not require battery power.
Alert Screen and Codes:
The thermostat features an alert screen to notify users of potential issues or maintenance reminders. An alert icon (a triangle) will appear on the home screen when an alert is active. Users can access the Menu to view the specific error/alert code. Once an alert is viewed, the symbol will remain on the home screen until it is cleared. Snoozed alerts will reappear after 7 days if not addressed.
The manual provides a list of alert codes and their definitions:
Troubleshooting: The guide includes a troubleshooting section to help users resolve common issues. This covers problems such as a blank display (check batteries), inability to change system settings to Cool (check System Setup Option 220), fan not turning on when heat is required (check System Setup Option 205), and heating/cooling system not responding (check System Setup Options 200 or 218, ensure power switch is on, furnace door is closed, and circuit breaker is reset). It also addresses "Heat On / Cool On" flashing on the screen, which indicates compressor protection is engaged, requiring a 5-minute wait before the system restarts safely. Issues with heat pump operation (cool air in heat mode or warm air in cool mode) also point to checking System Setup Options 200 or 218.
Safety and Disposal: The manual includes important safety cautions, such as disconnecting power before installation to prevent electrical shock. It also provides guidance on proper disposal, noting that the product is an electronic device considered Household Hazardous Waste (HHW) and should not be disposed of with regular household trash. For controls containing mercury in a sealed tube, specific instructions for recycling and proper disposal from local waste management authorities should be followed.
| Model | RTH6360 Series |
|---|---|
| Type | Programmable Thermostat |
| Programming | 7-Day Programmable |
| Battery Backup | Yes |
| Filter Change Alert | Yes |
| Fan Control | Auto, On |
| Display | Digital |
| Compatibility | Gas, oil, electric, and heat pump systems |
| Power Source | Battery |
| Programmability | 7-Day, 5-2 Day |
| Temperature Range | 40°F to 90°F |
| Hold Feature | Temporary and Permanent Hold |
| System Switch | Heat, Cool, Off |
| Stages | 1 Heat/1 Cool (Single Stage) |