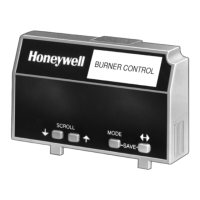
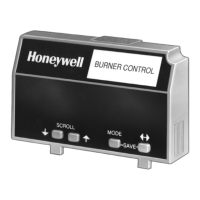
7800 SERIES S7800A KEYBOARD DISPLAY MODULE
65-0090—4 18
Fault 27
*Start Switch On*
Start Switch was on during
PREPURGE (Device specific).
1. Start Switch held on too long.
2. Check wiring; verify that Start Switch is correctly connected.
3. Make sure that the Start Switch is functioning properly and that
the switch contacts are free of contaminants.
4. Reset and sequence the relay module to PREPURGE; set the
Run/Test Switch to Test. Make sure there is no power at
terminal 6 during PREPURGE.
5. If steps 1 through 4 are correct and the fault persists, replace
the relay module.
Fault 28
*Pilot Flame Fail*
Pilot flame failure. 1. Check pilot valve wiring and operation. Correct any errors.
2. Check fuel supply.
3. Check pilot pressure and repeat pilot turndown test.
4. Check ignition transformer electrode, flame detector, flame
detector sighting and flame amplifier.
5. If steps 1 through 4 are correct and the fault persists, replace
the relay module.
Fault 29
*Lockout ILK*
Lockout Interlock fault. 1. Check wiring and correct any errors.
2. Inspect the fan; make sure that there is no blockage of the air
intake and that it is supplying air.
3. Make sure that the Lockout Interlock Switches are working
properly and that all switch contacts are free from
contaminants.
4. Reset and sequence the relay module to PREPURGE (place
the Run/Test Switch in the Test position, if available). Measure
the voltage between terminals 7 and L2(N). Line voltage
should be present.
5. If steps 1 through 4 are correct and the fault persists, replace
the relay module.
Fault 30
*Running ILK*
Running Interlock fault. 1. Inspect the Running Interlocks, including the Airflow Switch,
and the connections.
2. Make sure that the Running Interlocks, including the Airflow
Switch, are functioning properly and that switch contacts are
free from contaminants.
3. Reset and sequence the relay module to PREPURGE. Set the
Run/Test Switch, if available, to Test. Measure the voltage
between terminal 7 and L2(N). Line voltage should be present.
4. If steps 1 through 3 are correct and the fault persists, replace
the relay module.
Fault 31
*Low Fire Sw. Off*
Low Fire Interlock Switch failure
to close during RUN (Device
specific).
1. Check wiring and correct any errors.
2. Reset and sequence the relay module.
3. Use either the manual motor position to drive the motor to the
Low Fire position, or use the Run/Test Switch option, if
available. Sequence to Run drive to Low Fire and place the
switch in the Test position. Adjust the Low Fire Switch while in
this state to make sure it is closing properly.
4. While in Run, drive to Low Fire state, measure the voltage
between terminal 18 and L2(N). Line voltage should be
present. If not, the switch adjustment is incorrect and/or the
switch is defective and needs replacement.
5. Reset and sequence the relay module. If line voltage was
present between the Low Fire Switch and terminal 18, and the
fault persists, replace the relay module.
Table 7. Hold and Fault Message Summary (Continued).
Fault Code System Failure Recommended Troubleshooting
Artisan Technology Group - Quality Instrumentation ... Guaranteed | (888) 88-SOURCE | www.artisantg.com
 Loading...