6 7
5 Take a picture of how your wiring
looks right now
Be sure to include the letters next
to the terminals where the wires
are inserted. This will be a helpful
reference when wiring your thermostat.
Tip: If the color of your wires has faded
or if 2 terminals have the same wire
color, use the wire labels provided in
the package to label each wire.
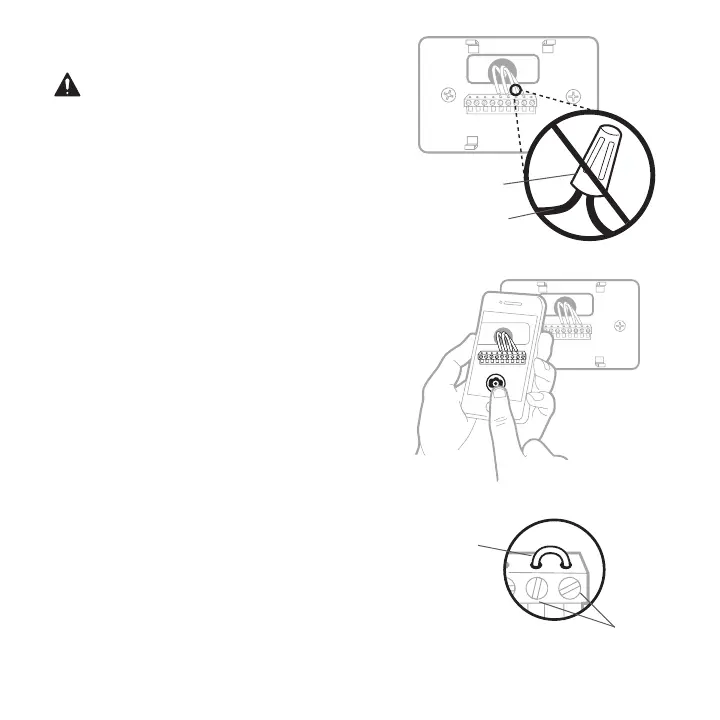
4 Make sure there are no
120/240V wires
Do you have thick black wires with
wire nuts?
Is your thermostat 120V or higher?
If you answered yes to either of these
questions, you have a line voltage
system and the thermostat will not
work.
If you are unsure visit:
resideo.com
6 Remove any jumpers
A jumper connects one terminal to
another terminal. It may look like a
small staple or even a colored wire and
must be removed before continuing.
Use a screwdriver to release wires from
terminals.
The thermostat does not
need jumpers.
Example of
a jumper
Wire nut
Thick black wire
Terminals