EasyManua.ls Logo

Honeywell T8600 User Manual

Honeywell T8600
4 pages
To Next Page IconTo Next Page
Page #1 background imageLoading...
Page #1 background image
1 69-0575—1
TG586A
Locking Cover for
Chronotherm
®
III Thermostats
R. R. • Rev. 1-95 • ©Honeywell Inc. 1995 • Form Number 69-0575—1
One model provides all the display options shown in
Fig. 1. It also allows display of LEDs (light emitting
diodes) on thermostat models with subbase LEDs.
NOTE: System switches cannot be changed when locking
cover is secured.
Fig. 1—Locking cover display options.
E
N
R
G
. S
A
V
.
SYSTEM
W
A
R
M
E
R
C
O
O
LE
R
E
N
R
G
. S
A
V
.
SYSTEM
TIME AND TEMPERATURE DISPLAY
AND PROGRAMMING
KEYS COVERED.
VISIBLE TIME AND
TEMPERATURE
DISPLAY.
VISIBLE TIME AND TEMPERATURE
DISPLAY WITH ACCESS TO
PRESENT SETTING/
WARMER/COOLER
KEYS.
M9843
P
R
E
S
E
N
T
S
E
TTIN
G
Application
The TG586A Locking Cover protects T8600, T8601,
T8602, T8603, T8611 and T8621 Microelectronic
Chronotherm
®
III Thermostats against tampering and dam-
age. It replaces the thermostat cover without removing or
adjusting the thermostat.

Other manuals for Honeywell T8600

Question and Answer IconNeed help?

Do you have a question about the Honeywell T8600 and is the answer not in the manual?

Honeywell T8600 Specifications

General IconGeneral
Compatibility24V HVAC systems
Wi-Fi EnabledNo
Battery BackupNo
Stages1 Heat/1 Cool
BacklightNo
Hold FunctionYes
Voltage24V AC

Summary

Application Overview

Product Protection and Compatibility

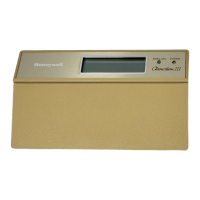
Protects Chronotherm III thermostats against tampering and damage.

Display Options and LED Support

Supports multiple display options and thermostat LEDs.

System Switch Limitation

System switches are inaccessible when the locking cover is secured.

Installation Guide

Installation Precautions

Read instructions carefully, ensure product suitability for application.

Thermostat Compatibility

TG586A is compatible only with specific Chronotherm III models.

Removing Existing Thermostat Cover

Steps to detach the original thermostat cover.

Installing the Locking Cover

Instructions for attaching the locking cover.

Locking Cover Installation Options

Install with cover insert for full protection or partial access.

Removing the Locking Cover

Instructions for detaching the locking cover.

Setting Adjustments

Adjusting Temperature (Cover Removed)

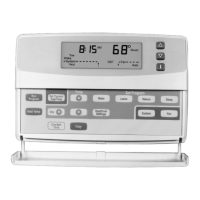
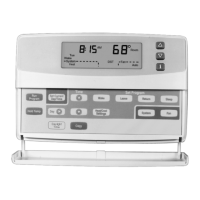
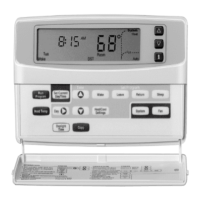
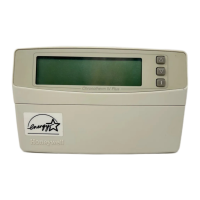
Raise or lower temperature using WARMER/COOLER keys when cover is off.

Important: Present Setting Key

Press PRESENT SETTING key before adjusting temperature.

Temperature Adjustment Procedure

Steps for adjusting temperature in Heat or Cool modes.

Auto Changeover Mode Adjustment

Procedure to change mode in Auto Changeover models.

Related product manuals