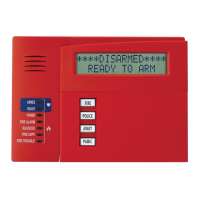
Checking Zones: Before arming your system, all protected doors, windows and other
detection zones must be closed or bypassed; otherwise the keypad displays "Not Ready."
GOTO: If the user is authorized, a keypad in one partition can be used to perform system
functions in the other partition by using the GOTO command.
Displays all faulted zones.
GOTO
User code +
+ partition no.:
1 through 8 = go to partition;
0 = return to home part
The keypad beeps to confirm the
partition change.
• Keypads automatically return to their
original partition after 2 minutes with no
ARMING THE SYSTEM, CHIME MODE, and CONTROLLING DEVICES
Before arming, close all perimeter doors and windows and make sure the Ready to Arm
message is shown. After arming, leave the premises through an entry/exit door during the
exit delay period and be sure the door is reclosed to avoid causing an alarm.
When to use an arming mode and what happens
STAY
STAY Mode 1
User code + 3
+
1
STAY Mode 2
User + 3 + 2
STAY Mode 3
User code + 3
+
3
for 3
Three beeps confirm.
• Used when staying on premises, but someone
might use the entrance door later.
• Arms the perimeter (doors, doors, windows,
etc., no interior zone such as s motion
detectors).
• An alarm sounds if a protected window or any
door is opened.
When armed in STAY mode, the system will
sound an alarm if a protected door or window is
opened, but you may otherwise move freely
throughout the premises.
Arrivals can enter through the entrance door
without causing an alarm, but must disarm the
system within the entry delay period or an alarm
will occur.
The system provides three STAY modes STAY
mode 1, 2, and 3.
•
When activated, STAY modes 1 and 2
automatically bypass specific zones assigned
by your installer to each of the STAY modes.
• STAY mode 3, when activated, automatically
bypasses all zones assigned to STAY modes 1
AND 2.
NOTE:
If none of the zones in a partition are
assigned to Stay mode 2, then when the user
enters [User Code] + [3]
(STAY), all zones
assigned to Stay mode 1 are automatically
bypassed.
The keypad beeps three times, displays the
armed message, and indicates which STAY mode
AWAY
User code + 2
two beeps confirm
Used when nobody is staying inside.
• Arms the entire system (interior and perimeter).
• An alarm sounds if a protected window or any
door is opened, or if any movement is detected
MAXIMUM
User code + 4
two beeps confirm
• Used when leaving the premises for extended
periods (e.g., close of business for a holiday).
• Same as Away mode, except entry delay is off.
• An alarm sounds same as Away mode, and
sounds upon opening entry/exit doors.
# + arming key
If programmed, you can press the [#] key in place
of your security code when arming the system
CHIME
MODE
User Code + 9
(enter again to
turn Chime mode
off)
• Alerts you to the opening of a perimeter door or
window while the system is disarmed.
• Three tones sound at the keypad whenever a
perimeter door or window is opened (interior
zones do not produce a tone).
• Pressing the READY key displays the open zones.
CONTROL
OUTPUT
DEVICE
User Code + #
Activate output device as programmed.
User Code + #
Activate output device manually
User Code + #
Activate output device or system event instantly
RANDOMIZE
OUTPUT
DEVICE
User Code + #
Randomize output devices set for random
schedules
User Code + #
Enter 42.
Randomize output devices set for random
schedules with activation times between 6 PM and
sequence used to
De-activate randomization
DISARMING THE SYSTEM and SILENCING ALARMS
The 1 OFF key is used to disarm the system, silence alarm and trouble sounds, and clear
memory of alarm displays.
and
User Code + 1
• System is disarmed and alarm sounding silences.
• To clear the memory of alarm display (if present),
enter your User Code + 1 again.
BYPASSING ZONES
Use the 6 BYPASS key when you want to arm your system with one or more zones
intentionally unprotected.
BYPASS
ZONES
User Code + 6 +
3-digit zone
numbers to be
bypassed
• When finished, the keypad will momentarily display a
"Bypass" message for each bypassed zone number.
Wait for all bypassed zones to be displayed.
• Arm the system as usual. When armed, the arming
message is displayed with “ZONE BYPASSED.”
• Bypassed zones are unprotected and will not cause
an alarm if violated.
• The system does not allow fire zones to be bypassed.
• Zones may be automatically unbypassed when the
PANIC KEYS
Your system may have been programmed to use special keys or key pairs to manually
activate emergency (panic) functions as follows:
No change to the keypad (no sound).
Audible Alarm Audible alarm A loud, steady alarm at keypad(s) and
at any external sounders.
Personal Alarm Auxiliary alarm Steady alarm sound at keypad(s), but
not at external bells or sirens.
Fire Alarm Fire alarm Temporal (pulsing) sound at external
∗ Enter the appropriate keys programmed by your installer for each function (see installer).
∗∗ All panic functions send signals to the Central Monitoring Station, if connected.
To activate a Panic Function:
Press and hold down the programmed or paired
keys for at least 2 seconds for the desired
emergency function (or press both keys of the
assigned key pair at the same time).
• When entering codes and commands, sequential key depressions must be made within
4-5 seconds of one another. If 4-5 seconds elapse without a key depression, the entry will
be aborted and must be repeated from its beginning.
• If you make a mistake while entering a security code, stop, press the
key, and then start
over. If you stop in the middle while entering a code, and then immediately start the entry
over, an erroneous code might be entered.
SECURITY CODES
Your installer assigned a master code that is used to perform all system functions.
In addition, other security codes can be assigned for use by other users.
• Only the Master and Manager Codes can assign security codes to users.
• Users are identified by a 3-digit user number.
• In addition to a security code, each user is assigned an authority level and various system
attributes. See the full User Guide for definitions of each Authority Level.
• Security codes can be used interchangeably within a partition when performing system
functions (a system armed with one security code can be disarmed by a different security
code), with the exception of the Guest codes.
• Security code programming involves these steps:
1. Choose a user number from the set of users assigned to the partition in which the user
will be operating, and assign a 4-digit security code.
2. Assign an authority level to that user.
3. Assign other attributes as necessary.
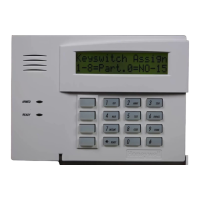
Assigning Security Codes and User Attributes
The following lists the various command strings for adding security codes and attributes.
Add Security
Code
Master or Manager code + 8 + [user no.] + new user’s security
code
Follow the screen prompts to add the authority level and other
attributes for this user. The Keypad beeps once to confirm that
new user was added.
Delete Security
Code
Master or Manager code + 8 + [user no.] + Master or Manager
code first entered. When prompted, press 1 (YES).
The security code set for this user number is erased from the
system.
Change a User
Security Code
Master code + 8 + [user no.]. Enter the new code for that user.
When prompted, press 0 (NO).
The security code set for this user number is changed to the new
code.
 Loading...