Do you have a question about the Hoover H-DISH 300 LITE and is the answer not in the manual?
Appliance usage by persons aged 8+ with limited capabilities if supervised.
Appliance not intended for persons with reduced capabilities unless supervised.
Children must be supervised to ensure they do not play with the appliance.
Children of aged 3 and under should be kept away unless continuously supervised.
Damaged supply cord must be replaced by manufacturer or service agent.
Only use supplied hose-sets for water supply connection.
Water pressure 0.08-1 MPa; ensure ventilation openings are not obstructed.
Appliance must be positioned for accessible plug; avoid leaving door open.
Refer to manufacturer's website for further product information.
Ensure system is earthed and socket is compatible with plug.
Ensure dishwasher does not crush power cables; avoid adaptors/extension cables.
Appliance must not be supplied via external switching device or timer.
Unplug appliance and turn off water supply before cleaning or maintenance.
Do not leave appliance exposed to elements (rain, sun).
Leaning or sitting on open door can cause tip-over.
Do not lift by the door; use two people; do not lean door on trolley.
Only wash normal kitchen utensils; avoid items contaminated by petrol, paint, etc.
No need to add salt if water softener is installed at home.
Switch off, turn off water, do not tamper; repair by approved agent with genuine parts.
Load sharp utensils with points down or horizontally in the basket.
Remove packaging; keep materials away from children; do not install if damaged.
Do not connect to mains until all installation ops are performed as per notes.
Do not connect to mains until front panel is fully installed to avoid electrical hazard.
For worktop removal, contact Authorized Technical Assistance Centres.
Ensure product is installed horizontally using adjustable feet.
Broken hose must be replaced with an original spare part.
Use only supplied inlet hose; old hoses must not be reused.
Instructions for removing anti-removal device and inlet hose.
Connect new inlet hose by screwing the ring nut.
Fit the anti-removal device with the designated screw.
Connect to water mains using new hose-sets; old ones should not be reused.
Inlet and drain hoses can be directed to left or right.
Connect to cold or hot water, not hotter than 60°C.
Water pressure must be between 0.08 MPa and 1 MPa.
Connect inlet hose to tap for water supply cutoff when not in use.
Dishwasher fitted with 3/4" threaded connector.
Connect inlet hose "A" to tap "B" with 3/4" attachment; ensure tightened.
Inlet pipe can be lengthened up to 2.5m with extension pipe from Service Centre.
Run water through new pipes before connecting to remove deposits.
Overview of overflow safety device and its function.
Prevents flooding caused by malfunctions or pipe fractures.
Stops water flow if the supply tube deteriorates.
Instructions for discharging the outlet hose into a standpipe or sink.
Standpipe must be at least 40cm high with a minimum 4cm internal diameter.
Advisable to fit an anti-odour air trap for the outlet hose.
Outlet hose can be extended up to 2.5m, max height 85cm.
Hose can hook over sink side but must not be immersed in water.
Hose clamp must be attached to wall under worktop.
Check that there are no kinks in the inlet and outlet hoses.
Appearance of white stains indicates salt container needs filling.
Container for salt is on the bottom of the machine for softener regeneration.
Use only salt specifically designed for dishwashers.
Unscrew cap, refill container, clean residue, retighten.
Recommended to run a complete washing cycle or cold rinse after loading salt.
Add water until container overflows for first start-up.
Capacity is between 1 kg; refill from time to time.
Instructions for adjusting Type A basket using blocks 'A'.
Upper basket with height adjustment system for Easy Click models.
Adjust before loading; accompany descent; never raise/lower on one side only.
Upper basket features movable supports for cups, knives, ladles.
Movable supports can be open for cups/knives or lowered for more space.
Goblet-shaped glasses can be hung on the ends of the supports.
Position larger plates inclined towards the front for easy insertion.
Ensure spray arm rotates freely without hitting dishes after loading.
Accessory for optimal washing of long kitchen objects like bread knives, ladles.
Special accessories for delicate items like crystals, pottery, wine glasses.
Houses pots, pans, tureens, salad bowls, lids, serving plates, dinner plates, soup plates.
Place cutlery handle down in the special plastic container in the lower basket.
Lower basket may have adjustable combs for dish stability.
Basket for cutlery, excluding long items that interfere with the sprinkler.
Use the third basket for cutlery, load knives with cutting side down.
Load sharp utensils with points down or horizontally.
Use detergent specifically designed for dishwashers (powder, liquid, gel, tablet).
Open dispenser door, pour detergent, close door until it clicks.
Use one tablet, ensure it doesn't interfere with the opening system.
Use 20-30g for wash section; amount varies by dirtiness and dish type.
Ensure plates do not obstruct the detergent dispenser when loading.
Avoid excessive detergent to limit environmental damage.
Additional detergent for pre-wash cycles must be poured into the appropriate location (C).
Tablets may not fully dissolve in short programs; choose longer ones.
Concentrated detergents with enzymes are eco-friendly and effective at 50°C.
Detergents with rinse aid must be used with empty rinse aid container.
Follow packaging instructions; check water hardness; ignore indicator lights.
Can cause limescale, reduced washing/drying performance; issues not covered by warranty.
If problems occur, return to separate salt, detergent, and rinse aid.
Helps dishes dry quickly and prevents spots and stains.
Open dispenser lid, add rinse aid up to Max indication.
Spilled rinse aid can cause excessive frothing; remove from wash tank.
Display or indicator light shows when rinse aid needs filling.
Procedure to adjust rinse aid level (R1-R6) via settings menu.
Water limestone content affects limescale and drying; regulate rinse aid accordingly.
Check rinse aid level via optical display (B) on dispensing container.
Adjust rinse aid amount during washing via a special smartphone APP.
Central container, micro filter, and flat gauze.
Check and clean filters after each wash for excellent results.
Turn handle anti-clockwise and pull upwards to remove the filter unit.
Central container is removable by pressing buttons on sides.
Wash rotor arms under water jet to clear blockages in spray heads.
Re-assemble by following reverse operations carefully.
Check filter unit every two weeks; check central container and gauze filter are not clogged.
Remove food debris, do not pre-rinse, soak encrusted dishes, place dishes correctly.
Save energy/water by using full loads and appropriate programmes.
Avoid washing certain materials like thermoplastic, aluminum, leaded glass.
Rinse silver immediately, do not sprinkle detergent, keep separate from other metals.
Test wash one item first to check if decorations fade.
Avoid silver cutlery with non-stainless steel handles due to potential chemical reaction.
Ensure new crockery or cutlery is suitable for dishwasher washing.
Avoid dripping from top rack by removing lower rack first.
Leave door ajar for air circulation to improve drying performance.
Disconnect power; clean with a damp cloth, avoid solvents/abrasives.
Tank is self-cleaning; wipe door gasket regularly.
Periodically run a cycle with specialist cleaning products to remove deposits.
Check and clean spray heads on rotor arms if dishes are not washed/rinsed properly.
Instructions for removing upper and lower rotor arms.
Refit rotor arms, remembering to re-align the arrow and screw into position.
Spots on lining may be due to iron salts; remove with mild abrasive agent.
Turn off water supply and switch off machine after every wash.
Steps for not using the machine for some time (empty wash, unplug, etc.).
Explanation of each button (ON/OFF, Programme Selection, Reset, Half Load/Tablets, Delay Start/Settings, Start/Reset).
Press the ON/OFF button to turn the appliance on and off.
Open door, place dishes, press ON/OFF, select programme using PROGRAMME SELECTION button.
Press START/RESET button; programme starts automatically when door is shut.
Memory stores selected programme and resumes when power is restored.
Programmes reducing consumption, noise, and improving performance.
Opening door stops machine; close door to resume.
Hold RESET button for 3 seconds to change or cancel a programme.
Check for detergent before starting a new programme; top up if necessary.
End indicated by 3 signals; "END" displayed for one minute.
Door opens automatically during drying phase in models with this option.
Select for small, lightly-soiled loads to save time, energy, water.
Optimises use of combined detergents; may extend RAPID programme duration.
Indicator lights up when salt container needs refilling.
Press RESET button after refilling salt container.
Must fully refill salt container to ensure correct functioning of salt indicator.
Set start time by delaying by 3, 6, or 9 hours.
Adjust parameters like softener, buzzer, memo function via settings menu.
Turn appliance OFF, then hold ON/OFF for 3 secs to turn ON and enter menu.
Activate or deactivate acoustic indicator using HALF LOAD/TABLETS button.
Enable memorisation of the last programme used.
Disables controls to prevent unwanted changes; turn on/off via CHILD LOCK button.
Adjust softener unit based on water hardness level (S0-S5).
Table listing water hardness levels and corresponding softener settings.
Water softener unit is factory-set at level 3 for most users.
Information on water and energy consumption during resin regeneration.
Errors reported by "E" number and audio signal.
Errors shown by LED flashes sequence.
"NO WATER" or E2 error; check water supply and hose.
E3 error; check drain pipe, siphon, and filters.
E4 error; check drain pipe, siphon, and filters.
E8 error; check water heating element and filter plate.
E18 error; check water level problems and clogged filter plate.
E21 error; close water tap and disconnect appliance.
For any other code, turn off, unplug, wait, restart; contact service if persists.
Check plug, buttons, door, electricity.
Check water tap, hose bends, and filter.
Check filter, drain pipe bends, extension connection, outlet connection.
Check drain pipe position.
Reduce detergent, check for items preventing rotation, clean filter.
Check water supply tap turned off.
Check saucepan washing, repositioning, spray arm blockage, loading.
Check salt container, programme duration, dispenser obstruction.
Check salt and rinse aid level; contact service if fault persists.
Re-check loading of dishes and revolving arms.
Ensure adequate air flow; leave door ajar; fill rinse aid.
Do not attempt self-repair; contact Authorized Technical Assistance Centres. Use original spare parts.
| Brand | Hoover |
|---|---|
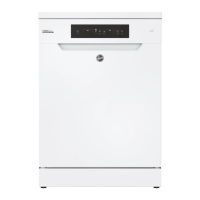
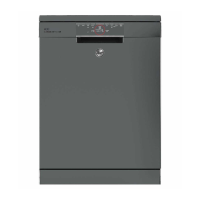
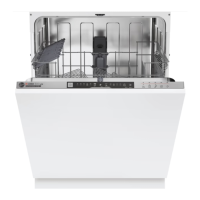
| Model | H-DISH 300 LITE |
| Category | Dishwasher |
| Language | English |