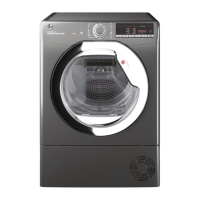
This document is a user manual for a Hoover tumble dryer, providing instructions and guidelines for safe use, installation, maintenance, and optimal performance.
Function Description:
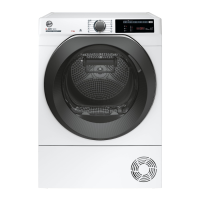
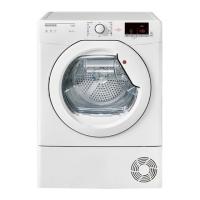
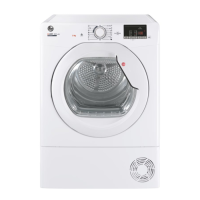
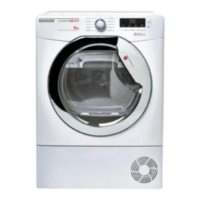
The Hoover tumble dryer is designed for domestic use, specifically for drying household textiles and garments. It offers various drying programs tailored to different fabric types and load sizes, including cottons, synthetics, wool, jeans, shirts, and sportswear. Some models are equipped with Wi-Fi technology, allowing remote control via a dedicated hOn App. The dryer features a "Drying Manager" function for automatic cycles, indicating intermediate drying levels. It also includes an "ACTIVE DRY" cycle for refreshing garments and smoothing creases, and an "ANTI CREASE" option to minimize wrinkles.
Important Technical Specifications:
- Power Input / Power Current Fuse Amp / Supply Voltage: Refer to the product rating plate.
- Maximum Load Drying Weight: Refer to the energy label.
- Energy Class: Refer to the energy label.
- Refrigerant Gas: Contains R290, an eco-sustainable and flammable refrigerating gas.
- Wi-Fi Network Frequency: Must be set to the 2.4 GHz band; not configurable on 5 GHz networks.
- Installation Temperature: Ambient room temperature should be between +5°C and +35°C for optimal performance. Operating between +2°C and +5°C may cause water condensation and drips.
- Drain Hose Connection: Maximum height of 85 cm from the base of the dryer.
- Stacking Kit Compatibility:
- Standard size: for washing machines with a minimum depth of 44 cm.
- Slim size: for washing machines with a minimum depth of 40 cm.
- Universal stacking kit with sliding: for washing machines with a minimum depth of 47 cm.
Usage Features:
Quick User Guide:
- Open the door and load laundry, ensuring garments do not hinder door closure.
- Gently close the door until it clicks.
- Select the desired drying program using the knob or specific buttons.
- Press the START/PAUSE button to begin.
- If the door is opened mid-cycle, close it and press START/PAUSE to resume.
- The machine enters a cool-down phase near completion.
- After the cycle, the drum rotates intermittently to minimize creasing until switched OFF or the door is opened.
- Warning: Do not open the door during automatic programs for proper drying.
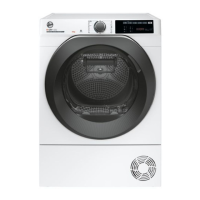
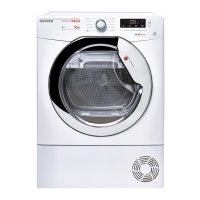
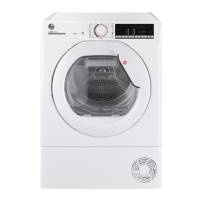
Controls and Programmes:
- Programme Selector (A): Turn to select programs; must be in OFF position at the end of a cycle.
- START/PAUSE Button (B): Starts, pauses, and resumes cycles.
- DELAY START Button (C): Delays program start from 30 minutes (or 1 hour on some models) up to 24 hours.
- TIME CYCLE SELECTION/RAPIDS Button (D): Transforms automatic cycles to programmed ones (up to 3 minutes after start) or selects rapid program durations (30'/45'/59').
- ACTIVE DRY Button (E): Refreshes garments and smooths creases; available during program selection.
- DRYING SELECTION Button (F): Sets desired dryness level (Ready to Iron, Dry Hanger, Dry Wardrobe, Extra-dry); editable up to 3 minutes after cycle start.
- ANTI CREASE Button (G): Activates alternate drum movements to reduce folds and sets drying level to "Ready to Iron."
- DISPLAY (H): Shows remaining time, delayed start time, and notifications.
- CHILD LOCK (F+G): Locks control panel buttons when F and G are pressed simultaneously for 2 seconds.
Remote Control (Wi-Fi):
- Appliance Pairing: Download the hOn App, create a profile, and pair the appliance by scanning the QR code or using the provided link.
- Enable Remote Control: Ensure router is on and connected to the Internet, load laundry, close the door, and turn the program selector to the REMOTE CONTROL (Wi-Fi) position. Start the cycle via the app.
- Disable Remote Control: Turn the program selector to any position other than REMOTE CONTROL (Wi-Fi) (without passing OFF) to regain control from the appliance panel. If the door is opened, remote control is disabled; close the door and re-select REMOTE CONTROL to re-enable.
Drying Guide:
- Standard Cycle (COTTON DRY): Most energy-efficient for normal wet cotton laundry.
- Maximum Drying Weight: Cottons (max. capacity declared), Synthetics/Delicates (Max. 4 kg).
- EN 61121 Programs: STANDARD DRY COTTON, IRON DRY COTTON (WHITES - Ready to Iron), EASY-CARE TEXTILE (SYNTHETICS - Dry Hanger).
Program Descriptions:
- WHITES: For cottons, sponges, towels.
- ECO COTTON: Most efficient for cottons and linens (hang dry).
- WOOLMARK: Approved by The Woolmark Company for machine washable wool (up to 1 kg), reverse clothes before drying.
- TRAINERS: Dries 2 pairs of canvas shoes using a special rack; remove laces.
- SYNTHETICS: For synthetic fabrics requiring specific treatment.
- SHIRTS: Minimizes tangles and folds; remove immediately after cycle.
- JEANS: Dries jeans/denim uniformly; flip garments inside out.
- FITNESS: Gentle drying for technical sportswear to preserve elasticity.
- SOFT CARE: For delicate garments with a small load.
- FRESH CARE: Dries different fabrics (cotton and synthetic) together in 59 minutes; cycle shortens for smaller/drier loads.
- ALLERGY CARE: Reduces allergens like dust mites, pet hair, pollens, and detergent residue.
- CARE 30'/45'/59': Rapid drying cycles (30, 45, or 59 minutes).
- ALL IN ONE: Dries different fabrics simultaneously; alerts when lightweight items are dry.
- AUTO CARE: Adapts drying technology to load capacity and fabric type automatically.
Practical Hints:
- Always dry maximum load for energy saving.
- Always clean filters before each cycle.
- Never put dripping wet items into the dryer.
- Sort laundry by care symbols, amount/thickness, and fabric type.
- Do not tumble dry silk, nylon stockings, delicate embroidery, fabrics with metallic decorations, PVC, or leather trimmings.
- Do not dry articles treated with dry cleaning fluid or rubber clothes (fire/explosion hazard).
- Remove all objects (lighters, matches) from pockets.
- Do not overload the drum, especially with large wet items.
Maintenance Features:
Environmental Conditions:
- Appliance is marked according to European directive 2012/19/EU on Waste Electrical and Electronic Equipment (WEEE).
- WEEE should not be treated as household waste; dispose at relevant collection points.
Installation:
- Do not install in low temperature rooms or where frost may occur.
- Do not install near curtains.
- Do not install behind a lockable, sliding, or opposite-hinged door that restricts full opening.
- Ensure correct installation for safety; adjust feet for level placement.
Electrical Connections and Safety Instructions:
- Ensure electrical system is earthed and compatible with appliance plug.
- Do not use adapters, multiple connectors, or extensions.
- Plug must be accessible after installation.
- Do not plug in or switch on until installation is complete.
- Damaged supply cords must be replaced by manufacturer/service agent.
- Warning: Appliance must not be supplied through an external switching device (timer) or circuit that is regularly switched on/off.
Ventilation:
- Ensure adequate ventilation to prevent gases from other burning fuels entering the room.
- Install rear of appliance close to a wall.
- Maintain a 12 mm gap between machine and obstructions.
- Keep inlet and outlet air clear of obstruction.
- Ensure carpets/rugs do not obstruct ventilation openings.
- Prevent items from falling behind dryer that could obstruct air inlets/outlets.
- Exhaust air must not be discharged into a flue used for other burning fuels.
- Regularly check for restricted airflow and lint accumulation.
Water Containers:
- Water is collected in a container; an indicator light/message advises when it needs emptying (recommended after each cycle).
- To remove container tank in door drawer: Pull out by handle (A), tilt to empty (B), replace (C).
- To remove container bottom water drawer: Pull bottom of kickplate (A), pull handgrip to slide out container (B), support with both hands (C), open lid to empty (D), replace lid and slide container back (D), refit kickplate.
Door, Filters, and Heat Exchanger:
- Lint Filters and Heat Exchanger Cleaning Indicator Light: Illuminates for lint filters, blinks for heat exchanger.
- Cleaning Lint Filters: Extract filters (A and B) by pulling upwards, open them, gently remove lint with fingertips/brush/cloth/water, close and reposition.
- Warning: Clean filters before every cycle. Dry filters if cleaned with water. Ensure no lint residue before reinserting. Do not use dryer without filters.
- Cleaning Heat Exchanger: Remove kickplate, turn handle anti-clockwise to pull out front cover, gently clean fins with soft brush/vacuum cleaner (do not damage fins), refit cover and kickplate.
- Warning: Clean heat exchanger every six months or when indicator light blinks. Do not touch fins with hands.
Troubleshooting and Warranty:
- Common Issues: Drying time too long/clothes not dry enough, dryer not operating, noisy dryer, filters cleaning indicator light on, water container indicator light on.
- Troubleshooting Steps: Check program selection, spin-drying, filter cleanliness, heat exchanger cleanliness, load size, airflow obstructions, power supply, fuse, door closure, and activation.
- Customer Service: If problems persist, contact service for advice or technician visit. Charges may apply if machine is working, incorrectly installed, or misused.
- Spares: Always use genuine spares from service.
- Warranty: Product guaranteed under terms on certificate; keep certificate and purchase receipt.
- Disposal: Disconnect mains plug, cut power cable, destroy with plug. Break door hinges/lock to prevent children from being trapped.
- Manufacturer Responsibility: Declines responsibility for printing errors; reserves right to make product changes without altering essential characteristics.