STEP
Determine the type of installation that is
correct for your system (hose or drip) and insert
the correct Flo-Disc if necessary (see “Flow
Requirements Section”).
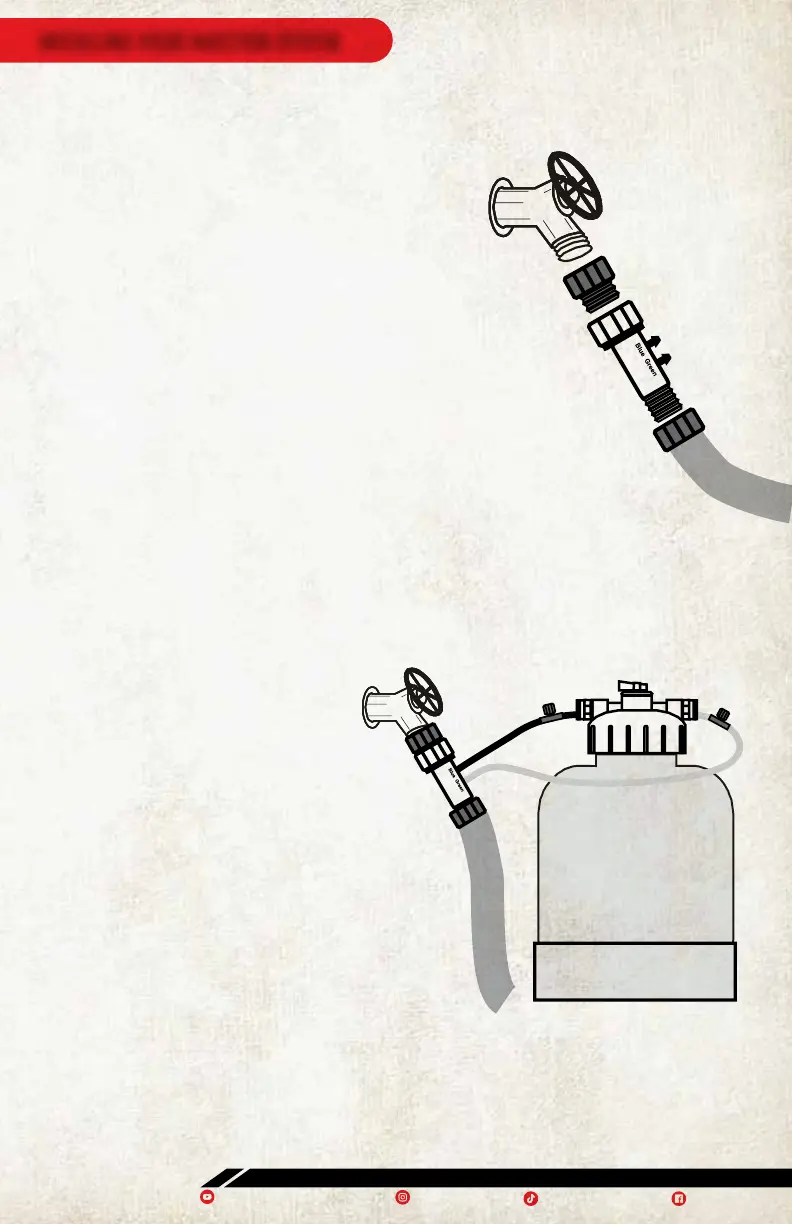
STEP
Install the Hose Bib Adapter inthe correct position
as shown in the illustrations.
STEP
Aach tubing to the Hose Bib Adapter fiing.
Slide the Black Tubing over the barb next to the
Blue mark carefully to avoid stressing the fiing.
Repeat with the Clear Tubing next to the Green mark.
STEP
Aach tubing to the white tank cap.
Do not remove the fiings. To install press
the tubing into the hole until it stops. Light
pressure is required, do not stress the fiings.
COMPLETED
INSTALLATION
GARDEN HOSE
GREEN
BLUE
FOR TUTORIALS, DEMONSTRATIONS, AND EXPERT GARDENING TIPS, FOLLOW US ON SOCIAL MEDIA!
HOSSTOOLS
YOUTUBE.COM/HOSSGARDENTOOLS HOSSGARDENTOOLS @GARDENINGWITHHOSS
4
INSTALLING YOUR INJECTION SYSTEM
HOSE
BIB
BACK FLOW
PREVENTER
HOSE BIB
ADAPTER
GARDEN
HOSE
ADDITIONAL INSTALLATION NOTES
A back flow preventer (sold separately)
should be installed to use an injection
system per local plumbing codes.
When possible the Hose Bib
Adapter fiing should always be
the last component installed in any
configuration. Timers, filters, and
pressure regulators may be installed
aer the Hose Bib Adapter.
The included Tubing Shut O Valves
(TVLV) may be used to shut o the unit.
These can be installed in the clear and
black tubing at any point. Tubing valves
normally drip under pressure, this will
not aect the operation of the injector.
Injector includes 5 of clear and 5 of black tubing, you may trim tubing to necessary length.
A timer may be installed before or aer the hose bib connector.