EasyManua.ls Logo

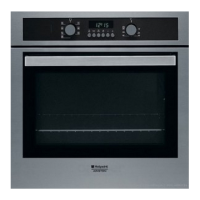
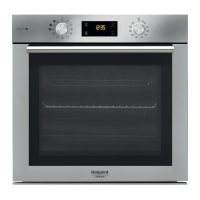
Hotpoint Ariston FA4S 844 P IX HA User Manual

Hotpoint Ariston FA4S 844 P IX HA
16 pages
To Next Page IconTo Next Page
Page #1 background imageLoading...
Page #1 background image
EN
Quick guide
SLIDING SHELVES AND SHELF GUIDES
Before using the oven remove the protective tape [a] and then
remove the protective foil [b] from the sliding runners.
REMOVING THE SLIDING RUNNERS [c]
Pull the lower part of the sliding runner to uncouple the lower
hooks (1) and pull the the sliding runners upwards, removing
them from the upper hooks (2).
REFITTING THE SLIDING RUNNERS [d]
Hook the upper hooks on the shelf guides (1) then press the
lower part of the sliding runners against the shelf guides, until
the lower hooks are clicking (2).
1
2
1
2
[c] [d]
REMOVING AND REFITTING THE SHELF GUIDES
1. To remove the shelf guides, rmly grip the external part of
the guide, and pull it towards you to extract the support and
the two internal pins from the lodging.
2. To reposition the shelf guides, position them near the cavity
and initially insert the two pins into their lodgings. Next,
position the external part near its lodging, insert the support,
and rmly press towards the wall of the cavity to make sure
the shelf guide is properly secured.
FIRST TIME USE
1. SETTING THE TIME
You will need to set the time when you switch on the
appliance for the rst time: Press until the icon and the
two digits for the hour start ashing on the display.
Use
or to set the hour and press to conrm. The
two digits for the minutes will start ashing. Use or to
set the minutes and press to conrm.
Please note: When the icon is ashing, for example following
lengthy power outages, you will need to reset the time.
2. SET THE POWER CONSUMPTION
By default the oven is programmed to work at a power
higher than 3 kW (Hi): To operate the oven at a power that is
compatible with a domestic power supply less than 2,9 kW
(Lo), you will need to change the settings.
To go to the change menu, turn the selection knob to
,
then turn it back to .
CONTROL PANEL DESCRIPTION
1 32 4 5
6
1. SELECTION KNOB
For switching the oven on by selecting
a function. Turn to the position to
switch the oven o.
2. LIGHT
With the oven switched on, press
to turn the oven compartment lamp on
or o.
3. SETTING THE TIME
For accessing the cooking time settings,
delayed start and timer.
For displaying the time when the oven
is o.
4. DISPLAY
5. ADJUSTMENT BUTTONS
For changing the cooking time settings.
6. THERMOSTAT KNOB
Turn to select the temperature you
require when activating manual
functions.
THANK YOU FOR BUYING A HOTPOINT
ARISTON PRODUCT
In order to receive a more complete
assistance, please register your product on
ww w . hotpoint . eu/register
Before using the appliance carefully read the Safety
Instruction.
Questions and Answers:

Hotpoint Ariston FA4S 844 P IX HA Specifications

General IconGeneral
Temperature Range50 - 250 °C
Thermostat Range50 - 250 °C
Self-CleaningYes
Oven cleaning typePyrolytic
Height595 mm
ColorStainless steel
Installation TypeBuilt-in
ThermostatYes
Control positionFront
TimerYes
Cool doorYes
GrillYes
Grill power2800 W
Convection cookingYes
Defrost functionYes
Pizza making functionYes
Installation compartment width560 mm
Product colourStainless Steel
Cooling FanYes
LightYes
Voltage220-240 V
Oven sizeLarge
Number of ovens1
Oven typeElectric
Oven Capacity71 L
Frequency50 Hz
Total oven(s) interior capacity71 L

Summary

Control Panel Description

Selection Knob

Switches the oven on/off by selecting a function. Turn to '0' to switch off.

Light

Press to turn the oven compartment lamp on or off when the oven is switched on.

Setting the Time

Accesses cooking time, delayed start, and timer settings. Displays time when oven is off.

Display

Shows information for cooking time settings, delayed start, and timer.

Adjustment Buttons

Used for changing the cooking time settings.

Thermostat Knob

Selects the required temperature for manual functions.

Sliding Shelves and Shelf Guides

Removing the Sliding Runners

Instructions to detach sliding runners from shelf guides by uncoupling lower and upper hooks.

Refitting the Sliding Runners

Steps to reattach sliding runners by hooking upper hooks and pressing lower hooks into place.

Removing and Refitting Shelf Guides

Guide to remove shelf guides by pulling outwards and refit by inserting pins and pressing.

First Time Use

Setting the Time

Procedure to set the initial hour and minute after switching on the appliance.

Set the Power Consumption

Instructions to change oven power setting from 'Hi' to 'Lo' for lower wattage supplies.

Functions and Daily Use

Conventional Cooking

For cooking any dish on a single shelf.

Forced Air Cooking

For cooking different foods on multiple shelves at the same temperature.

Pizza Function

Ideal for baking various types and sizes of pizza and bread.

Grill Function

For grilling, roasting, and toasting. Use dripping pan with water for meat.

Turbo Grill Function

Suitable for roasting large joints of meat like legs or roast beef.

Rising Function

Aids in the effective rising of sweet or savoury dough.

Eco Forced Air

For cooking roasts on a single shelf, preventing excessive drying.

Automatic Cleaning - Pyro

Eliminates cooking spatters using a high-temperature cycle.

Steam Functions

Provides excellent results by adding steam to cooking cycles.

Preheating and Residual Heat

Indicates preheating phase with audible signal and flashing icon.

Programming Cooking

Duration Programming

Set the cooking duration, including preheating, by pressing until the icon flashes.

End Cooking Time / Delayed Start

Program the time when cooking should end, enabling delayed start.

End of Cooking Notification

An audible signal and display indicate function completion.

Setting the Timer

Use the display as a timer during active functions or when the oven is off.

Automatic Cleaning Function - Pyro

Instructions and safety precautions for running the pyrolytic self-cleaning cycle.

Troubleshooting

Oven Not Working

Check power supply and connections; turn off and restart the oven.

Display Shows 'F' Error

Indicates an oven failure; contact After-sales Service with the error code.

Display Shows 'Hot' / Function Won't Start

Oven temperature is too high; allow to cool before activating function.

Related product manuals