49-5000041 Rev. 3 11
Installation
Unit Installation (Continued)
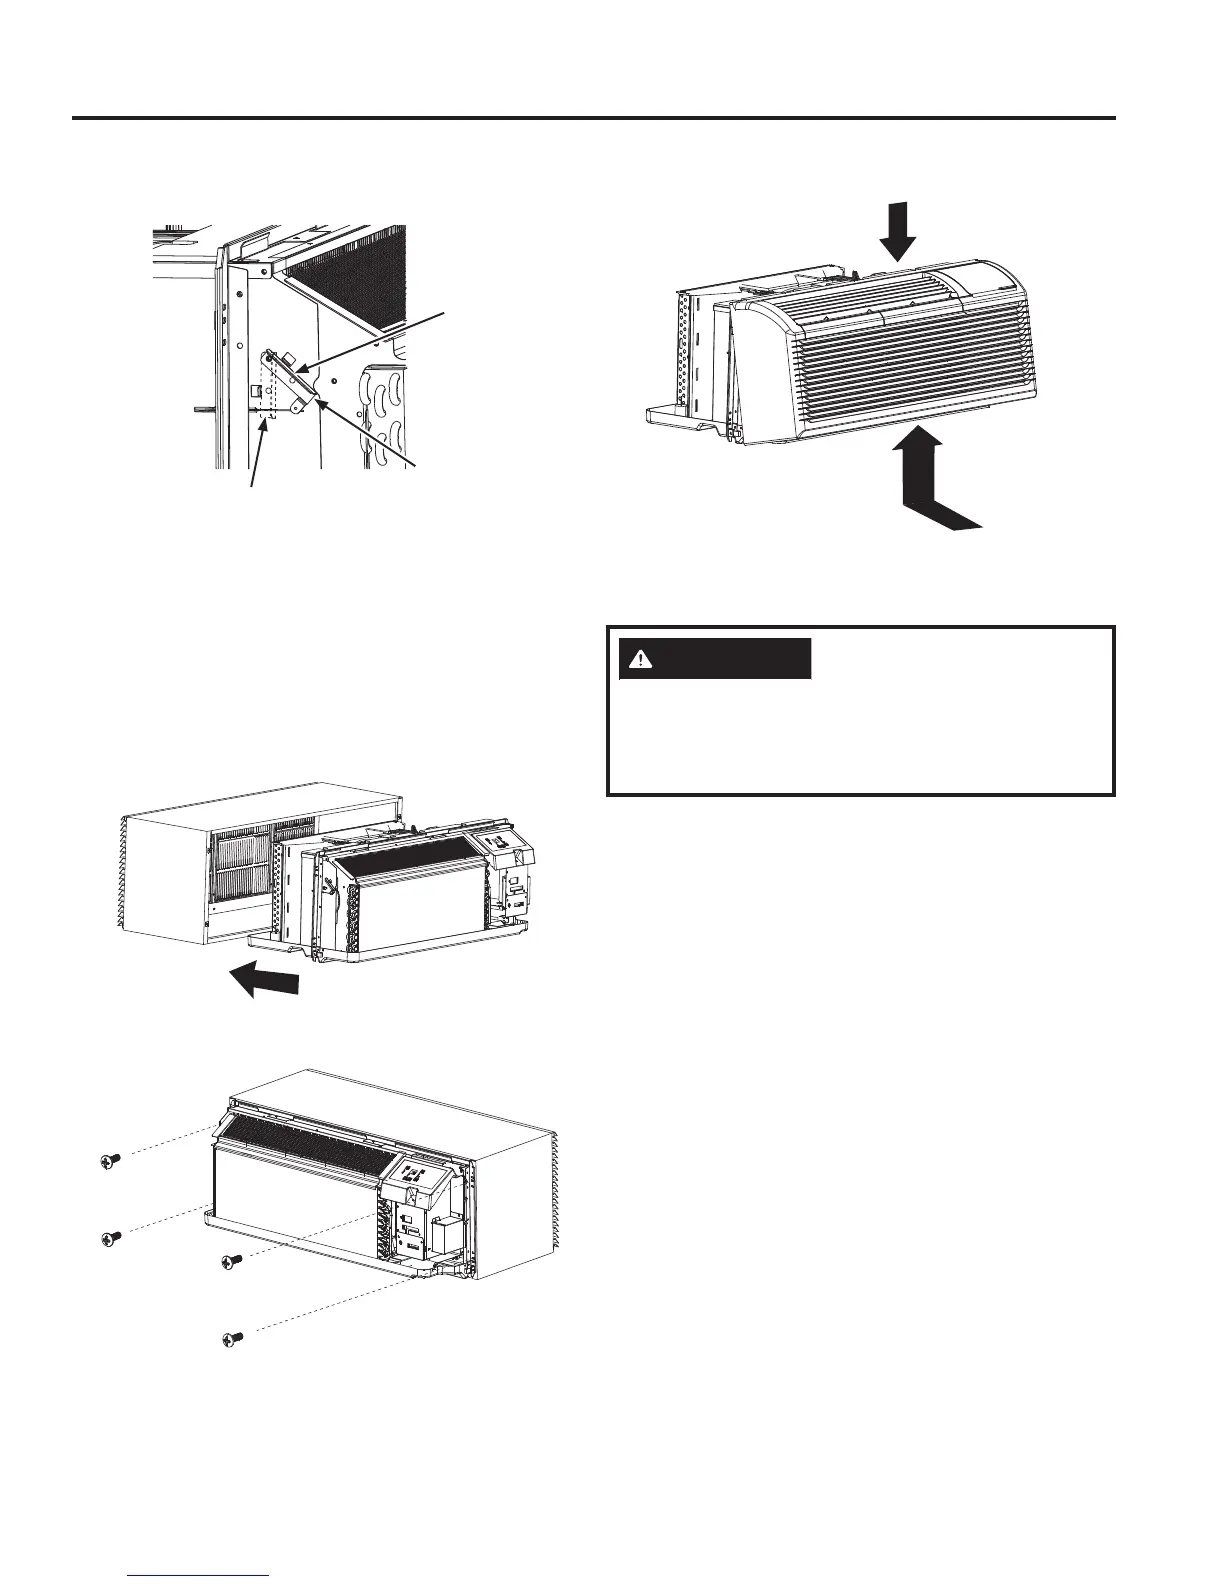
Ŷ5RWDWHWKHYHQWFRQWUROOHYHUWRHLWKHURSHQRUFORVH
the vent door.
NOTE: :KHQYHQWFRQWUROOHYHULVVHWDW&/26(RQO\
WKHDLULQVLGHWKHURRPLVFLUFXODWHGDQGILOWHUHG:KHQ
VHWDW23(1VRPHRXWGRRUDLUZLOOEHGUDZQLQWRWKH
room. This will reduce heating and cooling efficiency.
Ŷ/LIWXQLWOHYHODQGVOLGHXQLWLQWRZDOOVOHHYHXQWLOILUPO\
against front of wall sleeve and secure with 4 screws
DQGZDVKHUVVXSSOLHGLQWKH6/((9($66(0%/<
through the unit flange holes. If screws are needed,
SXUFKDVH[ò´KH[RUSKLOOLSVKHDGVFUHZVDW\RXU
local hardware store.
Ŷ5HLQVWDOOIURQWSDQHO
3ODFHWDEVRYHUWRSUDLO1.3XVKLQZDUGDWERWWRP
until panel snaps into place (2.).
Vent Open
Vent
Closed
Vent
Control
/HYHU
1.
2.
CAUTION
Do not put obstacles around air-inlet or inside of
air-outlet of the unit, such as window curtains, etc.
$OZD\VLQVHUWWKHILOWHUVHFXUHO\&OHDQILOWHURQFH
HYHU\ZHHNVDVUHTXLUHG
INSTALLATION