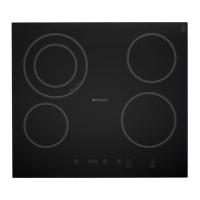
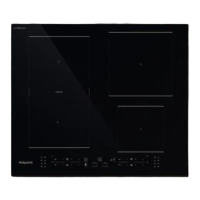
This document provides operating instructions for Hotpoint HOB models GE640X, GE640TX, GE641TX, GE640KX, and GE641TKX. It covers installation, usage, precautions, maintenance, troubleshooting, and after-sales service.
Function Description
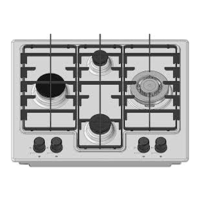
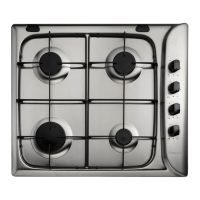
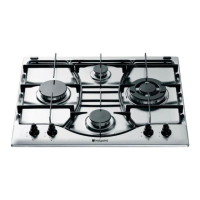
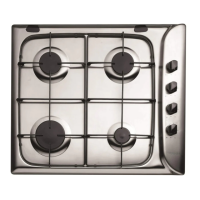
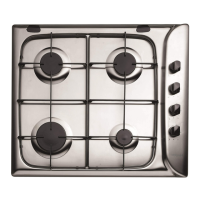
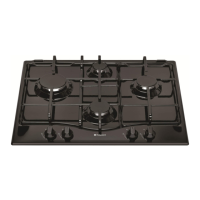
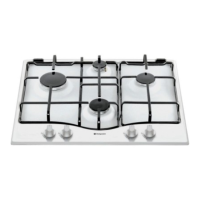
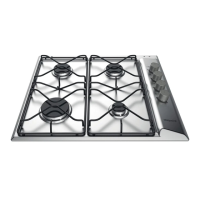
The Hotpoint HOB is a gas cooking appliance designed for domestic use. It features multiple gas burners of varying sizes and power, controlled by individual knobs. Some models include safety devices that stop gas flow if the flame is accidentally extinguished, and automatic ignition for specific burners. The appliance is intended for food preparation and should not be used for heating rooms or other commercial/industrial purposes.
Important Technical Specifications
- Power Supply Voltage and Frequency: 220-240V a.c. 50/60Hz.
- Gas Types: The hob can be adapted for Liquid Gas (Propane, Butane) or Natural Gas.
- Burner Specifications (Table 1):
- Fast (Large) (R):
- Diameter: 100 mm
- Thermal power (Reduced): 0.70 kW
- Thermal power (Nominal) Liquid Gas: 3.00 kW
- Thermal power (Nominal) Natural Gas: 3.00 kW
- Nozzle 1/100 Liquid Gas: 86 mm
- Nozzle 1/100 Natural Gas: 116 mm
- Reduced Fast (RR):
- Diameter: 100 mm
- Thermal power (Reduced): 0.70 kW
- Thermal power (Nominal) Liquid Gas: 2.60 kW
- Thermal power (Nominal) Natural Gas: 2.60 kW
- Nozzle 1/100 Liquid Gas: 80 mm
- Nozzle 1/100 Natural Gas: 110 (Υ) mm
- Semi Fast (Medium) (S):
- Diameter: 75 mm
- Thermal power (Reduced): 0.40 kW
- Thermal power (Nominal) Liquid Gas: 1.65 kW
- Thermal power (Nominal) Natural Gas: 1.65 kW
- Nozzle 1/100 Liquid Gas: 64 mm
- Nozzle 1/100 Natural Gas: 96 mm
- Auxiliary (Small) (A):
- Diameter: 55 mm
- Thermal power (Reduced): 0.40 kW
- Thermal power (Nominal) Liquid Gas: 1.00 kW
- Thermal power (Nominal) Natural Gas: 1.00 kW
- Nozzle 1/100 Liquid Gas: 50 mm
- Nozzle 1/100 Natural Gas: 79 mm
- Triple Crown (TC):
- Diameter: 130 mm
- Thermal power (Reduced): 1.50 kW
- Thermal power (Nominal) Liquid Gas: 3.30 kW
- Thermal power (Nominal) Natural Gas: 3.60 kW
- Nozzle 1/100 Liquid Gas: 91 mm
- Nozzle 1/100 Natural Gas: 145 (H1) mm
- Supply Pressures:
- Liquid Gas (Nominal): 28-30 mbar
- Liquid Gas (Minimum): 20 mbar
- Liquid Gas (Maximum): 35 mbar
- Natural Gas (Nominal): 37 mbar
- Natural Gas (Minimum): 25 mbar
- Natural Gas (Maximum): 25 mbar
- P.C.S. (Propane): 50.37 MJ/kg
- P.C.S. (Butane): 49.47 MJ/kg
- P.C.S. (Natural): 37.78 MJ/m³
- Installation Cavity Dimensions: 555 mm width, 475 mm depth.
- Clearances:
- Kitchen cabinets adjacent to the appliance and taller than the hob top must be at least 600 mm from the edge of the hob.
- Hoods must be installed at a minimum distance of 650 mm from the hob.
- Wall cabinets adjacent to the hood must be at a minimum height of 420 mm from the hob.
- If the hob is installed beneath a wall cabinet, the latter must be situated at a minimum of 700 mm above the hob.
- Ventilation: The room must be equipped with an air extraction system (hood or electric fan) and allow proper air circulation (not less than 2 m³/h per kW of installed power). Air circulation can be direct from outside via a pipe (inner cross section at least 100 cm²) or indirectly from adjacent rooms.
- Electrical Connection: Supplied with a 13 amp fused plug. Requires earthing. Wires are coloured: Green & Yellow (Earth), Blue (Neutral), Brown (Live). For appliances rated greater than 13 amp, the mains cable must be wired into a cooker output point with a rating of 45 amp (cable not supplied).
- Gas Connection: Adjustable L-shaped pipe fitting with a threaded 1/2 gas cylindrical male attachment. Flexible jointless stainless steel pipes must not exceed 2000 mm when fully extended.
Usage Features
- Control Knobs: Each gas burner has a corresponding control knob with settings for Off (•), Maximum (large flame icon), and Minimum (small flame icon).
- Ignition: To light a burner, hold a lit match or lighter near it, or use the automatic ignition (if available). Press down and turn the corresponding knob anti-clockwise to the maximum setting. For models with a safety device, hold the knob pressed for 2-3 seconds to allow the device to heat up and keep the flame alight.
- Flame Adjustment: Adjust the flame size by turning the control knob between maximum and minimum settings.
- Safety Device: If the flame is accidentally extinguished, turn off the control knob and wait at least 1 minute before attempting to relight.
- Cookware Recommendations:
- Use appropriate cookware for each burner size to prevent flames from extending beyond the bottom of the cookware.
- Always use cookware with a flat base and a cover.
- Turn the knob to minimum once the contents of the pan reach boiling point.
- Recommended Cookware Diameters:
- Fast (R): 24-26 cm
- Reduced Fast (RR): 22-24 cm
- Semi Fast (S): 16-20 cm
- Auxiliary (A): 10-14 cm
- Triple Crown (TC): 24-26 cm
- Gas Type Adaptation: The hob can be adapted to different gas types by replacing burner nozzles. This procedure involves removing grids and burners, unscrewing old nozzles with a 7 mm socket spanner, replacing them with new ones for the desired gas type, and reassembling. The old rating sticker must then be replaced with one indicating the new gas type.
- Minimum Flame Setting Adjustment: For some appliances, the minimum flame setting can be adjusted by removing the knob and turning an adjustment screw until the flame is small but steady. After adjustment, quickly change the knob position between minimum and maximum several times to ensure the flame does not go out. If a safety device is fitted and fails to work at the low flame setting, increase the setting using the screw.
Maintenance Features
- Switching Off: Disconnect the appliance from the electricity supply before any maintenance.
- Cleaning:
- Do not use abrasive or corrosive detergents, stain removers, anti-rust products, powder detergents, or abrasive sponges.
- Never use steam cleaners or pressure cleaners.
- Clean the hob with a damp sponge and dry with absorbent kitchen roll.
- Wash removable burner parts (grates, caps) frequently with warm water and soap to remove burnt-on substances.
- For hobs with automatic ignition, clean the terminal part of the electronic instant lighting devices frequently and check gas outlet holes for blockages.
- Stainless steel surfaces should be rinsed and dried after cleaning to prevent marks from hard water or aggressive detergents.
- Gas Tap Maintenance: If gas taps become jammed or difficult to turn over time, they must be replaced by a qualified technician authorized by the manufacturer.